Hello! Welcome back to our module on Deployment, Containerization, and Observability.
In our last lesson, we took a deep dive into containers. We demystified them by breaking them down into their fundamental Linux kernel components—namespaces and cgroups—and you learned how to package a single Python application into a portable image using a Dockerfile.
However, as you know from your full-stack experience, real-world applications are rarely a single, monolithic service. A typical backend consists of multiple interacting components: your web application, a database, a caching layer, and perhaps several other microservices. Managing the lifecycle of all these services manually with individual docker run commands would be complex and error-prone.
Today, we'll solve that problem by learning to use Docker Compose. This tool allows you to define and manage a complete, multi-service application environment using a single configuration file. By the end of this lesson, you will be able to define and run a multi-service backend environment consisting of a Django application, a PostgreSQL database, and a Redis cache.
1. What is Docker Compose?
Docker Compose is an orchestration tool that makes it easy to manage multi-container applications. You use a YAML file, typically named docker-compose.yml, to configure all of your application's services. With a single command, you can then create and start all the services from your configuration.
The key advantages of using Docker Compose, especially for development, are:
- Declarative Stack Definition: Your entire application stack (web app, database, etc.) is defined in one place, making it easy to understand, version control, and share.
- Simplified Lifecycle Management: A single command,
docker-compose up, builds, creates, starts, and attaches all services.docker-compose downtears everything down. - Isolated Networking: Docker Compose automatically sets up a dedicated network for your services, allowing them to communicate with each other using their service names as hostnames (e.g., your app can reach the database at the hostname
db). - Persistent Data Management: It simplifies the management of volumes, ensuring that data for stateful services like your database persists even when containers are recreated.
To begin, let's familiarize ourselves with the basic structure of a docker-compose.yml file.
A Deep Dive into Docker Compose
This article provides a clear, high-level overview of the main building blocks of a Docker Compose file. Understanding these will give you the vocabulary for the rest of the lesson.
Read the first section, 'Understanding the Docker Compose File Structure'. Focus on the four main components it introduces: version, services, networks, and volumes.
2. Building a Multi-Service Django Environment
Now, let's get practical. We will define a docker-compose.yml file for a typical Django backend stack that includes:
- A web service running our Django application with Gunicorn.
- A db service running a PostgreSQL database.
- A cache service running Redis.
Step 1: Defining the Django Application Service
In the last lesson, we created a Dockerfile for a simple Flask app. For a production-ready Django application, we need a more robust setup. This involves using a proper application server like Gunicorn instead of Django's single-threaded development server.
Docker + Django: Containerize the Right Way with Nginx, Postgresql & Gunicorn
Let's learn how to correctly containerize a Django application. This video details a best-practice approach, including how to configure Gunicorn, manage environment variables, and structure the Dockerfile for security and efficiency.
Watch the video from 01:06 to 09:29. The first part (until 04:57) covers the necessary Django project setup for containerization. The second part (from 04:57) explains how to create a secure, multi-stage Dockerfile. Pay attention to the rationale behind each step, such as using multi-stage builds to reduce image size and running as a non-root user.
With a Dockerfile like the one described in the video, we can now define the web service in our docker-compose.yml file.
# docker-compose.yml
version: '3.8'

services:
  web:
    build: .
    container_name: django_app
    command: gunicorn your_project_name.wsgi:application --bind 0.0.0.0:8000
    volumes:
      - .:/app
    ports:
      - "8000:8000"
    env_file:
      - .env
Let's break this down:
web:: This is the name of our service.build: .: Tells Compose to build an image from theDockerfilein the current directory.container_name:: A specific name for the container, making it easier to reference.command:: Overrides the defaultCMDin the Dockerfile. Here, we start the Gunicorn server. Remember to replaceyour_project_namewith the actual name of your Django project's main folder (the one containingwsgi.py).volumes: - .:/app: This is a bind mount. It mounts the current directory on the host (.) to the/appdirectory inside the container. This is incredibly useful for development, as changes you make to your code on your machine are instantly reflected inside the running container without needing to rebuild the image.ports: - "8000:8000": This maps port 8000 on the host to port 8000 in the container, so you can access your app from your browser atlocalhost:8000.env_file: - .env: Tells Compose to load environment variables from a.envfile in the same directory. This is best practice for managing configuration and secrets, keeping them out of your version-controlleddocker-compose.yml.
Step 2: Adding the PostgreSQL Database Service
Next, we'll add our database. Instead of building our own image, we'll use a pre-built, official image from Docker Hub.
# in docker-compose.yml, under 'services:'
  db:
    image: postgres:13-alpine
    container_name: postgres_db
    volumes:
      - postgres_data:/var/lib/postgresql/data/
    environment:
      - POSTGRES_DB=${POSTGRES_DB}
      - POSTGRES_USER=${POSTGRES_USER}
      - POSTGRES_PASSWORD=${POSTGRES_PASSWORD}
db:: The service name. As you'll see soon, ourwebservice will connect to the database using this hostname.image: postgres:13-alpine: Specifies the official PostgreSQL 13 image, using the lightweightalpinevariant. Docker will pull this image if it's not present locally.volumes: - postgres_data:/var/lib/postgresql/data/: This is crucial. It creates a named volume calledpostgres_dataand mounts it to the directory where PostgreSQL stores its data. This ensures your database data persists even if you stop and remove thedbcontainer. We will definepostgres_dataat the bottom of the file.environment:: These variables are used by the PostgreSQL image on its first run to initialize the database, user, and password. We are loading their values from our.envfile for security.
Step 3: Adding the Redis Cache Service
Adding Redis is very similar to adding PostgreSQL. We use another official image.
Docker Compose | Django | PostgreSQL | Redis & Celery Baseline Configuration
Let's add our Redis cache. This clip demonstrates how to add a Redis service to a docker-compose.yml file. Notice how straightforward it is to integrate another pre-built service into our stack.
Watch from 05:03 to 06:23. The video discusses different image tags; we'll stick with alpine for its small footprint.
Now, let's add the cache service to our file:
# in docker-compose.yml, under 'services:'
  cache:
    image: redis:6-alpine
    container_name: redis_cache
cache:: The service name, which our Django app will use to connect to Redis.image: redis:6-alpine: Specifies the official Redis 6 image.
For a basic development cache, this is all we need. Redis is an in-memory store, so we don't necessarily need to persist its data for this use case.
3. The Complete docker-compose.yml
Now, let's assemble the full docker-compose.yml file, adding the top-level volumes key and making the web service depend on the db and cache services.
version: '3.8'

services:
  web:
    build: .
    container_name: django_app
    command: gunicorn your_project_name.wsgi:application --bind 0.0.0.0:8000
    volumes:
      - .:/app
    ports:
      - "8000:8000"
    env_file:
      - .env
    depends_on:
      - db
      - cache

  db:
    image: postgres:13-alpine
    container_name: postgres_db
    volumes:
      - postgres_data:/var/lib/postgresql/data/
    environment:
      - POSTGRES_DB=${POSTGRES_DB}
      - POSTGRES_USER=${POSTGRES_USER}
      - POSTGRES_PASSWORD=${POSTGRES_PASSWORD}

  cache:
    image: redis:6-alpine
    container_name: redis_cache

volumes:
  postgres_data:
The new depends_on key in the web service tells Docker Compose to start the db and cache services before it starts the web service. This helps manage startup order, although it doesn't wait for the database to be fully ready to accept connections (entrypoint scripts are often used for that, as seen in the resources).
The final piece is your .env file. It should look something like this (do not commit this file to Git!):
# .env file
DEBUG=1
SECRET_KEY=your-django-secret-key
DJANGO_ALLOWED_HOSTS=localhost 127.0.0.1 [::1]


# Postgres settings
POSTGRES_DB=your_db_name
POSTGRES_USER=your_db_user
POSTGRES_PASSWORD=your_db_password
Step 4: Configuring Django to Connect to Services
With the services defined, the last step is to configure your Django settings.py to use them. This is where the magic of Docker Compose's networking shines.
Database Connection:
# settings.py
DATABASES = {
    'default': {
        'ENGINE': 'django.db.backends.postgresql',
        'NAME': os.environ.get('POSTGRES_DB'),
        'USER': os.environ.get('POSTGRES_USER'),
        'PASSWORD': os.environ.get('POSTGRES_PASSWORD'),
        'HOST': 'db',  # The service name from docker-compose.yml
        'PORT': '5432',
    }
}
Redis Cache Connection:
# settings.py
CACHES = {
    "default": {
        "BACKEND": "django_redis.cache.RedisCache",
        "LOCATION": "redis://cache:6379/1", # Service name 'cache'
        "OPTIONS": {
            "CLIENT_CLASS": "django_redis.client.DefaultClient",
        }
    }
}
Notice how the HOST for the database is 'db' and the hostname for Redis is 'cache'. Docker Compose provides automatic DNS resolution within its private network, allowing containers to find each other simply by using their service names.
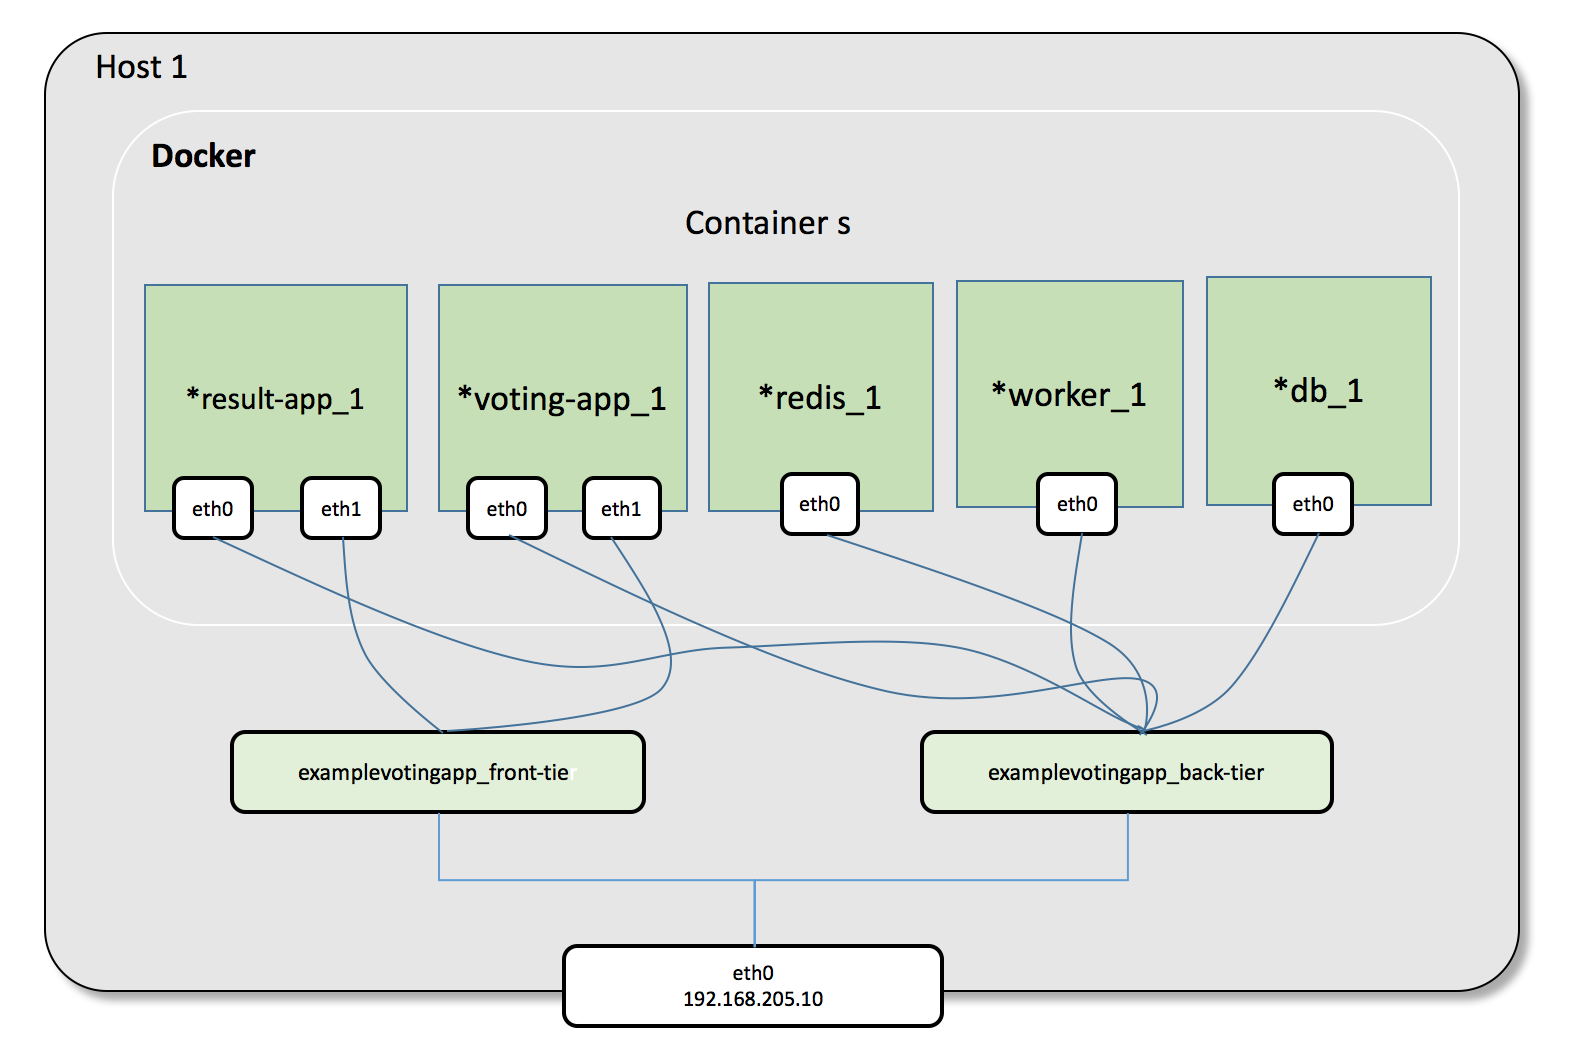
4. Running Your Multi-Service Environment
With the Dockerfile, docker-compose.yml, and .env files in place, managing your entire application stack is now trivial. Open a terminal in your project root and use these commands:
-
To start everything:
docker-compose up(Add
-dto run in detached mode, so the logs don't occupy your terminal). -
To stop and remove containers and networks:
docker-compose down -
To run a Django management command (like migrations):
docker-compose exec web python manage.py migrateThe
execcommand is extremely useful. It lets you run a command inside a running container. Here, we're executingpython manage.py migrateinside thewebcontainer.
Conclusion
Today you've made a significant leap from managing single containers to orchestrating a complete, multi-service application stack. You learned how to use Docker Compose to define, configure, and link an application, a database, and a cache, creating a portable and reproducible development environment.
Key Takeaways:
docker-compose.ymlis the blueprint for your entire application stack. It defines all the services, networks, and volumes needed.- Services communicate by name. Docker Compose's built-in networking allows your application container to connect to
db:5432orcache:6379without worrying about IP addresses. - Volumes are essential for stateful services. By using a named volume for PostgreSQL, you ensure your data is safe across container restarts.
docker-composesimplifies development workflows with commands likeup,down, andexec, streamlining how you run, debug, and manage your application.
Preview of the Next Lesson
We've now mastered creating a consistent development environment that runs on any machine with Docker. The next logical step is to automate the process of building our container images and deploying them. In the next lesson, we will explore the key stages of a Continuous Integration and Continuous Deployment (CI/CD) pipeline, learning how we can automatically build, test, and deploy our containerized backend service.