Introduction
Welcome back! In the last lesson, you added a layer of polish to your site by implementing hover and pressed states for your interactive elements. These micro-interactions provide immediate feedback based on direct user input like clicks and mouse movements.
Today, we'll explore a different type of animation: effects triggered by the user's scroll position. This lesson focuses on how to implement performant scroll-triggered effects for key page sections. These animations are essential for creating the modern, aesthetic, and professional feel you're aiming for. They guide the user's attention down the page, create a narrative flow, and can make the experience of browsing your site much more engaging.
We will cover two main types of scroll effects in Framer:
- Scroll Animations: One-shot animations that play when an element scrolls into view (e.g., fading in).
- Scroll Transforms: Animations where an element's properties change continuously as you scroll through a section (e.g., parallax effects).
We'll also focus on the "performant" aspect of the learning outcome, ensuring these beautiful effects don't compromise your site's speed—a top priority for you.
1. Scroll Animations: Triggering Effects on View
The most common type of scroll effect is a "trigger-and-play" animation. When an element or section scrolls into the viewport, an animation—like a fade-in or slide-in—plays once and then stops. This is perfect for revealing content gracefully as the user explores your page.
Framer provides a straightforward way to achieve this using the Scroll Animation effect. To get a solid grasp of the fundamentals, let's watch a video from the official Framer team that covers the three main trigger types.
Triggering animations on scroll in Framer (Animation Lesson 7)
This video, 'Triggering animations on scroll in Framer,' is an excellent introduction to the core concepts. It will show you how to trigger animations based on an element's position, a section's position, and the direction of the scroll.
Please watch the entire video. Pay close attention to the distinction between the three trigger types: Layer in View (01:46): The animation is tied to the element itself entering the screen. This is great for self-contained elements. Section in View (05:50): The animation is tied to a parent container entering the screen. This is a more systematic way to choreograph animations for multiple elements at once. On Scroll (10:48): The animation is triggered by the simple act of scrolling up or down. The hiding navbar is a classic example.
As you saw, the Section in View trigger is particularly powerful for a systematic approach to design. By defining a parent frame as a trigger, you can ensure all child elements animate in a coordinated, predictable way, which aligns well with your preference for rule-based frameworks.
Performance & User Experience Note
Notice the Replay option in the effect settings. For most entrance animations, it's best to set this to No. Constantly re-playing animations as a user scrolls up and down can be distracting and negatively impact performance. The goal is a tasteful reveal, not a constant light show.
Activity: Animate a Section into View
Now, let's apply this. Open your Framer project.
- Choose a section of your page that's below the initial fold (e.g., your feature section or social proof section).
- Select the main parent frame for that entire section.
- In the Properties Panel on the right, go to Effects and add a Scroll Animation.
- Set the Trigger to
Layer in View. - Choose a simple preset like
Fade InorSlide In Up. - For a more subtle effect, click on the Enter animation and adjust its properties. For example, you could change the starting
Opacityto 0 and theY Offsetto just 20px for a gentle upward drift. - Ensure Replay is set to
No. - Preview your site (Cmd/Ctrl + P). As you scroll down, you should see your section animate smoothly into view.
2. Scroll Transforms: Tying Animation to Scroll Progress
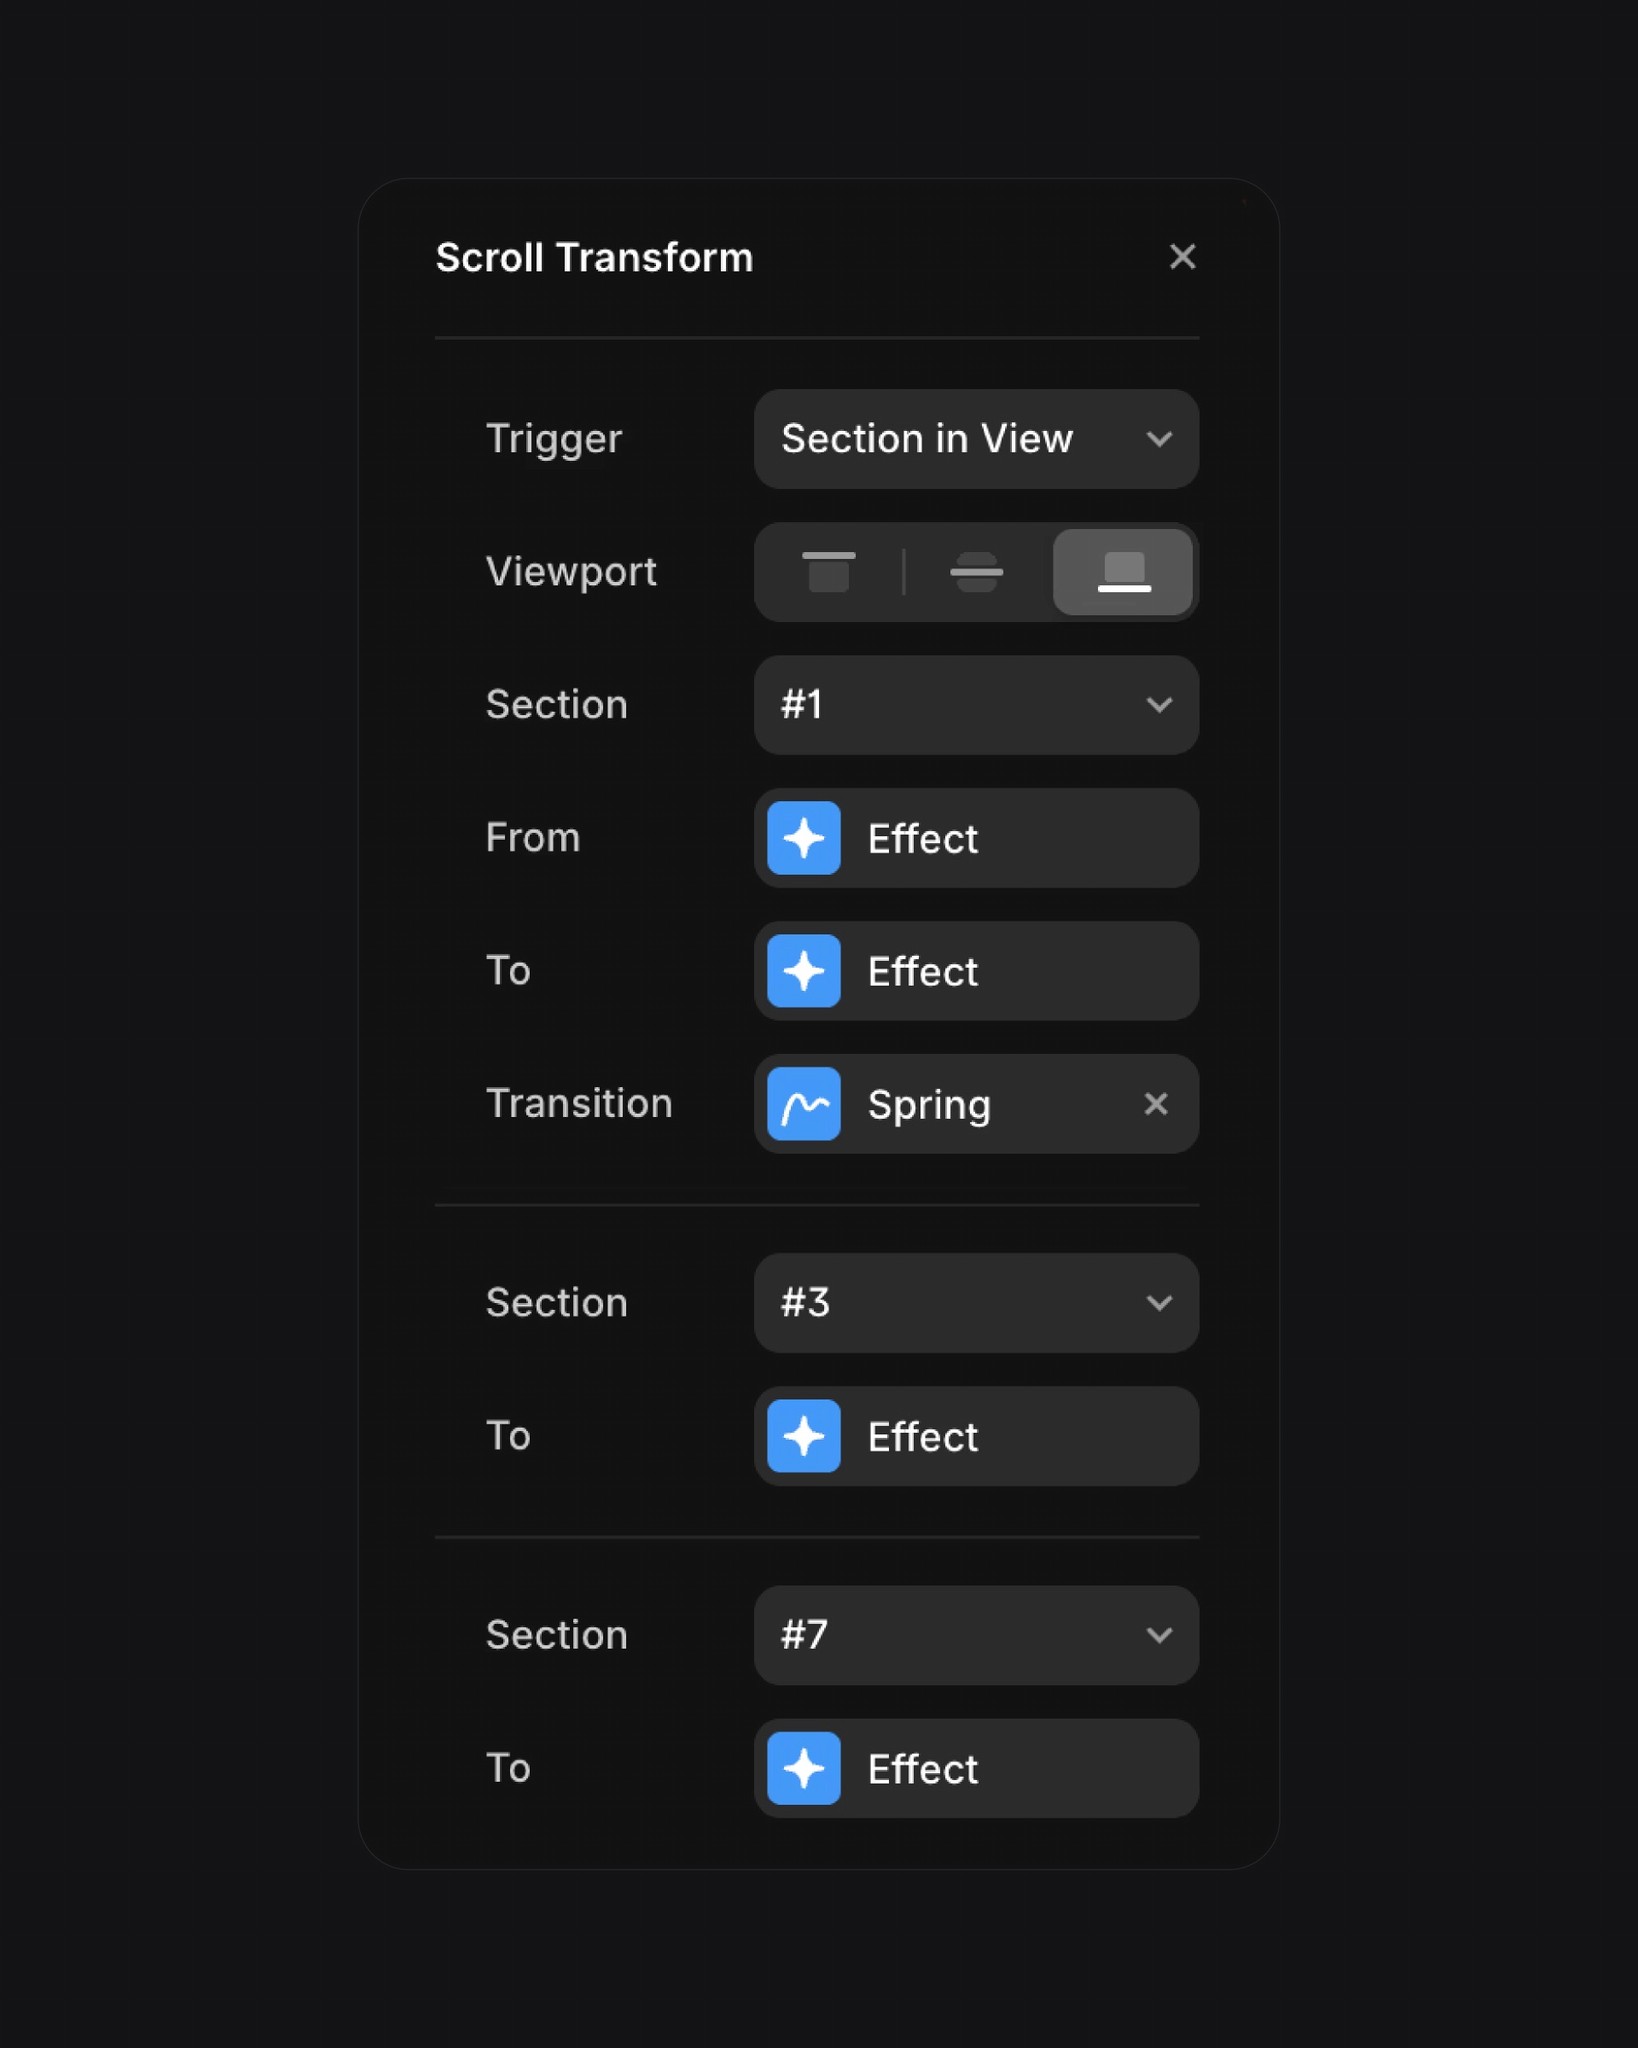
While Scroll Animations are "fire and forget," Scroll Transforms link an element's properties directly to the scrollbar's progress. As you scroll through a section, an element can scale, rotate, or move in sync with your scroll. This is how you create effects like parallax, where an image moves at a different speed than the text next to it.
This technique involves defining a From state (how the element looks at the start of the scroll range) and a To state (how it looks at the end). Framer handles the interpolation.
Let's watch the follow-up video from Framer that explains this concept.
Transforming elements on scroll in Framer (Animation Lesson 8)
The video 'Transforming elements on scroll in Framer' breaks down how to use the Scroll Transform effect. It clearly explains the difference between triggers and how to define the start and end states of your animation.
Watch the full video. Focus on these key ideas: From/To States (00:46): Understand that you are defining the start and end points of a transformation that happens during a scroll. Triggers (03:26): Note the difference between On Scroll (page-based), Layer in View (element-based), and Section in View (parent-based). Section in View often gives you the most precise control. Transitions (04:40): See how adding a 'Spring' transition can smooth out jerky scrolling and add a more fluid, physical feel to the interaction.
Activity: Create a Subtle Parallax Effect
Let's use a Scroll Transform to add a subtle, premium feel to an image.
- Find a section on your page that contains both text and an image.
- Select the image element.
- Add a Scroll Transform effect.
- For the Trigger, select
Layer in View. This will tie the animation's progress to the image's visibility on the screen. - In the
Fromstate, set the Scale to1.2(making it start 20% larger). Leave theTostate as is (it will default to the element's normal state,Scaleof 1). - Optionally, add a default
Springtransition to make the movement feel less rigid. - Preview the page. As you scroll the image into view, you should see it smoothly scale down from 120% to its final 100% size. This creates a sense of depth and draws the eye.
3. Advanced Techniques and Performance
The built-in effects are powerful, but you can achieve even more customized and performant animations by combining Framer's features. This is where you can really lean into a systematic, component-driven workflow.
Using Component Variants for Custom Scroll Animations
What if you want to animate something the effects panel doesn't support, like a mask, a border radius, or a filter? The solution is to use Scroll Variants.
The technique is simple and powerful:
- Create a component for the element you want to animate.
- Create two variants: an
Outvariant (the "before" state) and anInvariant (the "after" state). - Design the visual differences between these two states (e.g., in the
Outstate, an image is masked; in theInstate, it is not). - On your main canvas, apply the Scroll Variant effect to your component instance, telling it to transition from
OuttoInusing aLayer in Viewtrigger.
This method gives you total creative control and is highly reusable. To learn more, let's review a short article that details this technique.
Use This Technique for Animating Anything in Framer
This article, 'Use This Technique for Animating Anything in Framer' from Framer University, explains the Scroll Variant workflow. It's a game-changer for creating unique, custom animations without code.
Read the sections 'The core idea: Animate between variants,' 'Step 1: Build the component,' 'Step 4: Connect it with scroll variant,' 'Step 5: Animate anything,' and the 'Bonus' section on video playback. This will solidify your understanding of this powerful, systematic approach.
A Critical Performance Win: On-Demand Video Playback
The bonus tip in that article is incredibly important for performance. Autoplaying videos, especially several on one page, can severely slow down your site. Using the Scroll Variant technique to only play a video when it becomes visible is a major optimization.
- Variant 1 (Not Playing): Video playback is set to "No".
- Variant 2 (Playing): Video playback is set to "Yes".
- Effect: Use
Scroll Variantwith aLayer in Viewtrigger to switch from "Not Playing" to "Playing".
This ensures your site loads quickly and only uses resources to play the video when the user is actually looking at it. This is a perfect example of a performant effect.
Conclusion
You've made excellent progress today. You've moved beyond static interactions and can now breathe life into your pages with animations that respond to a user's journey through your site. By understanding and implementing these effects, you are well on your way to creating the highly polished and performant websites that top creators are known for.
Key Takeaways:
- Scroll Animations are best for "fire-and-forget" entrance effects, like fading in a section of content.
- Scroll Transforms are ideal for effects tied to scroll progress, such as parallax, where properties change continuously as you scroll.
- Scroll Variants offer the most control, allowing you to animate any property by transitioning between component states on scroll.
- Performance is key:
- Use animations purposefully and subtly.
- Disable the "Replay" setting for most entrance animations.
- Use the Scroll Variant technique to only play videos when they are visible in the viewport.
- Prioritize animating
transformandopacityproperties, which Framer is highly optimized for.
Preview of the Next Lesson:
We've just discussed a major performance technique with video loading. In the next lesson, we will continue our focus on site speed by tackling another critical asset: images. You will learn how to optimize images for web delivery by selecting appropriate formats (WebP, AVIF) and compression settings, ensuring your beautiful visuals load instantly.