Introduction
Welcome back! In our last session, you successfully built your digital storefront on either Gumroad or Payhip. You applied your brand identity and configured the payment systems, creating a professional and functional "home" for your future products. It's a significant step to have the infrastructure in place to get paid.
Now, with an empty store, our next challenge is to attract your first potential customers. We'll do this by creating a lead magnet. This lesson will guide you through the process of creating a free, valuable resource that you'll offer in exchange for a person's email address. This is the cornerstone of building an audience, especially without relying on social media.
By the end of this 60-minute lesson, you will be able to: Design and package a lead magnet that provides value and complements your main product offering.
We'll break this down into three parts:
- The Strategy: Understanding what makes a lead magnet effective.
- The Design: Deciding on the format and creating the content and visuals.
- The Packaging: Preparing the final files for delivery.
Let's begin.
1. The Strategy of a Great Lead Magnet
A lead magnet is more than just a freebie; it's the first step in building a relationship with a potential customer. It's your opportunity to demonstrate your expertise and build trust. Since you'll be building your business without social media initially, your email list is your single most valuable marketing asset. The lead magnet is the tool you use to build that list.
To understand the core principles, let's start with a video that breaks down what a lead magnet is and what it must accomplish.
3-Step Lead Magnet Tutorial: How To Create A High-Converting Lead Magnet
Alex Cattoni is a copywriter and marketing strategist who explains this concept very clearly. In this video, she details the three essential functions of a lead magnet and provides four practical strategies for creating one.
Watch from the timestamp 2:08 to 10:13. Focus on these key ideas: The three things a lead magnet must do: solve an immediate need, create desire for more, and sell your main offering. The four strategies for creating desire with 'useful but incomplete' information. This is a systematic framework that should resonate with your preference for rule-based design.
As you saw, a powerful lead magnet isn't just about giving away free stuff. It's a carefully designed piece of a larger system. Here's a summary of the key strategic takeaways:
- It offers a quick win: It should solve a very specific, tangible problem for your target audience, and do it quickly.
- It proves your value: The quality of your free content signals the quality of your paid content.
- It serves as a bridge: It should logically connect to a more comprehensive paid product.
The Payhip article, "How to Start Selling Digital Products," places the lead magnet within a broader "Value Ladder" concept. It's the first, free step that can lead a customer to higher-priced offerings.
2. Designing Your Lead Magnet
Now that we have the strategy, let's move on to the practical steps of designing and creating your lead magnet. This is a process of ideation, content creation, and visual design.
Step 1: Ideation and Format Selection
Your lead magnet must align with your niche and a potential future paid product. Think back to the market research you did in Module 2. What are the common pain points of your target audience?
- If you plan to sell a comprehensive Notion template system for creators... your lead magnet could be a single, simple Notion page, like a "Content Idea Tracker."
- If you plan to sell a premium icon set... your lead magnet could be a free "sampler" pack of 5-10 icons.
- If you plan to sell a detailed course on branding... your lead magnet could be a "Brand Name Availability Checklist."
The format you choose should be the simplest possible way to deliver the value. For your first lead magnet, simplicity is key. A one-page checklist or a simple template is an excellent starting point.
Ultimate Guide to Creating a Lead Magnet Design in 9 Steps
The article 'Ultimate Guide to Creating a Lead Magnet Design' by Growbo provides an extensive list of potential lead magnet formats and advice on how to choose one.
Read 'Step #1: Choose Which Type of Lead Magnet Aligns Best With Your Offer'. Pay attention to the variety of formats available, from checklists to video training, and think about which one would be easiest for you to create and most valuable to your target audience.
Step 2: Content Creation and Visual Design
Once you have your idea and format, it's time to create it. You have access to the Adobe suite, and you're skilled in Figma, so you have excellent tools at your disposal.
- Create the Content First: As the Growbo article advises, write the text for your checklist or build the structure of your template before you start working on the visual design.
- Apply Your Brand Guide: Use the brand guide you created in Module 3. Apply your color palette, your logo, and your chosen fonts to keep everything consistent. This reinforces your brand identity from the very first interaction.
- Focus on Readability and Hierarchy: Use whitespace, clear headings, and a logical flow. The goal is for the user to understand and use the resource effortlessly.
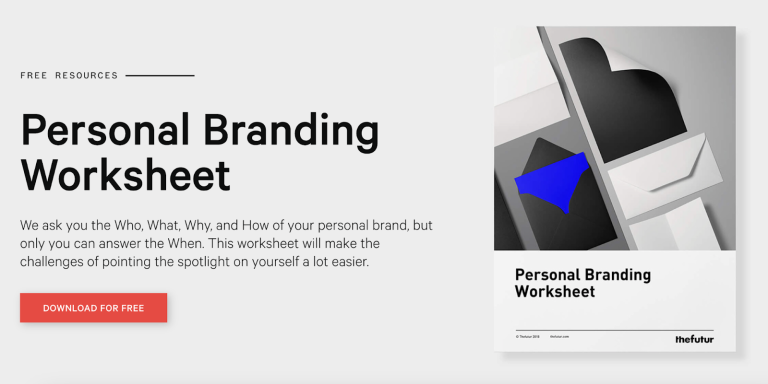
- Create a Cover: Even for a simple one-page PDF, a well-designed cover makes the product feel more tangible and valuable. It should include the title, a short description, and your logo.
The Growbo article contains several excellent, practical tips for the design phase.
Ultimate Guide to Creating a Lead Magnet Design in 9 Steps
Let's continue with the Growbo article. It offers a systematic approach to the design process, covering tools, typography, and imagery.
Scan through the following sections to pick up some actionable design rules: Step #2: Create the Content for Your Lead Magnet: Reinforces the 'content-first' approach. Step #3: Use the Best Tool...: Mentions Adobe Illustrator, which you know, but also free options like Canva. Step #4: Choose the Font Style & Size...: Discusses how typography affects user experience. Step #6: Read the Content & Empathize...: Gives advice on choosing relevant, high-quality images. Step #7: Make Each Main Section of Your Content Start on a New Page: A simple layout tip that drastically improves readability.
3. Packaging Your Lead Magnet for Delivery
The final step is to package your creation into a professional, easy-to-download format. The goal is a seamless user experience.
- File Format: For checklists, guides, and ebooks, PDF is the universal standard.
- File Compression: If your lead magnet consists of multiple files (e.g., a wallpaper pack for desktop and mobile, or a template with instructions), you should package them in a single
.zipfile. - File Organization: Before you zip the files, make sure they are clearly named and organized into folders if necessary (e.g.,
Desktop Wallpapers,Mobile Wallpapers). - Include Instructions: If your lead magnet requires any setup (like importing a Notion template), include a simple
README.txtor aStart Here.pdffile with clear instructions.
This short clip from Oliur's video on selling digital products shows this exact process for a wallpaper pack.
Creating & Selling Your Own Digital Product - Easier than you realise!
Watch how Oliur organizes his wallpaper files into folders and creates zip archives. This is the final step in preparing a digital product for delivery.
Watch from 1:54 to 2:25. Notice the simple, clean folder structure before he creates the zip files. This is best practice for any multi-file digital product.
Your Task: Create and Package Your First Lead Magnet (30 minutes)
Now it's your turn to put this all together. Your goal is to create a simple but complete lead magnet. Don't aim for a 50-page ebook; a one-page checklist is a perfect start.
- Brainstorm & Decide (5 mins): Based on a potential paid product you might create, decide on a topic and format for your lead magnet. Write it down. (e.g., "A checklist for choosing a brand color palette" to complement a future branding guide).
- Create the Content (10 mins): Open a document or Figma and create the core content. Write the checklist items, design the simple template, or gather the 3-5 images for a mini-wallpaper pack.
- Design and Refine (10 mins): Apply your brand guide. Create a simple cover page with a title and your logo. Ensure the layout is clean and professional.
- Package for Delivery (5 mins):
- Export your final creation as a high-quality PDF.
- If you have multiple files, organize them in a folder.
- Create a
.ziparchive of the file or folder. - Give the final file a clear, professional name (e.g.,
Brand_Color_Checklist_YourName.pdf).
Keep this file safe. You will be uploading it in the next lesson.
Conclusion
Excellent work. You've just created your very first marketing asset. You've moved beyond just having a store to creating something of value that can attract an audience and begin to build the trust necessary for a successful digital business.
Key Takeaways:
- A lead magnet is a strategic tool, not just a giveaway. It solves a specific problem and serves as a bridge to your paid products.
- Value and presentation matter. Even a free product should be professional and reflect the quality of your brand.
- The process is systematic: By following the steps of Ideation -> Content Creation -> Design -> Packaging, you can reliably produce effective lead magnets.
- Start simple. A high-value, one-page checklist is more effective than a low-value, 20-page ebook that no one reads.
Preview of the Next Lesson
Your lead magnet is designed, packaged, and ready to go. But how do you get it to people automatically when they sign up? In the next lesson, we will set up an automated delivery system for your lead magnet using your platform's workflow features. We'll also begin our journey into email marketing by writing the welcome email that delivers your lead magnet and sets audience expectations.