Welcome to the third lesson in our module on image data preparation. In our previous lesson, you built a robust data augmentation pipeline with torchvision.transforms. This is a vital technique for artificially expanding your dataset, which will be essential given that you'll be starting with a relatively small number of hand-labeled images.
Before we can train any model, however, we need those initial labels. Labeling data, especially for a complex task like assessing meal quality, can be highly subjective. To ensure your model learns from consistent and meaningful data, we must first establish a clear and formal set of rules for annotation. This set of rules is known as an annotation schema.
This lesson is dedicated to designing that schema. We will translate the high-level goals of your project—monitoring quality, quantity, and violations—into a concrete, actionable guide for labeling your image data. This process is foundational; a well-designed schema is the bedrock of a successful supervised learning project.
1. The Role of an Annotation Schema
At its core, image annotation is the process of adding descriptive labels to images that a machine learning model can learn from. An annotation schema is the formal specification that dictates exactly what labels to use and how to apply them. For your project, this means defining precisely what constitutes "Good," "Adequate," or "Poor" quality, and how to identify specific violations.
A strong schema ensures that every image is labeled according to the same criteria, creating a consistent and reliable ground truth for your model. Given your background in building structured applications, you can think of the annotation schema as the API contract for your data—it guarantees that the inputs to your model (the labels) are predictable and standardized.
The following resource provides an excellent introduction to the concept of image annotation and the various forms it can take.
Image Annotation Guide: Types, Techniques & Best Practices for ...
This guide from Sama introduces the fundamental concepts of image annotation and its role in supervised learning.
Read the section "What Is Image Annotation?". Focus on understanding how labeling enables a model to learn and the connection to supervised learning.
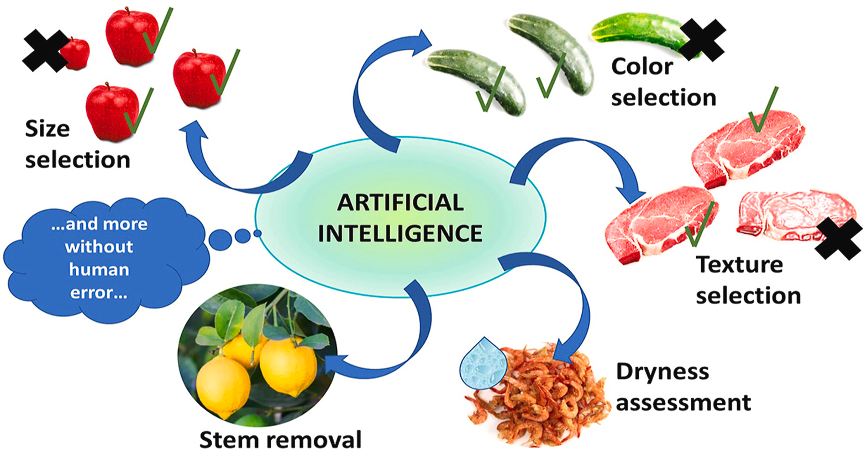
Your project aims to automate tasks that are typically done by human inspection, moving from manual checks to an AI-driven system.
2. Grounding Your Schema in Official Guidelines
To make your labels as objective as possible, we must base them on the official rules governing the Mid-Day Meal (MDM) scheme. Your project's goal is to detect violations, and violations can only be defined in relation to a set of standards. The Government of India provides detailed guidelines on nutrition, quantity, and safety, which will serve as our "ground truth."
[PDF] guidelines on food safety and hygiene for school level kitchens ...
This official PDF from the Ministry of Education outlines the specific requirements for the Mid-Day Meal scheme. It is the primary source for defining objective annotation criteria.
Please read the following sections of this document: In the introduction (page 5), focus on the paragraph that specifies the nutritional requirements. Note the prescribed calories, protein, and grammage of ingredients (rice, pulses, vegetables) for both primary and upper primary levels. This is the basis for your Quantity and Composition labels. On page 6, read the paragraph defining the three types of contaminants: Biological, Physical, and Chemical. This list gives us concrete examples for our Violation labels (e.g., insects, hair, stones).
The grammage requirements mentioned in the document are conveniently visualized in this infographic.

From these guidelines, we can extract concrete, objective criteria:
- Quantity & Composition: A meal should contain specific amounts of food grains, pulses, and vegetables. A "complete" meal must include these components.
- Violations: The presence of any foreign object (insects, hair, stones), signs of spoilage (mold), or unhygienic elements constitutes a clear violation.
3. Choosing Annotation Types and Defining Labels
Now we translate these rules into a practical schema. This involves choosing the right type of annotation and defining a specific, granular set of labels.
There are several ways to annotate an image. For your project, a combination of two types will be most effective:
- Image Classification: Assigning one or more tags to the entire image to describe it as a whole. This is fast and ideal for high-level assessments like overall quality.
- Object Detection (Bounding Boxes): Drawing boxes around specific objects in the image. This is more detailed and will be crucial for identifying individual food items (for portion estimation later) and localizing specific violations (like an insect).
The following video from Roboflow explains several best practices for creating high-quality labels, which are directly relevant to building our schema.
The Best Way to Annotate Images for Object Detection
This video covers essential tips for creating effective object detection labels. The principles discussed apply broadly to any annotation task.
Please watch the following segments: Use Specific Labels: 1:20 - 3:32. This is the most important principle for our schema. Instead of a generic "Violation" label, we should define specific types like insect or stale_food. Create Tight Bounding Boxes: 3:45 - 5:12. This highlights the importance of precision when you start drawing boxes. Label All Objects: 5:29 - 6:03. This reinforces the need for consistency. Create Clear Instructions: 8:25 - 8:47. This is exactly what we are doing now—creating a clear, reproducible guide for labeling.
4. The Mid-Day Meal Annotation Schema
Based on the official guidelines and annotation best practices, here is the proposed schema for your project. It is divided into three parallel tasks. When you annotate an image, you will apply labels from all relevant categories.
Task 1: Overall Quality (Image-Level Classification)
This task uses a single label to classify the overall impression of the meal in the image.
quality:Good: The meal appears fresh, appetizing, and contains visible variety (e.g., dal, vegetables, and rice are all present and distinct).Adequate: The meal seems edible but may lack variety (e.g., only rice and watery dal) or appear unappetizing. It meets the bare minimum but no more.Poor: The meal looks stale, spoiled, or is clearly missing essential components (e.g., just plain rice).
Task 2: Meal Quantity (Image-Level Classification)
This task estimates the portion size relative to the plate or container.
quantity:Full: The portion seems generous and likely meets the grammage guidelines.Half: The portion is noticeably small, roughly half of what would be considered a full meal.Quarter: The portion is extremely small and clearly insufficient.
Task 3: Food & Violation Identification (Object Detection with Bounding Boxes)
This task involves drawing tight bounding boxes around specific items and violations. This is the most granular part of the schema and will provide rich data for your models.
object_class:- Food Items:
grain: Any rice, roti, or other primary carbohydrate source.pulse: Any dal, sambar, or legume-based dish.vegetable: Any cooked or raw vegetable side dish.
- Violations:
foreign_object: Any non-food item (e.g., insect, stone, hair, plastic).stale_food: Visible signs of mold, discoloration, or decay.unhygienic_condition: General dirt or filth on the plate or in the food.
- Food Items:
This structured, hierarchical approach gives you maximum flexibility. You can train a simple image classifier on the quality labels, or a more complex object detection model (like YOLO) on the bounding box annotations. Later, you can even combine these, for example, by creating a rule that any image containing a foreign_object box is automatically classified as Poor quality.
5. A Glimpse at Annotation Tools
With the schema defined, the next step is to use a tool to apply these labels to your images. While we will cover the practical application in the next lesson, it's helpful to see what this process looks like. Tools like Label Studio provide a user interface to load images and apply classification tags or draw bounding boxes.
Label Studio: The Easiest Way To Annotate Your Datasets
This video from NeuralNine provides a great walkthrough of Label Studio, a popular open-source annotation tool.
Watch these two short clips to see how a schema like ours would be implemented: Image Classification UI: 9:15 - 10:22. Notice how you can define labels (cat, dog) and simply click to apply them to an image. This is how you would apply your quality and quantity tags. Object Detection UI: 11:08 - 12:12. This shows the process of selecting a class (car, house) and drawing a bounding box. This is exactly how you will label grain, pulse, and foreign_object.
Conclusion
In this lesson, you have constructed a critical component of your project: a detailed annotation schema. This schema is not arbitrary; it is grounded in the official Mid-Day Meal guidelines and designed using established machine learning best practices.
Here are the key takeaways:
- An annotation schema is a formal set of rules that ensures consistent and high-quality data labeling.
- Your schema should be rooted in objective criteria. For this project, the official MDM guidelines on quantity, composition, and safety are your source of truth.
- A multi-task schema (combining image-level classification and object detection) provides the most flexibility for training different types of models.
- Labels should be specific and granular (e.g.,
foreign_objectinstead of justviolation) to capture detailed information.
You have now completed the conceptual framework for your data. In the next lesson, we will get hands-on. You will use a lightweight annotation tool to apply the schema you've just designed, labeling your first small batch of images. This will create the initial dataset that you'll use to build your first baseline model.