Welcome back. In the previous lesson, we established a solid foundation for our project by designing a detailed annotation schema. You translated the abstract requirements of monitoring meal quality, quantity, and violations into a concrete set of rules, grounded in official Mid-Day Meal guidelines. This schema is the blueprint for creating the labeled data that will train your models.
Now, it's time to move from theory to practice. This lesson is focused on the hands-on process of labeling your first batch of images. We will use a lightweight, efficient tool to apply the classification labels from your schema (quality and quantity). This initial annotated dataset is a crucial milestone, as it will be the direct input for training your first baseline model in the next module.
Given your strong background in Python and experience with web development tools, we'll start with a script-based approach directly within a Jupyter Notebook. This method is fast, highly customizable, and perfect for the immediate task of image classification. We will also look ahead at more powerful tools you will use later for the complex task of bounding box annotation.
1. Choosing the Right Tool for the Task
The world of data annotation has a wide array of tools, from simple scripts to comprehensive platforms. For your project, which involves both image-level classification and object detection, a hybrid approach is most effective.
- For Image Classification (
quality,quantity): A lightweight script is often the fastest way to get started. You can build a simple UI with buttons directly in a Jupyter Notebook. This avoids the overhead of installing and learning a large application for a relatively straightforward task. - For Object Detection (drawing bounding boxes): This task requires a more sophisticated graphical user interface (GUI) to draw and manage boxes accurately. Tools like Label Studio are designed for this and will be essential when you start annotating specific food items and violations for your YOLO model in a later module.
For this lesson, we will focus on the first part: building and using a script to label for quality and quantity. This will produce the data needed for your immediate next step—building a baseline image classifier.
2. A Lightweight Annotation Script with ipywidgets
We can create a surprisingly effective interactive tool in Jupyter using the ipywidgets library. It allows us to add buttons, text fields, and other UI elements to a notebook, and connect them to Python functions. The result is a simple, custom-built application for your specific needs.
This animated image shows a similar tool in action. The user is presented with an image and clicks buttons to assign a label.

This GIF demonstrates a simple image classification tool built within a Jupyter Notebook, similar to what we will implement.
The following article from the dida blog provides an excellent walkthrough of how to build such a tool from the ground up. It explains the core concepts and provides the necessary code structure.
How to implement a labeling tool for image classification in a Jupyter ...
This article explains the rationale and implementation of a simple, interactive image labeling tool using Python's ipywidgets in a Jupyter Notebook. It's a great guide for creating a fast and custom solution.
As you read, focus on understanding the key components of the tool: Interactivity with ipywidgets: Read the section on ipywidgets to understand how it enables us to build a UI in Python. Setup and Variables: Review the code in "Getting started" to see how the image paths and label classes are defined. Displaying Images: Understand how an Output widget is used to display and update images dynamically. Button Logic: Pay close attention to the sections on adding navigation buttons and class label buttons. The key is the .onclick() method, which links a button press to a Python function. Saving Data: Note the suggestion in the conclusion to save labels to a .json file. This is crucial for making your work persistent.
3. Your Custom Annotation Script
Inspired by the article, here is a complete script adapted for your project. This script will allow you to assign both a quality and quantity label to each image and save the results to a annotations.json file.
Instructions:
- Create a new Jupyter Notebook in your project directory.
- Make sure you have
ipywidgetsinstalled. If not, runpip install ipywidgetsin your terminal. You may also need to enable the extension withjupyter nbextension enable --py widgetsnbextension. - Place your collected images in a subdirectory (e.g.,
data/images/). Update theimage_pathvariable in the script to point to this directory. - Copy and paste the following code into a cell in your notebook and run it.
import json
from pathlib import Path
from ipywidgets import Output, Button, Layout, HBox, VBox
from IPython.display import Image, display, clear_output

# --- Configuration ---
# 1. Update this path to your folder of images
image_path = Path("data/images/")
# 2. Define the output file for your annotations
output_file = Path("annotations.json")

# Define the labels from your schema
QUALITY_LABELS = ["Good", "Adequate", "Poor"]
QUANTITY_LABELS = ["Full", "Half", "Quarter"]
OTHER_LABELS = ["Skip", "< Prev"]

# --- State Management ---
# Load existing annotations if the file exists
if output_file.exists():
    with open(output_file, "r") as f:
        annotations = json.load(f)
else:
    annotations = {}

# Get a list of all images and filter out already annotated ones
all_images = [p.name for p in image_path.glob("*.jpg")]
images_to_label = [img for img in all_images if img not in annotations]
position = 0

# --- UI Widgets ---
# Image display area
image_output = Output(layout=Layout(width="400px", height="400px"))

# Progress and info display
info_output = Output()

# Button callback functions
def show_image():
    """Displays the image at the current position."""
    with info_output:
        clear_output(wait=True)
        if images_to_label:
            img_name = images_to_label[position]
            progress = f"Image {position + 1} / {len(images_to_label)}"
            print(f"{img_name}\n{progress}")

            with image_output:
                clear_output(wait=True)
                display(Image(image_path / img_name))
        else:
            print("All images have been annotated!")

def record_annotation(button):
    """Saves the annotation and moves to the next state or image."""
    global position

    img_name = images_to_label[position]
    label_type, label_value = button.description.split(": ")

    # Initialize annotation for the image if it doesn't exist
    if img_name not in annotations:
        annotations[img_name] = {}

    # Store the label
    annotations[img_name][label_type] = label_value

    # Check if both labels are present, then move to the next image
    if "quality" in annotations[img_name] and "quantity" in annotations[img_name]:
        # Save progress to file
        with open(output_file, "w") as f:
            json.dump(annotations, f, indent=2)

        # Move to next image
        if position < len(images_to_label) - 1:
            position += 1
            show_image()
        else:
            with image_output:
                clear_output(wait=True)
                print("Annotation complete!")
            with info_output:
                clear_output(wait=True)
                print(f"Saved {len(annotations)} annotations to {output_file}")
    else:
        # If only one label is present, just update the display
        with info_output:
            print(f"Recorded '{label_value}'. Now select a quantity.")

def on_button_click(button):
    """Main handler for button clicks."""
    global position

    if "Skip" in button.description:
        if position < len(images_to_label) - 1:
            position += 1
            show_image()
    elif "< Prev" in button.description:
        if position > 0:
            position -= 1
            show_image()
    else: # It's an annotation button
        record_annotation(button)

# --- Create and Layout Buttons ---
quality_buttons = [Button(description=f"quality: {lbl}", layout=Layout(width='auto')) for lbl in QUALITY_LABELS]
quantity_buttons = [Button(description=f"quantity: {lbl}", layout=Layout(width='auto')) for lbl in QUANTITY_LABELS]
other_buttons = [Button(description=lbl, layout=Layout(width='auto')) for lbl in OTHER_LABELS]

# Attach the event handler to all buttons
all_buttons = quality_buttons + quantity_buttons + other_buttons
for btn in all_buttons:
    btn.on_click(on_button_click)

# Display the UI
show_image()
display(VBox([
    info_output,
    image_output,
    HBox(quality_buttons),
    HBox(quantity_buttons),
    HBox(other_buttons)
]))
When you run this cell, an interface will appear. For each image, you must click one quality button and one quantity button. Once both are selected, your choices are automatically saved to annotations.json and the next image is displayed. Your goal for this lesson is to annotate at least 50 images using this tool.
4. A Preview of Bounding Box Annotation
Our script is perfect for classification, but for the object detection task defined in your schema (labeling grain, pulse, foreign_object, etc.), you'll need to draw bounding boxes. This requires a more powerful GUI. Label Studio is an excellent open-source tool for this, which you can run locally.
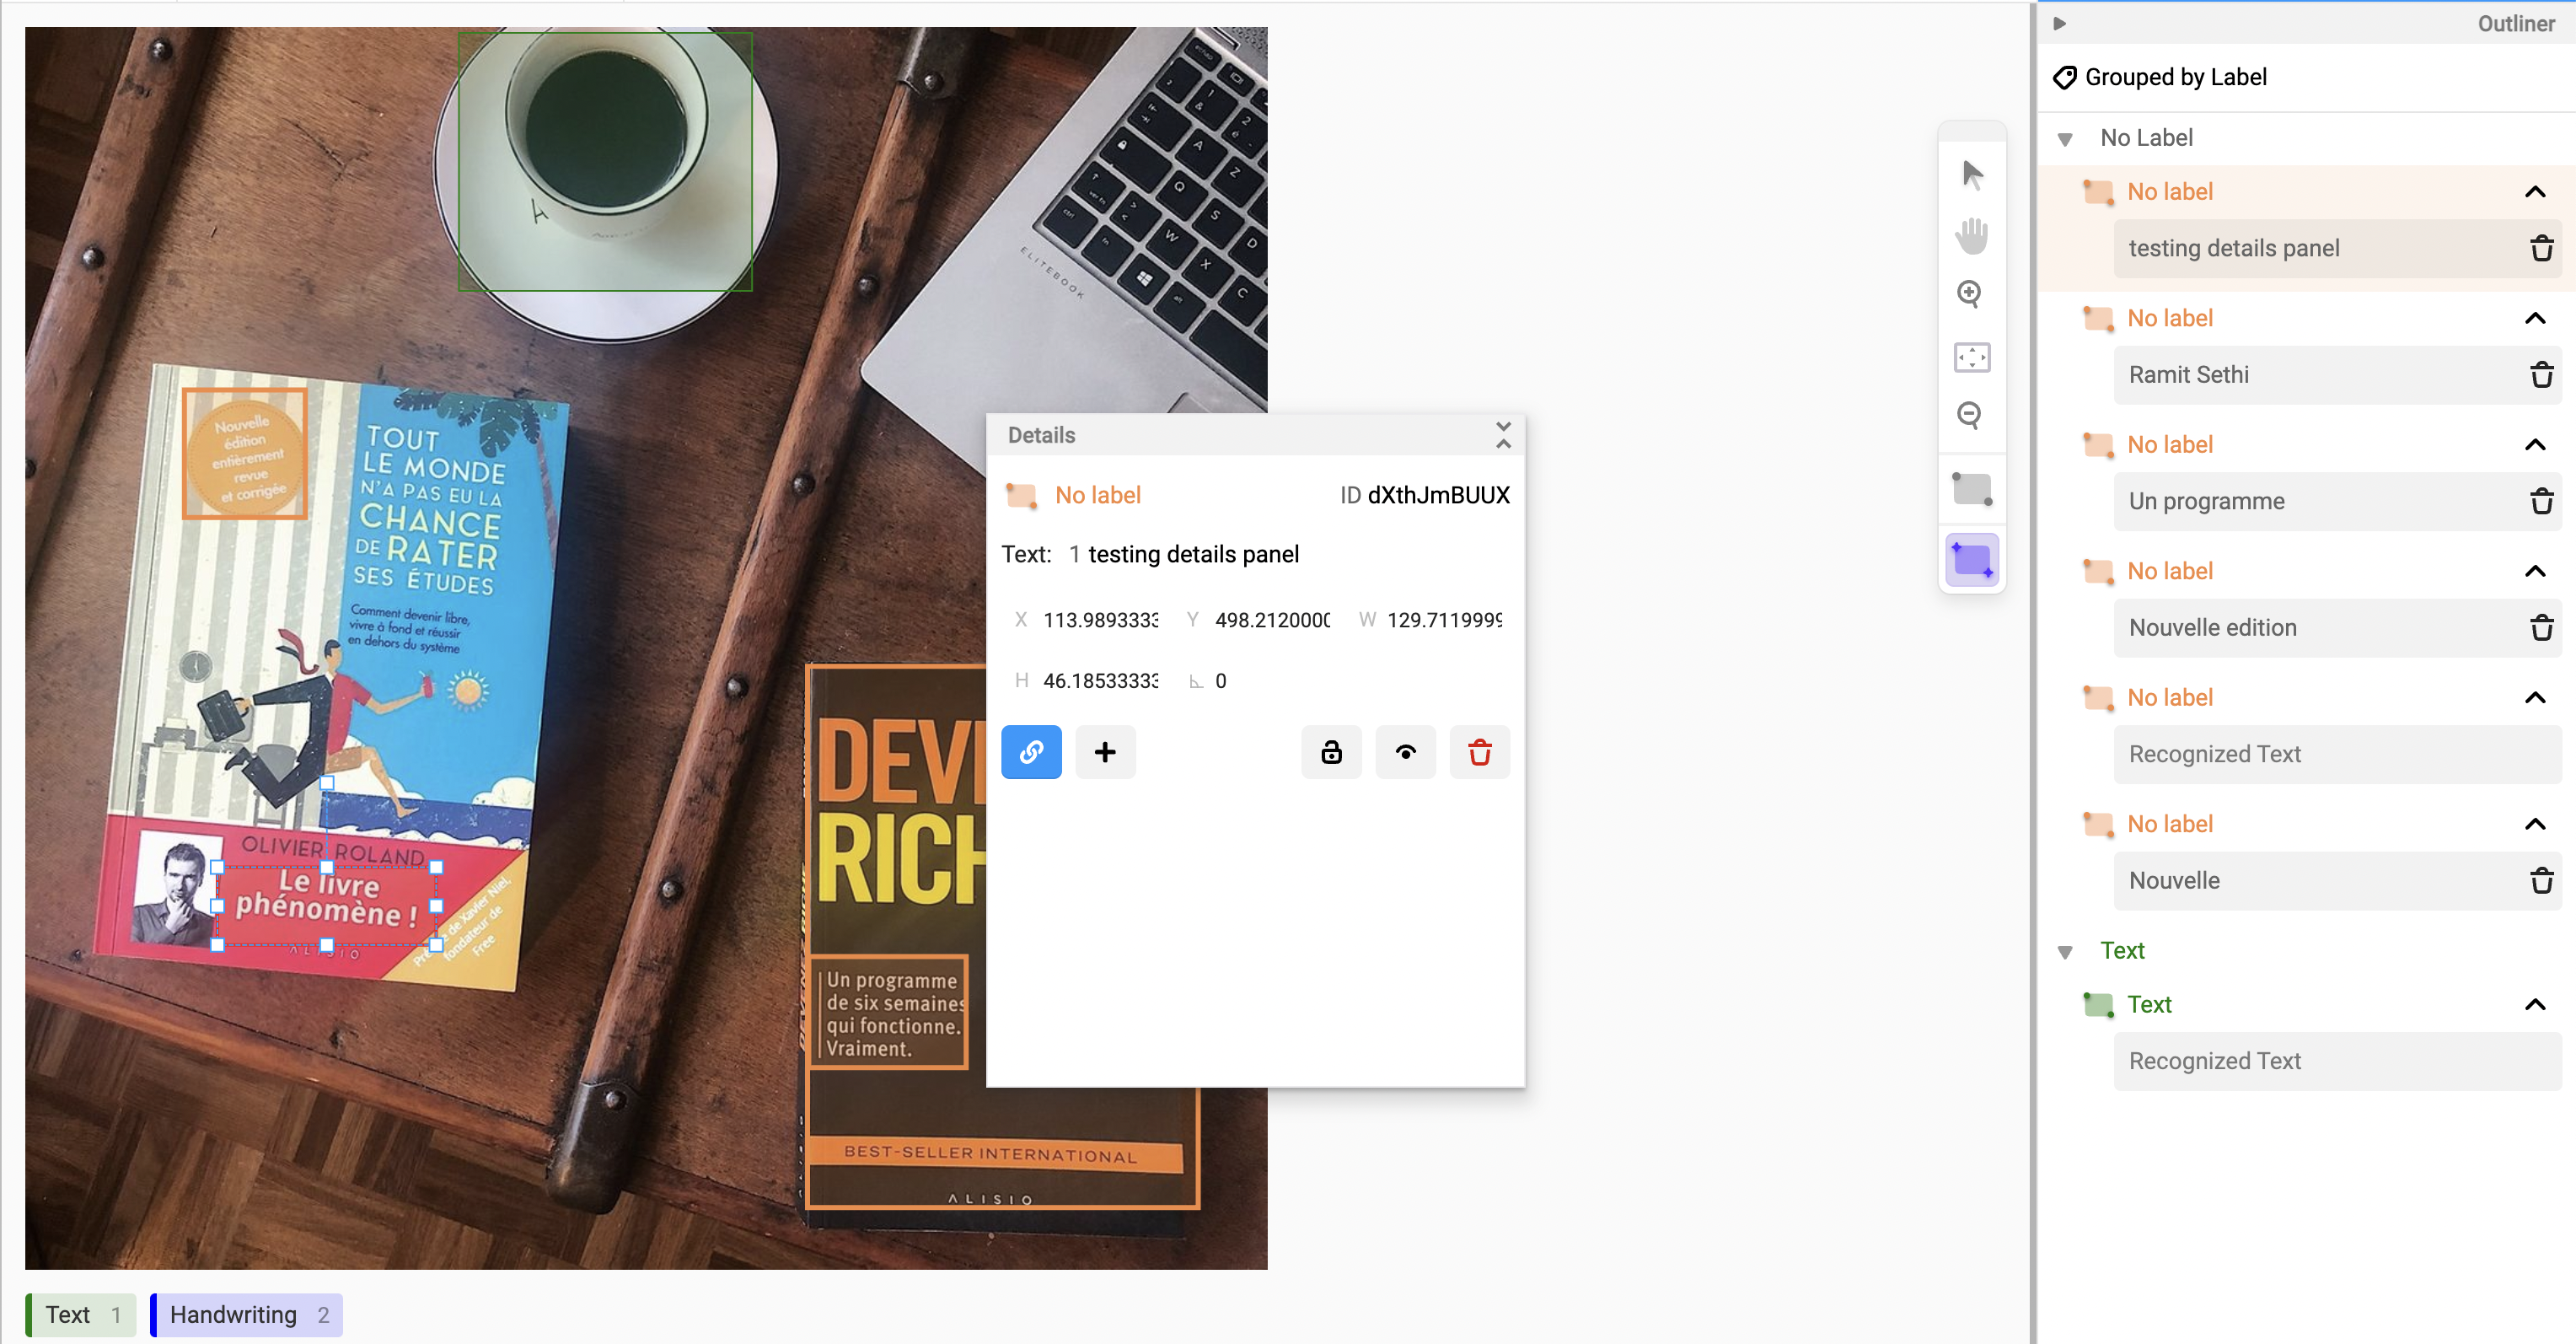
The Label Studio interface provides the tools needed to draw precise bounding boxes for object detection tasks.
While you don't need to perform bounding box annotation today, getting familiar with the tool will be beneficial. The following video provides a comprehensive guide to setting up and using Label Studio.
How To Label/Annotate Dataset Locally Using Label Studio For Machine Learning/Deep Learning 🎨🖌️
This video by Fahim Amin is a step-by-step tutorial on installing and using Label Studio for local data annotation.
Watch the following sections to understand the workflow. There is no need to install or follow along right now; the goal is to see how it works. Installation and Launch: Watch how Label Studio is installed with pip and started from the terminal from 2:23 to 8:30. Project Setup and UI Configuration: See how a new project is created and how the labeling interface is configured using templates from 8:50 to 13:11. This is where you would define your bounding box labels like grain and pulse. The Annotation Process: Observe the core process of importing images and drawing bounding boxes from 13:11 to 14:42.
This tool will be your go-to solution when you reach Module 6 and begin enhancing your features with object detection. For now, focus on completing the classification labeling with the Jupyter script.
Conclusion
In this lesson, you have successfully bridged the gap between planning and execution. You took the annotation schema from the previous lesson and applied it to your image data, creating the first version of your labeled dataset.
Here are your key takeaways:
- The choice of annotation tool should match the complexity of the task. Lightweight scripts are ideal for rapid classification, while full-featured GUIs are necessary for object detection.
- The
ipywidgetslibrary allows for the creation of simple, interactive annotation tools directly within a Jupyter Notebook, leveraging your existing Python skills. - You have produced a crucial project asset: an
annotations.jsonfile containingqualityandquantitylabels for your first batch of images.
This annotated data is the fuel for your first model. In the next lesson, you will build a custom PyTorch Dataset class. This class will be responsible for loading your images and the corresponding labels from the annotations.json file you just created, preparing them to be fed into a neural network for training.