Hello! Welcome back.
In our last lesson, we created a mental map of a Shopify theme's directory structure. We explored the roles of layout, templates, sections, snippets, and assets. You now know the "what" and "why" behind the architecture.
Today, we transition from theory to practice. This lesson's goal is to set up a local development environment using the Shopify CLI and connect it to your development store. For a developer with your background in full-stack JavaScript frameworks, this process will feel very familiar. Just as you use CLIs to bootstrap and manage React or Next.js projects, the Shopify CLI is the essential tool for professional theme development.
By the end of this lesson, you will have downloaded your theme's code, opened it in your preferred code editor, and established a connection to your Shopify store, ready to start building.
Why Develop Locally?
Before we install anything, let's address the "why," which is a cornerstone of your learning approach. While Shopify provides a web-based code editor in the admin panel, professional developers almost exclusively work locally.
The reasons will be immediately apparent given your experience:
- Use of Professional Tools: You can use your preferred code editor like VS Code, with all its powerful extensions for syntax highlighting, code completion (linting), and shortcuts.
- Version Control: Working locally allows for seamless integration with Git, which is non-negotiable for managing changes, collaborating, and maintaining a project history.
- Faster Workflow: A local server provides features like hot-reloading, meaning changes to your code are reflected in the browser almost instantly without manual page refreshes.
- Stability and Safety: You can experiment freely without the risk of breaking the live or preview theme on Shopify.
This short video provides a great summary of these benefits.
How to Install and Use Shopify's CLI as a Beginner
Watch the beginning of this video from 'Coding with Jan' to get a concise overview of why a local development setup is superior to the online editor.
Watch from the start until 01:37. The presenter contrasts the limitations of the built-in editor with the advantages of a local environment using VS Code.
Step 1: Installing the Shopify CLI and its Prerequisites
The Shopify CLI is a Node.js application. To run it, you'll need a few dependencies installed on your system.
Prerequisites:
- Node.js: You are already proficient with Node.js. The CLI requires version 16 or higher. You can verify your version by running
node -vin your terminal. - Git: Essential for version control. You can verify with
git --version. - Ruby: The Shopify CLI has some dependencies that require the Ruby programming language. You don't need to learn Ruby, but it must be installed.
- Bundler (for Windows users): If you are on Windows, you will also need to install Bundler, which is a package manager for Ruby.
The following video provides a detailed walkthrough of the installation process for these prerequisites and the Shopify CLI itself.
How to Install and Use Shopify's CLI as a Beginner
This clip from the same video walks through the entire installation process. It's crucial to follow these steps carefully and verify each installation.
Watch from 01:37 to 05:46. The video covers installing Node.js, Ruby, Git, and Bundler, and then installing the Shopify CLI via npm. Pay close attention to the commands used to check if each tool was installed correctly (e.g., ruby -v, gem list).
After following the video, you can install the Shopify CLI and the theme-specific packages globally using npm, which you're already familiar with:
npm install -g @shopify/cli @shopify/theme
To confirm a successful installation, run the following command in your terminal. It should output the installed version number.
shopify version
If you encounter a command not found error, try restarting your terminal or your computer to ensure the system's PATH variable has been updated.
Step 2: Connecting the CLI to Your Development Store
With the CLI installed, the next step is to authenticate it with your Shopify Partner account and connect it to the development store you created in the first module.
The primary command for this is shopify login, but an even more direct workflow is to use a command like shopify theme pull, which initiates the login process if you aren't already authenticated.
Let's walk through the process:
- Create a new folder on your computer for your project (e.g.,
my-shopify-theme). - Open your terminal and navigate into this new folder (
cd my-shopify-theme). - Run the command to pull a theme, specifying your store's URL. You can find this URL in your Partner Dashboard; it looks like
your-store-name.myshopify.com.
shopify theme pull --store your-store-name.myshopify.com
Running this command will trigger the following authentication flow:
- The CLI will prompt you to press any key to open a web browser.
- Your browser will open to a Shopify login page. Log in with your Shopify Partner credentials.
- You will then see a confirmation screen to authorize the CLI.
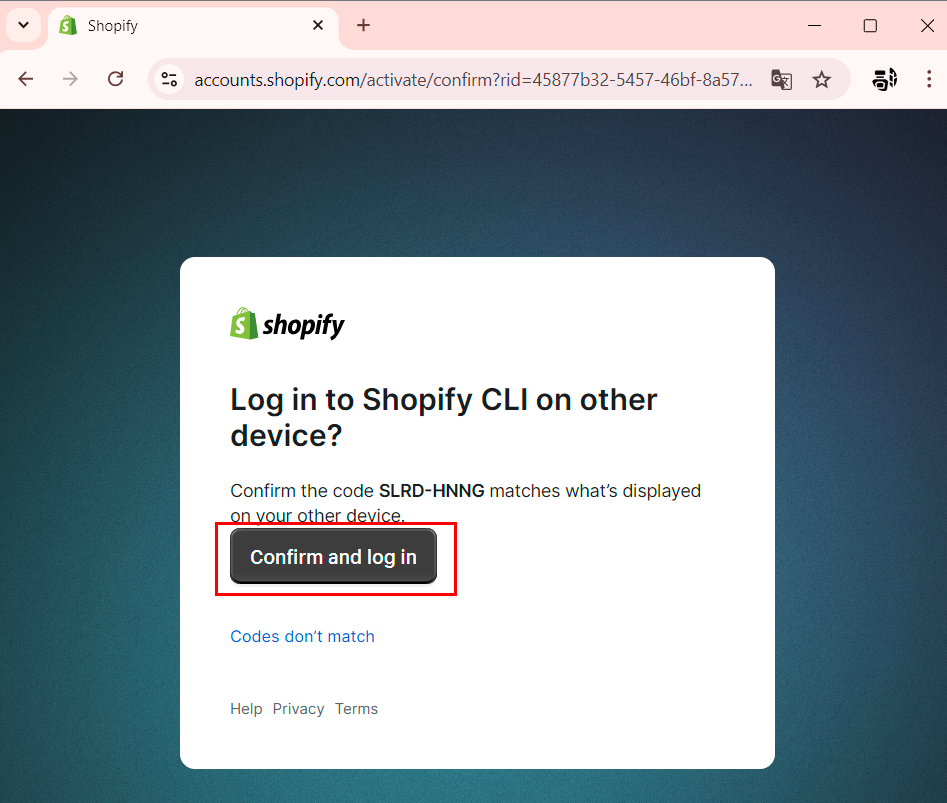
Once you confirm, your terminal will show that you've successfully logged in.
The official ShopifyDevs channel has a clear demonstration of this entire process, from logging in to pulling the theme.
How to use the Shopify CLI for Building Themes
This official video from Shopify demonstrates the login and theme pulling process. It provides a clean, visual guide to what we've just discussed.
Watch the segment from 02:24 to 06:35. It covers two key actions: Logging In (02:24 - 04:40): Shows the shopify login command and the browser authentication flow. Pulling a Theme (04:40 - 06:35): Demonstrates using shopify theme pull to select and download an existing theme from your connected store.
After the pull command finishes, look inside your project folder. You will see the exact directory structure (assets, layout, sections, etc.) that we discussed in the previous lesson. You have now successfully brought your theme from the cloud to your local machine!
Test your understanding!
You're starting a project for a new client who already has a store with a customized theme. Your first task is to make a small CSS change. After getting staff access to their store, what is the most direct CLI command to get their theme files onto your local machine? (Replace the placeholder with the client's store URL).
Show answer
The most direct command is:shopify theme pull --store client-store-url.myshopify.com
This single command will handle both authentication (if you're not already logged in to that store) and then present a list of themes on that store for you to download.
Alternative: Starting a New Theme from Scratch
While shopify theme pull is for working on existing themes, you might sometimes want to start a brand new theme from scratch. For this, the CLI provides the init command.
shopify theme init
This command clones Shopify's "Dawn" theme—their reference theme built with all the latest best practices—into a new folder. This is an excellent starting point for building a completely custom theme. We will be using this command later in the course.
For your reference, the official Shopify documentation provides a concise guide on creating a theme. You can quickly review the first step to see how the init command works.
Briefly read 'Step 1: Initialize a new theme'. This will solidify your understanding of how shopify theme init is used to clone the skeleton theme.
Conclusion
Congratulations! You have successfully configured a professional development environment. This is a critical milestone for any Shopify developer.
Let's summarize the key takeaways:
- Local development is standard practice for its efficiency, use of professional tools, and integration with version control.
- The Shopify CLI is the primary tool for interacting with themes from your terminal.
- Installation requires Node.js, Git, and Ruby.
- You connect your local environment to a store using
shopify loginor by passing the--storeflag to commands likepull. shopify theme pulldownloads an existing theme from a store.shopify theme initcreates a new theme based on Shopify's "Dawn" reference theme.
You now have the theme files on your computer and your editor is connected to your development store. In our next lesson, we will complete the workflow by learning how to use the shopify theme dev command. This will spin up a local server, allowing you to preview your changes in real-time with hot reloading and then push those changes back up to Shopify.