Hello! Welcome to the first lesson of Module 2, "Getting Started with ClickBank."
In our last module, we built a complete conceptual foundation for your affiliate business, covering everything from the core business model to the essential legal rules of the road. You now have the blueprint. Today, we transition from theory to action. It's time to take the first practical step toward earning your first commission.
This lesson directly addresses our learning outcome: Create a ClickBank account and navigate the main dashboard sections. We'll walk through the sign-up process together and then take a guided tour of the platform, so you feel confident and ready for the next steps.
Part 1: Creating Your ClickBank Account
ClickBank is an affiliate network. As we discussed in Module 1, it acts as the intermediary connecting you (the affiliate) with product creators (the merchants). It handles the product listings, tracking, and, most importantly, payments. Your first task is to join this network.
Creating an account is straightforward, but there are a few key steps to pay close attention to. The video below, from the official ClickBank channel, provides a perfect walkthrough.
How to Make Money with ClickBank in 2026 (Complete Beginner Tutorial)
This video, 'How to Make Money with ClickBank in 2026,' will guide you through creating your account step-by-step. We'll focus on the account creation part.
Please watch from 06:59 to 09:40. Follow along as the video guides you through: The initial sign-up form. Completing your profile and payment details. Creating your account nickname.
Key Step: The Account Nickname
As the video highlighted, creating your "Account Nickname" is a critical step. This is not just a username for logging in; it is your unique ID within the ClickBank ecosystem.
- It's for tracking: Every special affiliate link you create will contain this nickname, which is how ClickBank knows to credit you for a sale.
- It's permanent: You cannot change your nickname once it's created, so choose wisely.
- It represents you: Product creators can see your nickname when you promote their products. A professional-sounding nickname (e.g.,
HealthTipsPro,DigitalGrowthAdv) makes a much better impression than something unprofessional (e.g.,MoneyMakerz1999).
Take a moment to brainstorm a few professional-sounding nicknames related to a potential area of interest. Even if you're not sure of your niche yet, pick something general and respectable.
If you prefer a written guide to follow alongside the video, the article below provides a clear, step-by-step summary of the sign-up process.
ClickBank: The Brutally Honest, Must-Read Guide for 2024
This guide from SmartBlogger, 'ClickBank: The Brutally Honest, Must-Read Guide,' includes a detailed section on signing up.
Read the section titled 'How Do I Sign Up for ClickBank?'. It provides a text-based walkthrough that complements the video.
Once you've completed the sign-up process and created your nickname, you'll land inside your master account. Congratulations! You are now officially a ClickBank affiliate.
Part 2: Navigating Your Dashboard
Now that your account is active, let's get familiar with the main dashboard. It can seem a bit overwhelming at first, but we'll focus on the essential areas you'll use most often.
After you log in and select your nickname account, you'll see the main reporting dashboard. To start, it will look something like this:
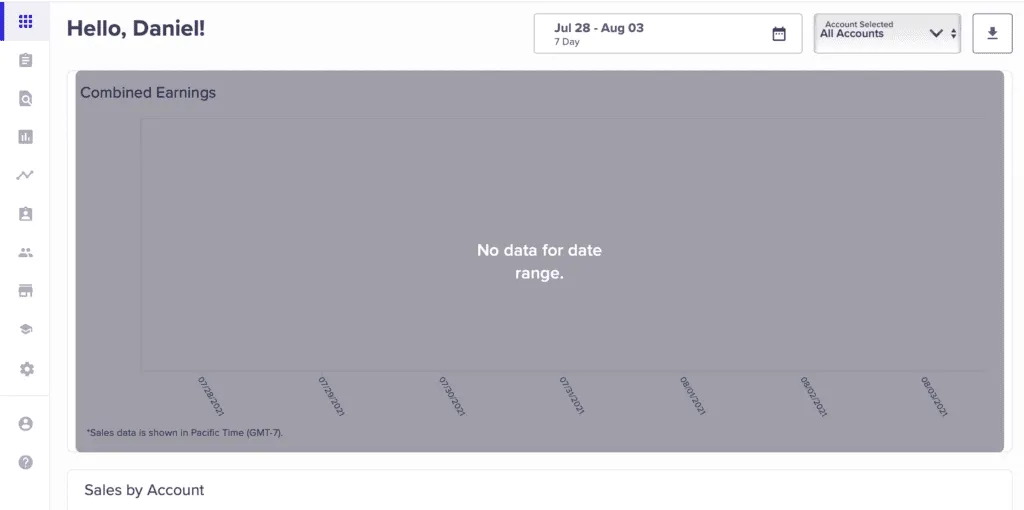
The article below provides a quick orientation to this space and points us toward the most important section for our purposes: the Marketplace.
ClickBank for Beginners: A 7-Step Affiliate Starter's Guide from ...
Let's refer to the 'ClickBank for Beginners' guide from the official ClickBank blog. It gives a simple overview of the dashboard and how to find the marketplace.
Read the section 'Step 2: Find a ClickBank Product to Promote.' Focus on the first few paragraphs that show you where to find the marketplace link, either in the sidebar or at the top of the page.
As the article explained, your primary destination from the main dashboard will almost always be the Affiliate Marketplace. This is the heart of ClickBank—a massive catalog of all the products available for you to promote.
You can access it using the "Marketplace" link in the main navigation menu on the left.
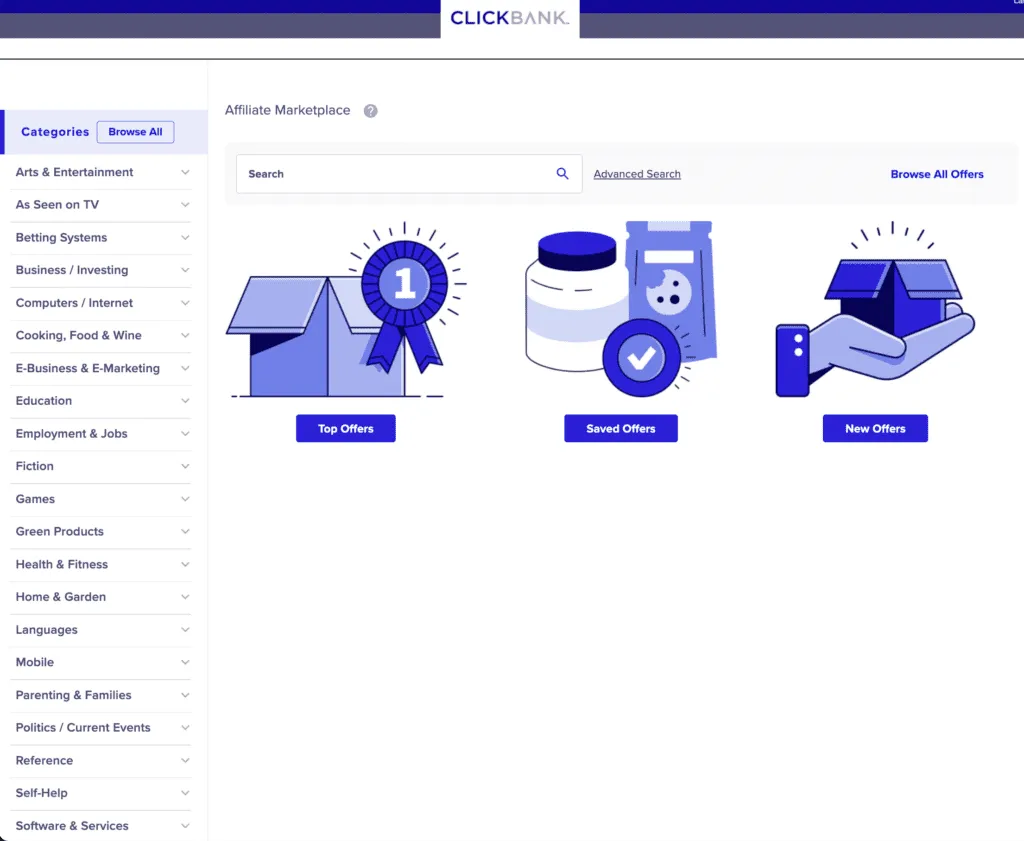
Take a moment to click around:
- Open the Marketplace from your dashboard.
- Expand a few categories on the left-hand side (e.g., "Health & Fitness" or "E-BUSINESS & E-MARKETING"). See how they have subcategories.
- Type a word into the main search bar at the top and hit the search button to see what happens.
Don't worry about understanding what all the numbers and stats next to each product mean just yet. The goal for today is simply to know where the marketplace is and how to perform a basic search.
Conclusion
Well done! You've taken your first concrete step into the world of affiliate marketing. You've moved from learning concepts to creating a tangible asset—your own affiliate account.
Here are your key takeaways from this lesson:
- You have successfully created a ClickBank account and understand the critical importance of choosing a permanent, professional account nickname.
- You can now navigate to your main dashboard and understand that this is where you'll see your future earnings reports.
- You know how to find and access the most important section of ClickBank for affiliates: the Affiliate Marketplace.
You are now perfectly positioned for our next lesson. We will build directly on what you've learned today.
Preview of the next lesson: Now that you know where the marketplace is, our next goal is to learn how to use it effectively. We will dive into the product listings and learn to interpret the key metrics that help you identify promising products, such as Gravity Score and Avg $/conversion. This is where the strategic side of product selection begins.