Introduction
Hello and welcome back. In our last lesson, you learned the fundamental three-level structure of a paid ad campaign: the Campaign (the objective), the Ad Set (the audience and logistics), and the Ad (the creative). This theoretical framework is the blueprint for all successful advertising on platforms like Facebook and Instagram.
Today, we move from theory to practice. It's time to build the "workshop" where you will construct, manage, and analyze all your future ad campaigns. This lesson will guide you through the essential one-time setup of your advertising accounts on Meta's platform.
Your learning outcome for this lesson is to set up a Facebook Ads account and navigate the Ads Manager interface. By the end of this 60-minute session, you will have created the necessary accounts and will be able to confidently find your way around the main dashboard, ready to build your first campaign.
1. The Foundation: Meta Business Manager
Before you can create an ad, you need a central hub to manage all your business activities on Meta's platforms (Facebook and Instagram). This hub is called the Meta Business Manager (often used interchangeably with Meta Business Suite). It's a professional tool that separates your personal Facebook profile from your business operations.
Think of it this way:
- Your Personal Facebook Profile: Your personal space for friends and family.
- Meta Business Manager: Your company's headquarters. It owns all your business assets, such as your Facebook Page, your Instagram profile, and, most importantly, your Ad Account.
Setting this up correctly is the first and most critical step.
Facebook Ads Tutorial - 2025 FREE COURSE for Beginners
To start, let's watch a video from Davie Fogarty that explains why using a Business Manager is crucial and provides essential tips for setting it up to avoid future problems, like account bans.
Watch from 02:53 to 04:46. Pay close attention to the advice about using an established Facebook account and ensuring your business information is accurate. This is vital for building trust with Meta's system.
Now that you understand the why, let's walk through the how.
Action Step: Your task is to create your own Meta Business Manager. Follow the steps outlined in the resources below. You will need to be logged into your personal Facebook profile to begin.
Go to business.facebook.com to start.
How to Advertise on Facebook in 8 Steps: The Visual Guide
This article from Wordstream provides a clear, text-based guide with screenshots for creating your Business Suite account. You can use this as a reference while you go through the process.
Read 'Step 1: Create a Business Suite account'. Follow the instructions to create your account. You can stop when you reach the section about connecting your Facebook Page.
2. Connecting Your Business Assets
With your Business Manager created, the next step is to bring your business assets into this central hub. The most important asset for running ads is your Facebook Page. You cannot run Facebook ads from a personal profile; they must be associated with a business Page.
Since you've already built a website for your niche, you should create a Facebook Page that represents this brand.
The BEST Facebook Ads Tutorial For Beginners in 2026
This video from Ben Heath will now show you how to navigate to the Business Settings within your new account and connect your essential assets, including your Facebook Page.
Watch from 02:02 to 03:45. Focus on the process for adding or creating a new Facebook Page. Don't worry about the Instagram account section for now, unless you already have one for your business.
Action Step: Inside your Business Manager, navigate to the Business Settings and either create a new Facebook Page for your affiliate website or add an existing one if you've already made it.
3. Creating Your Ad Account
Now we come to the core of today's lesson: creating the Ad Account. This is the specific account within your Business Manager that is used to pay for ads and organize your campaigns.

When creating your ad account, you will be asked for three pieces of information. Two of these are extremely important because they generally cannot be changed later:
- Ad Account Name: This is for your reference (e.g., "John's Affiliate Business").
- Time Zone: Set this to your local time zone. All ad reporting and scheduling will be based on this.
- Currency: Set this to the currency you will use for billing. This should align with your payment method to avoid conversion fees.
Facebook Ads Tutorial - 2025 FREE COURSE for Beginners
Let's return to Davie Fogarty's tutorial as he walks through creating the ad account and adding payment information. He gives some excellent practical advice here.
Watch from 05:51 to 07:49. Follow along to create your ad account. Pay close attention to his warnings about setting the correct time zone and currency, and his tip about which payment methods to use.
Action Step: Create your ad account and add your payment information. This is a necessary step before you can run any ads. For a detailed written guide on the payment setup, refer to the resource below.
How to Set Up Your Facebook Business Manager and ... - AdEspresso
The AdEspresso guide provides a comprehensive breakdown of the payment settings page, explaining billing thresholds and how to set a spending limit. This is useful for understanding how and when you'll be charged.
Read the section 'Set up your billing and payment information'. This will give you a deeper understanding of the options available on the payment settings page you just completed.
4. Navigating the Ads Manager Interface
Congratulations! Your entire account structure is now set up. The final step is to familiarize yourself with the main dashboard where you'll be working: the Ads Manager.
The Ads Manager is where you will apply your knowledge of the Campaign > Ad Set > Ad structure to build, launch, and analyze your advertising efforts.
First, let's see how to get there from the Business Suite.
The BEST Facebook Ads Tutorial For Beginners in 2026
In this short clip, Ben Heath shows you exactly where to click to move from the general Business Suite into the Ads Manager.
Watch from 06:40 to 07:12. The key is to find the 'All tools' menu (the 'hamburger' icon) and select 'Ads Manager'.
Once you're in the Ads Manager, you'll see a navigation panel and the main workspace.
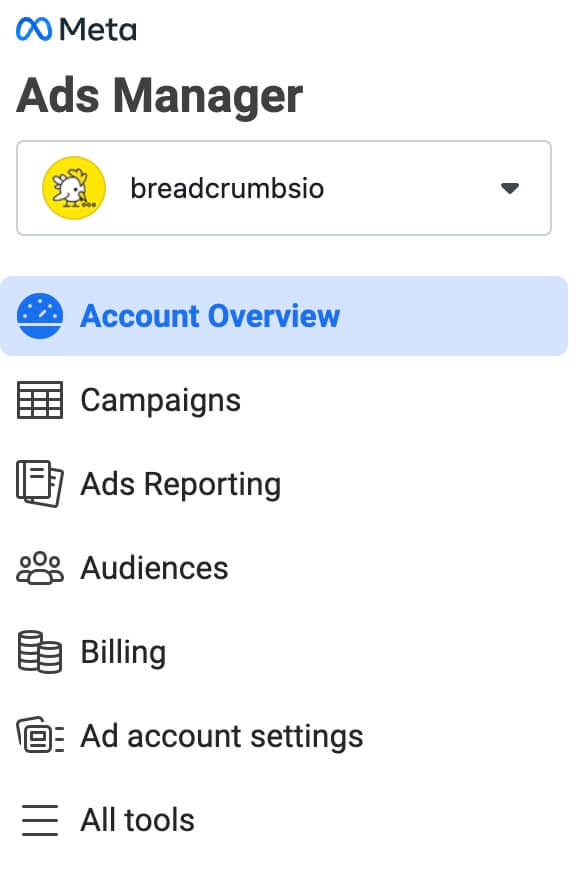
The main view is organized into the three levels you learned about in the last lesson. You'll see tabs for Campaigns, Ad sets, and Ads. This is the practical application of that hierarchy.
Facebook Ads Tutorial - 2025 FREE COURSE for Beginners
To bring everything together, let's watch this final segment. It shows the Ads Manager interface and directly connects it back to the three-level structure we've discussed.
Watch from 10:02 to 10:45. This will give you a tour of the Ads Manager home screen and show you the Campaign, Ad Set, and Ad tabs in action.
Action Step: Spend a few minutes exploring the Ads Manager on your own.
- Click between the Campaigns, Ad sets, and Ads tabs.
- Click the All tools menu (the hamburger icon) and just look at the different options available. Don't worry about what they all do; the goal is simply to become familiar with the layout.
Conclusion
Excellent work today. You've completed the essential, foundational setup required to advertise on Meta's platforms. While it may seem like a lot of administrative steps, having this professional structure in place from day one is crucial for organization, security, and long-term success.
Key Takeaways:
- Meta Business Manager is the central hub for all your business assets, separating them from your personal profile.
- You must have a Facebook Page connected to your Business Manager to run ads.
- The Ad Account is created within Business Manager and is where you manage campaigns and billing.
- Setting the correct Time Zone and Currency during Ad Account setup is a critical, irreversible step.
- The Ads Manager is your main dashboard for creating and managing campaigns, and its interface is built around the Campaigns, Ad Sets, and Ads structure.
Preview of the next lesson:
Now that your workshop is built and you know where the tools are, it's time to start your first project. In the next lesson, we will begin creating your first campaign. We'll focus on the "Ad Set" level, where you will learn to define a target audience for a Facebook ad campaign using basic demographic and interest targeting. This is where you start telling Facebook exactly who you want to see your affiliate offers.