Hello! Welcome back to our journey into containerization with Docker.
In our last lesson, you successfully built a Docker image for our FastAPI application. You took your source code and a Dockerfile and created a self-contained, portable artifact named fastapi-app.
Today, we will bring that image to life. Our goal is to run the application as a Docker container and test it locally. This is where you'll see the real power of containerization, as your application starts up in an isolated environment, ready to serve requests.
From Image to Container
First, let's clarify the relationship between an image and a container. An image is a passive, immutable blueprint containing your application and its environment. A container is a live, running instance of that image. You can run many containers from a single image.
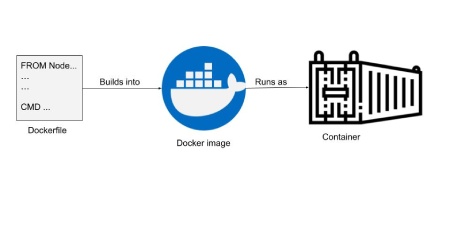
We've completed the "Builds into" step. Now, we'll focus on the "Runs as" part.
1. Running the Container with docker run
The primary command for launching a container is docker run. Let's start by trying to run the image you built in the previous lesson.
The basic command structure involves a few important flags:
-dor--detach: Runs the container in the background and prints the container ID. This is useful for long-running applications like a web server.-por--publish <HOST_PORT>:<CONTAINER_PORT>: This is crucial for web applications. It maps a port on your local machine (the host) to a port inside the container, allowing you to access the application from your browser.--name <CONTAINER_NAME>: Assigns a memorable name to your container, making it easier to manage.
FastAPI in Containers - Docker
The official FastAPI documentation provides a clear example of this command. Let's review it.
Read the short section titled 'Start the Docker Container'. Note the use of the -d, --name, and -p flags.
Now, open your terminal and run the following command. We'll map port 8000 on your machine to the port your application is configured to use inside the container (which we'll assume is also 8000, a common default).
docker run -d --name fastapi-container -p 8000:8000 fastapi-app
This command tells Docker to start a container named fastapi-container from the fastapi-app image, in the background, and forward traffic from localhost:8000 to port 8000 inside the container.
2. A Common Pitfall: The Host Address
Try opening http://localhost:8000 or http://localhost:8000/docs in your browser. It probably won't work, and you'll see a "site can't be reached" error. Why?
This is one of the most common issues when containerizing web applications. By default, Uvicorn (the server running your FastAPI app) binds to 127.0.0.1 (localhost). Inside the container, 127.0.0.1 refers to the container itself, not the outside world. The port mapping can't forward traffic to an application that's only listening for internal connections.
To fix this, we need to tell Uvicorn to listen on 0.0.0.0. This special address means "listen on all available network interfaces," which allows it to accept connections forwarded by Docker from your host machine.
Docker Tutorial For Beginners - How To Containerize Python Applications
This is a universal concept in container networking. The following video demonstrates this exact problem and its solution for a FastAPI application.
Watch from 16:18 to 18:30. The presenter first runs the container and shows that it's inaccessible. He then explains the need to set host="0.0.0.0" and map the ports with -p to make it work.
To implement this fix, we need to:
- Stop and remove the old, non-working container.
- Update the
Dockerfile. - Rebuild the image.
- Run the new, corrected image.
Step 1: Stop and Remove the Container
Run these commands in your terminal:
docker stop fastapi-container
docker rm fastapi-container
Step 2: Update Your Dockerfile
Open your Dockerfile and find the CMD instruction at the end. You need to add the --host 0.0.0.0 argument to the command. It should look something like this (your command might use fastapi run or uvicorn directly, either is fine):
If using uvicorn:
CMD ["uvicorn", "app.main:app", "--host", "0.0.0.0", "--port", "8000"]
If using fastapi run (as in the official docs):
CMD ["fastapi", "run", "app/main.py", "--host", "0.0.0.0", "--port", "8000"]
Step 3 & 4: Rebuild and Run
Now, rebuild your image with the change and run the new version:
# Rebuild the image with the updated Dockerfile
docker build -t fastapi-app .


# Run the container again with the same command
docker run -d --name fastapi-container -p 8000:8000 fastapi-app
Now, let's move on to testing it properly.
3. Testing Your Containerized Application
With the container running correctly, how can you be sure everything is working as expected?
Verification 1: List Running Containers
The docker ps command shows all currently running containers.
docker ps
You should see output similar to this, confirming your container is Up and the PORTS are mapped correctly.
CONTAINER ID   IMAGE         COMMAND                  CREATED         STATUS         PORTS                    NAMES
a1b2c3d4e5f6   fastapi-app   "uvicorn app.main:ap…"   15 seconds ago  Up 14 seconds  0.0.0.0:8000->8000/tcp   fastapi-container
Verification 2: Check the Logs
To see the output from your FastAPI application inside the container (e.g., Uvicorn's startup messages), use the docker logs command.
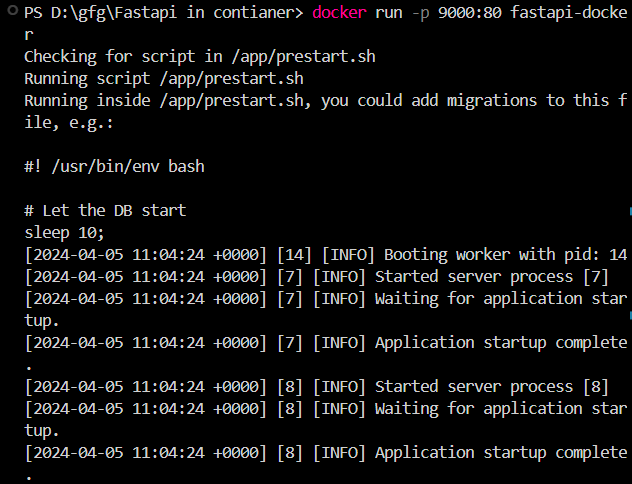
docker logs fastapi-container
You should see the familiar Uvicorn startup log, confirming the application has started successfully on http://0.0.0.0:8000.
Verification 3: Test in the Browser
Now, open your web browser and navigate to http://localhost:8000/docs. You should see the interactive Swagger UI for your API. This is the ultimate visual confirmation that your app is running and accessible.
FastAPI in Containers - Interactive API docs
The FastAPI documentation also highlights this step. Accessing the interactive docs is a key part of the development workflow.
Review the 'Interactive API docs' section. This is what you should be seeing in your own browser.
Verification 4: Test with curl
Finally, you can test an endpoint directly from your terminal using curl, just as you did in the first module of this course.
Your First Containerized Machine Learning Deployment with Docker...
This article, which focuses on deploying an ML model with FastAPI and Docker, provides a great example of testing an endpoint with curl.
Look at the section 'Testing the API Endpoint'. It shows how to use curl to send a request to the containerized application.
Based on that example, you can test your root endpoint like this:
curl http://localhost:8000/
You should receive the JSON response from your root endpoint, e.g., {"Hello":"World"}.
Conclusion
Excellent work! You have successfully run your FastAPI application as a Docker container and confirmed it is working correctly. This is a complete local development loop: write code, build an image, and run a container.
Key Takeaways:
- The
docker runcommand launches a container from an image. - The
-pflag is essential for mapping host ports to container ports to access web applications. - A containerized web application must listen on
0.0.0.0to be accessible from outside the container. - You can manage and inspect running containers using
docker ps(list),docker logs(view output),docker stop(stop), anddocker rm(remove). - Testing can be done via the browser, API clients like Postman, or command-line tools like
curl.
In the next lesson, we will explore how to manage application configuration, such as database URLs or API keys, using environment variables within the container. This will make your application more flexible and secure as we prepare for deployment.