Hello! Welcome to the first lesson in our second module, Introduction to Django.
In the previous module, we established a strong foundation in how the web works, culminating in our hands-on exploration of HTTP traffic with browser developer tools. You learned to observe the conversation between a client (the browser) and a server. Now, it's time to build the server-side of that conversation.
Today, we will take the very first practical step in becoming a backend developer. The learning outcome for this lesson is to set up a Python virtual environment and install Django. This process is the starting ritual for nearly every Python-based web project. We'll cover not just how to do it, but more importantly, why it's a critical best practice.
1. Why Do We Need Virtual Environments?
Before we write any code, let's address a fundamental challenge in software development: managing dependencies.
Imagine you are working on two separate projects:
- Project A is a legacy application that requires an older version of a library, say
Django==2.2. - Project B is a new application you're building with the latest and greatest features, requiring
Django==4.1.
If you install Python packages globally on your system, you can only have one version of Django installed at a time. Installing Django==4.1 would overwrite Django==2.2, potentially breaking Project A. This is known as a dependency conflict.
The solution is to create isolated environments for each project, where each can have its own independent set of installed packages. This is what virtual environments provide.
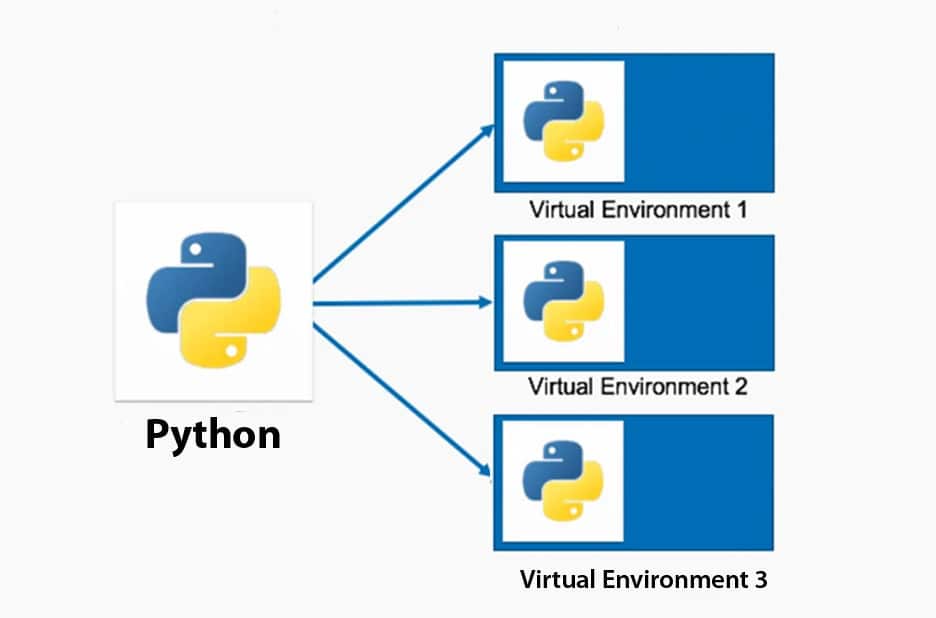
Virtual environments solve three key problems:
- Dependency Conflicts: They allow different projects to use different versions of the same package.
- Reproducibility: They make it easy to generate a list of a project's exact dependencies (
requirements.txt), so other developers (or your future self) can recreate the identical environment. - System Cleanliness: They prevent you from cluttering your global Python installation with project-specific packages, which can interfere with system-level scripts or other tools.
For a deeper dive into the problems that virtual environments solve, the following reading is excellent. It aligns well with your interest in understanding the underlying "why" before jumping into implementation.
Python Virtual Environments: A Primer
The article 'Python Virtual Environments: A Primer' from Real Python provides a comprehensive explanation of the rationale behind using virtual environments.
Please read the section titled 'Why Do You Need Virtual Environments?'. Focus on the three main sub-sections: 'Avoid System Pollution', 'Sidestep Dependency Conflicts', and 'Minimize Reproducibility Issues'.
2. Setting Up Your First Virtual Environment with venv
Python comes with a built-in module for creating virtual environments called venv. While other tools exist (like pipenv or poetry), venv is the officially recommended standard and the best place to start.
The process involves four simple steps: creating, activating, using (installing packages), and deactivating.
The following video provides a clear, step-by-step tutorial that covers this entire workflow.
Python Virtual Environments - Full Tutorial for Beginners
The video 'Python Virtual Environments - Full Tutorial for Beginners' by Tech With Tim is a concise and practical guide to using venv.
Watch the video from the beginning until 07:19. This will cover everything from the concept to creating an environment, activating it, installing packages, and generating a requirements.txt file. Pay close attention to the different commands for Windows versus macOS/Linux.
Let's summarize the key commands from the video for easy reference. You will perform these steps in your terminal or command prompt.
Step 1: Create a Project Folder and Navigate Into It
First, create a directory for your first Django project. We'll call it django_project_1.
mkdir django_project_1
cd django_project_1
Step 2: Create the Virtual Environment
We'll name our virtual environment venv. This is a common convention.
# On macOS/Linux
python3 -m venv venv

# On Windows
python -m venv venv
This command creates a new folder named venv inside your project directory. This folder contains a copy of the Python interpreter and a place to install project-specific libraries.
Step 3: Activate the Virtual Environment
Activating the environment tells your shell to use the Python interpreter and packages inside the venv folder.
# On macOS/Linux
source venv/bin/activate

# On Windows
venv\Scripts\activate
After activation, you will see (venv) prepended to your command prompt, indicating that the virtual environment is active.
Step 4: Deactivate the Virtual Environment
When you're finished working, you can deactivate the environment.
deactivate
The (venv) prefix will disappear from your prompt. You would then need to reactivate it to work on the project again.
Test your understanding!
You've just cloned a coworker's Python project from GitHub. Inside the project folder, you see a file named requirements.txt and nothing else related to an environment. What are the three essential command-line steps you need to take to get a working, isolated environment with all the necessary packages installed?
Show answer
- Create a virtual environment:
python3 -m venv venv(or the Windows equivalent). This creates the isolated space. - Activate the virtual environment:
source venv/bin/activate(or the Windows equivalent). This "enters" the isolated space. - Install dependencies from the file:
pip install -r requirements.txt. This reads therequirements.txtfile and installs all the specified packages into your newly activated environment.
3. Installing Django
With our project folder created and our virtual environment activated, we are now ready to install Django.
Make sure your virtual environment is active (you should see (venv) in your prompt). Then, run the following command:
pip install django
This command uses pip, Python's package installer, to download Django and its dependencies from the Python Package Index (PyPI) and install them into your active virtual environment's site-packages directory.
You can verify that Django was installed by running pip freeze:
pip freeze
This will list Django and its dependencies, such as asgiref and sqlparse.
Pinning Your Dependencies
Now that you have installed Django, your project has a dependency. The final and crucial step is to record this dependency in a requirements.txt file.
pip freeze > requirements.txt
This command takes the output of pip freeze and redirects it into a file named requirements.txt. This file should be committed to version control along with your source code. It acts as the official manifest of your project's dependencies, allowing anyone to replicate your environment precisely.
For a final reinforcement of this process, the first part of the following article provides a great summary.
Your First Steps With Django: Set Up a Django Project
The article 'Your First Steps With Django: Set Up a Django Project' from Real Python concisely covers the same ground we just did: preparing an environment and installing Django.
Please read the sections 'Prepare Your Environment' and 'Install Django and Pin Your Dependencies'. This will serve as a great text-based summary of the steps we've just performed.
Conclusion
Congratulations! You've successfully completed the foundational setup for any Django project. This might seem like a lot of preparatory work, but mastering this workflow is non-negotiable for professional Python development. It ensures your projects are clean, reproducible, and free from conflicts.
Key Takeaways:
- Virtual environments are essential for isolating project dependencies and creating reproducible builds.
- The standard Python tool for this is the built-in
venvmodule. - The workflow is: create (
python -m venv venv), activate (source venv/bin/activate), install packages (pip install ...), and pin dependencies (pip freeze > requirements.txt). - Django is installed into an active virtual environment using
pip install django.
Preview of the Next Lesson:
Now that we have Django installed, our next step is to use its command-line tools to create our first Django project. We will execute the command to generate the project's boilerplate code, explore the directory structure it creates, and understand the purpose of each file. We're about to see how Django begins to give structure to our backend application.