Hello! Welcome to a new module focused on transforming your raw data into beautiful, functional, and intuitive displays. In the last module, you mastered the "engine" of your Notion systems—linking data with relations, calculating with rollups, and creating workflows with buttons and automations. Now, it's time to build the "dashboard" for that engine.
The ability to present the same information in different ways is what elevates a simple database into a powerful, user-friendly tool. This is a cornerstone of professional template design. A great template doesn't just store information; it presents the right information at the right time.
This lesson kicks off our exploration of Database Views. We will focus on creating and switching between the three most fundamental view types: Table, Board, and List. Mastering these will give you the primary tools to build the project managers and content calendars you're aiming for.
1. The Core Concept: One Database, Many Lenses
Before we dive into specifics, it's crucial to understand the philosophy behind views. Unlike a spreadsheet where the structure is rigid, a Notion database separates the data from its presentation.
- The Data Source: This is your single, master collection of information (e.g., all your tasks, all your content ideas). It lives in one place.
- The View: This is a lens through which you look at that data. You can have many views of the same data source, each with a different layout, filter, or sort.
Changing a view doesn't change the data itself; it only changes how you see it. This is an incredibly powerful concept for template building, as you can create a single "master" database and then build dozens of useful, context-specific views for your users.
To see this idea explained clearly, let's start with a foundational video.
Notion Databases - Full Course for Beginners
In this segment from his comprehensive course, Thomas Frank explains the fundamental difference between a database and a spreadsheet, highlighting how views provide flexibility that spreadsheets lack.
Watch from 01:58 to 05:29. Pay close attention to his explanation of how database records are pages and how the true power lies in being able to view the same information in different layouts.
2. The Three Core Views: Table, Board, and List
While Notion offers several view types, these three are the workhorses you'll use most often. Each serves a distinct purpose.
Table View
This is the classic, spreadsheet-like layout and the default for any new database. It's the most data-dense view.
- Best For:
- Getting a "bird's-eye view" of all your data and properties.
- Bulk-editing properties quickly.
- Administrative tasks and data cleanup.
- Use Case for Your Goals: The main "All Tasks" or "All Content" view where you can see every single item and all its associated data (status, due date, platform, etc.).
Customize database views to focus on information you need
This brief clip from Notion's official channel concisely describes the utility of the Table view.
Watch from 00:51 to 01:12 to understand why the Table layout is considered ideal for administrative work and getting a complete overview.
Board View
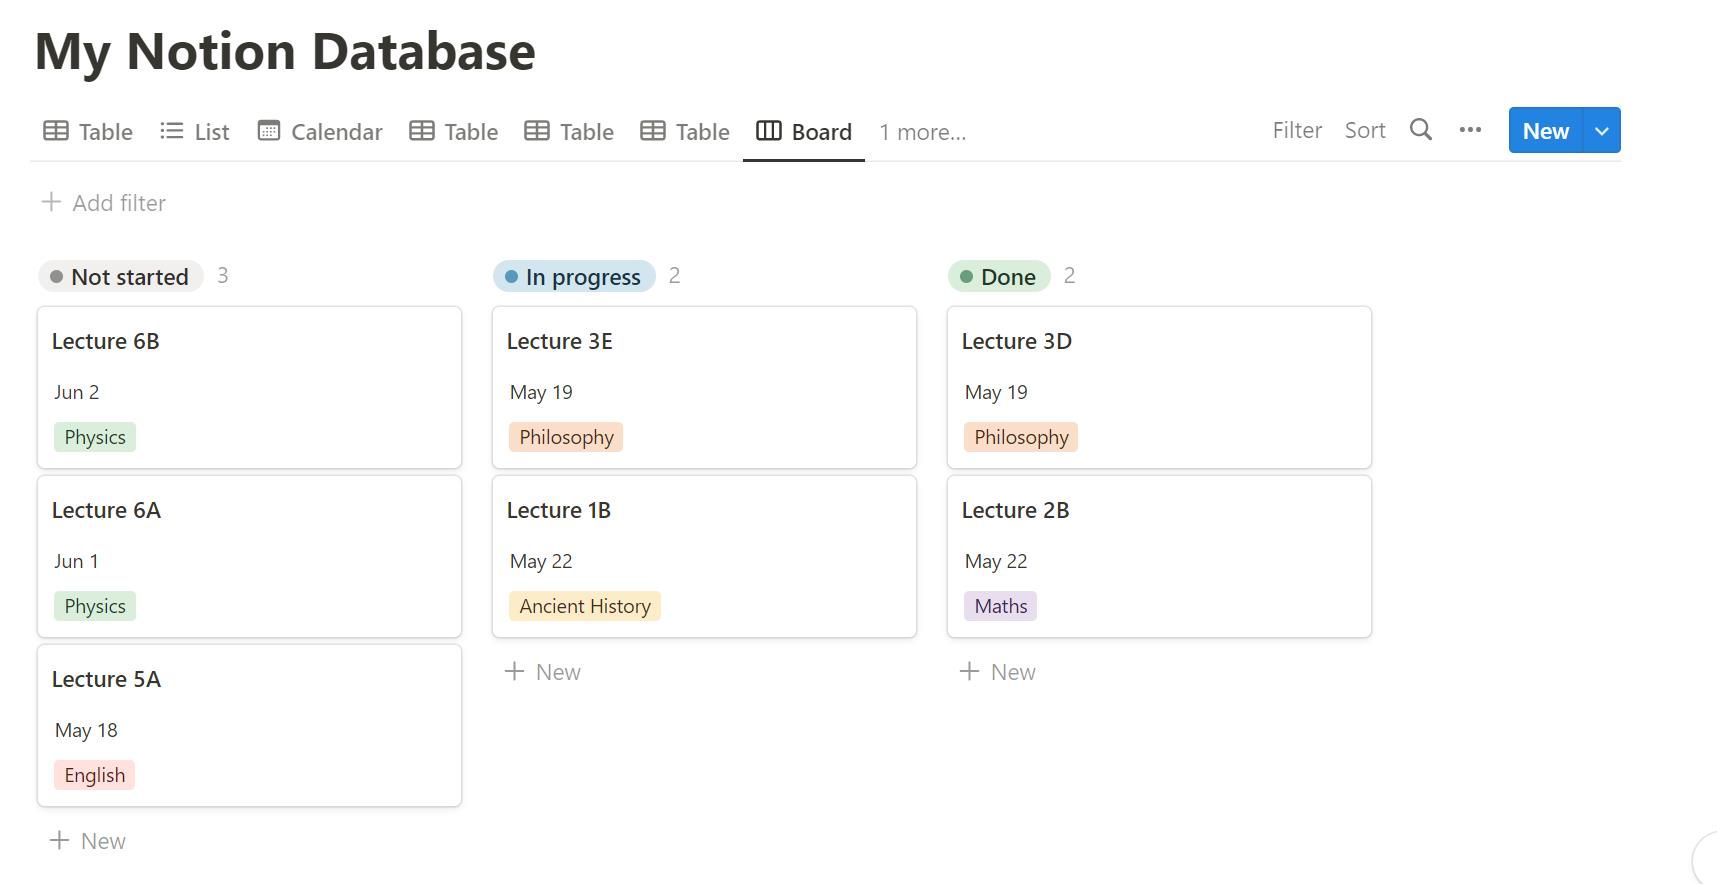
The Board view organizes your database items into columns based on a property, creating a Kanban-style board. This view is essential for visualizing workflows.
- Best For:
- Tracking the progress of items through a pipeline (e.g., To Do → In Progress → Done).
- Visually managing projects and content calendars.
- Use Case for Your Goals: This is the heart of your project manager and content creation hub. You'll use it to drag-and-drop tasks or articles from one stage to the next.
List View
This is the most minimal and clean view. It presents your database items as a simple, vertical list, similar to a to-do list app.
- Best For:
- Creating simple, scannable lists (e.g., meeting notes, quick ideas).
- Mobile-friendly displays.
- Situations where you only need to see the item's name and a few key properties.
- Use Case for Your Goals: A "Today's Tasks" widget on a dashboard or a simple inbox for new content ideas.
Customize database views to focus on information you need
Let's return to the Notion video to see their quick summary of the List layout's purpose.
Watch from 01:12 to 01:24. Notice the emphasis on it being 'simple, sleek, and minimal'.
Test your understanding!
You are building a content calendar template. Your client wants to see their planned posts move from "Idea" to "Drafting" to "Published". Which view would be the best choice to visualize this workflow?
Show answer
The Board view is the ideal choice. You can set the columns to be grouped by the 'Status' property, allowing the user to visually track and move content through the creation process.
3. How to Create, Switch, and Customize Views
Now for the practical part. Adding a new view or changing the layout of an existing one is straightforward. At the top of your database, you'll see your existing views as tabs.
- To add a new view, click the
+icon or click the name of the current view and select+ New view. - To switch between views, simply click on the tab with the name of the view you want to see.
- To change the layout of a view, click the
...icon at the top-right of the database, go toLayout, and select a new one.
Let's watch a demonstration of this process.
Notion Databases - Full Course for Beginners
This clip from Thomas Frank shows you exactly how to add new views, rename them for clarity, and change the layout type from the view options menu.
Watch from 09:41 to 10:30, where he adds and renames views. Then, jump to 15:08 and watch until 16:20 to see him create a new view and explicitly change its layout to a Board, and then cycle through the other layout options.
For a quick written reference on this process, the "Create and switch between views" section in Notion's official help article is an excellent resource to bookmark.
Views, filters, sorts & groups – Notion Help Center
This article from the Notion Help Center provides a step-by-step guide to adding and managing views. It's a great text-based companion to the video you just watched.
Read the section titled 'Create and switch between views'. Pay attention to the screenshot showing where to click to add a new view.
✍️ Exercise: Build Your Core Views
Let's apply this to the Tasks database you've been developing.
-
1. Refine Your Default View
- Navigate to your
Tasksdatabase. It is likely in a Table view already. - Click on the view's name (it might be called "Table").
- Select
Renameand call itAll Tasks - Admin. This clearly communicates its purpose as a data-heavy, administrative view.
- Navigate to your
-
2. Create a Workflow Board
- Click the
+next to your existing view tab to add a new view. - Name this new view
Task Kanban. - In the menu that appears, select Board as the layout.
- Notion will likely group the board by the
Statusproperty automatically. If not, click the...at the top right, selectGroup, and choose theStatusproperty. - Drag a few task cards from one column to another to see the workflow in action.
- Click the
-
3. Create a Minimalist List
- Add another new view by clicking the
+icon. - Name this view
Simple List. - Select List as the layout.
- This will give you a clean, simple view of your tasks.
- Add another new view by clicking the
You should now have three tabs at the top of your database: All Tasks - Admin, Task Kanban, and Simple List, each showing the same tasks in a different format.
Conclusion
You've just learned one of the most fundamental skills for designing effective Notion workspaces. By mastering the core view types, you can now build interfaces that are tailored to specific needs, transforming a simple data list into a dynamic and interactive system.
Key Takeaways:
- A single Notion database can be visualized through multiple views.
- Table view is best for administration and seeing all your data at once.
- Board view is essential for visualizing workflows and tracking progress.
- List view provides a clean, minimal, and mobile-friendly display.
- You can easily add, rename, and switch between views using the tab bar at the top of any database.
Preview of the Next Lesson:
Now that you've mastered the foundational views, we'll move on to time-based visualization. In the next lesson, we will explore the Calendar and Timeline views. These are absolutely critical for building the project management and content scheduling systems that are central to your goals.