Welcome back! In our last lesson, we built the high-level foundation of our project management system by designing the 'Projects' database. You now have a clean, gallery-style view of your major initiatives.
Today, we're diving into the engine of our system. We will design the 'Tasks' database, which will hold all the individual, actionable steps needed to bring your projects to life. Mastering this is crucial, as a well-designed tasks database is the core of most productivity templates you might want to create and sell.
This lesson focuses specifically on adding and configuring the three most essential properties for any task manager: Status, Priority, and Due Date.
1. Creating the 'Tasks' Database
Just as we did with 'Projects', we'll create our 'Tasks' database directly on the Project & Task Manager page you set up previously. This co-location is a key principle of good template design, as it keeps related systems together for easy access. We'll use an inline table, which is the most common and flexible format for a master task list.
Notion Databases: The Ultimate Beginner's Guide
To start, let's quickly review how to create an inline database. This guide from Thomas Frank provides a clear, simple explanation.
Read the section titled 'How to Create a Notion Database'. Focus on the first few paragraphs explaining how to use the /database command and select 'Database – Inline'.
2. Designing the Core Task Properties
A task is more than just a name; it has metadata that tells you its state, importance, and deadline. Choosing the right property types for this metadata is what transforms a simple list into a dynamic system.
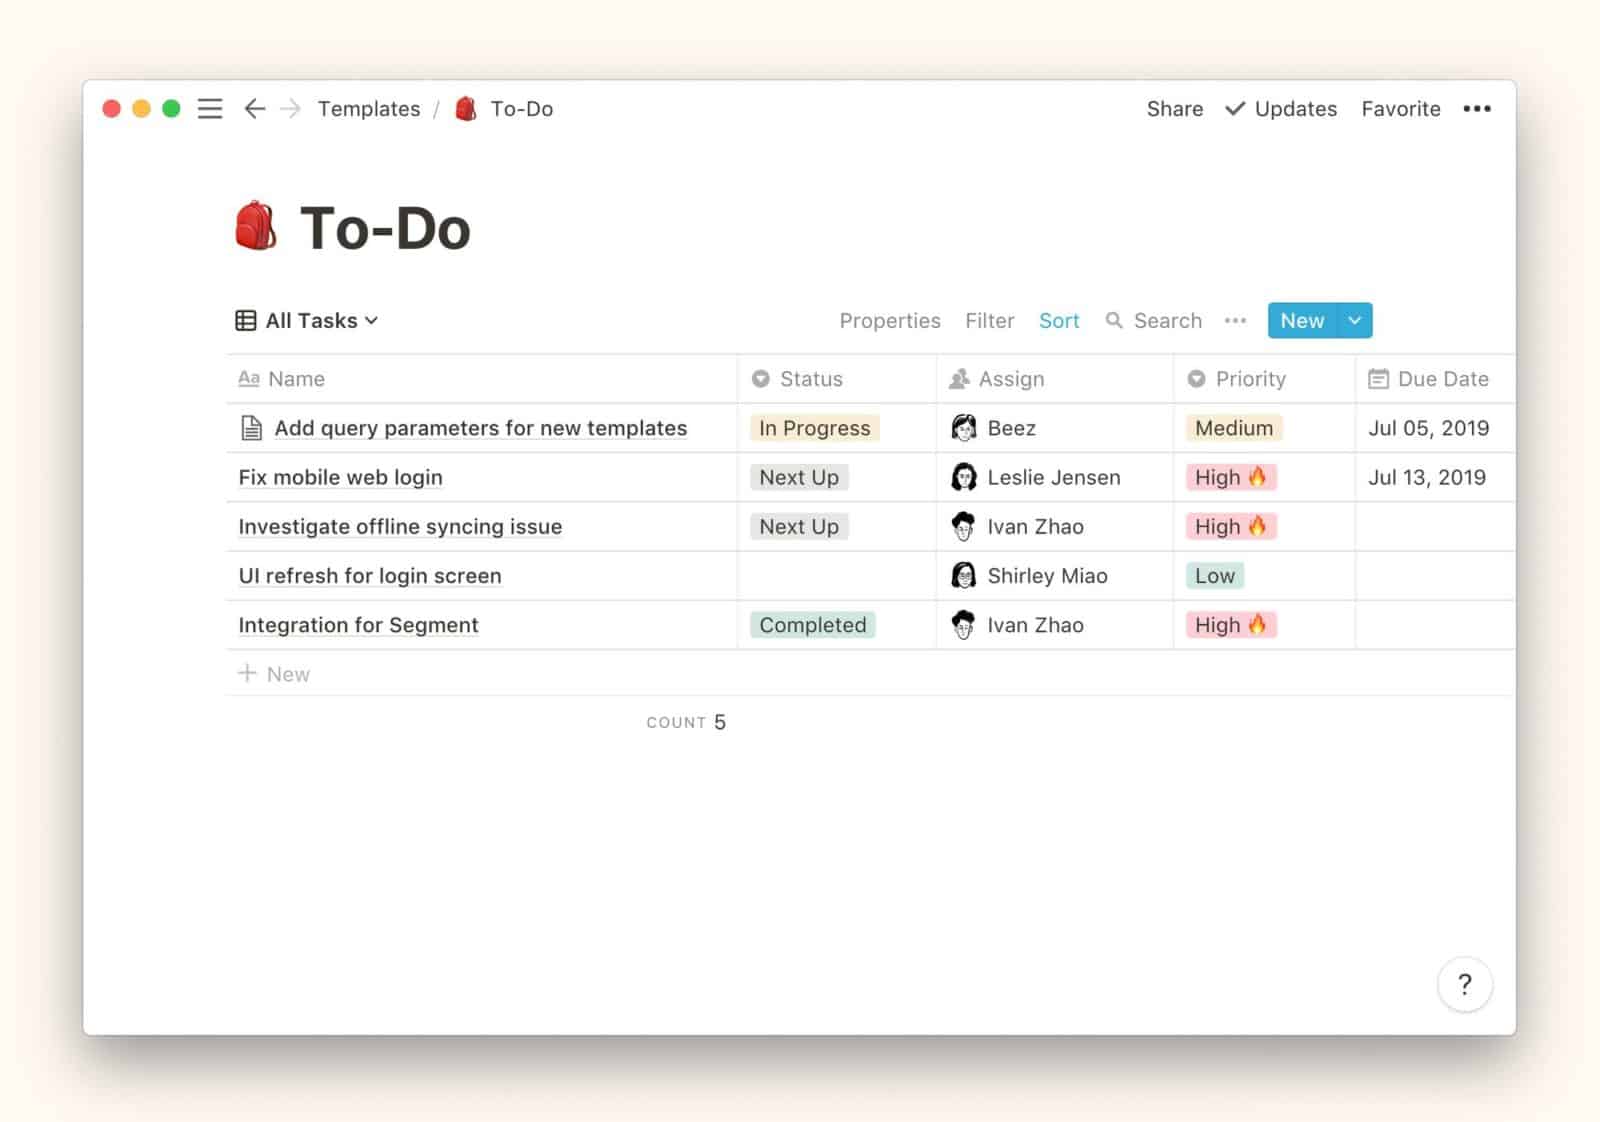
Let's watch a detailed walkthrough of how to build out these properties. The following video is packed with valuable techniques that are standard in professional Notion builds.
The Notion task manager you'll actually use (full build)
This video from Thomas Frank Explains demonstrates not just how to add the properties we need, but also how to use specific Notion features to make them more powerful. It's a masterclass in effective task database design.
Watch from 05:48 to 10:11. Pay close attention to these key steps: Turning it into a 'Tasks' database (05:48 - 07:20): This neat trick automatically adds the essential Status and Due Date properties for you. Customizing the Status Property (07:28 - 08:30): Learn how to change the names and colors of the status options to fit your workflow. Creating a 'Priority' Property (08:30 - 10:11): This is a fantastic pro-tip. The video shows how to use the Status property type—not the more obvious Select type—to create your priority tags. The key benefit is that it allows you to set a default value, ensuring every new task automatically gets a 'Medium' priority.
Let's break down the "why" behind those choices.
Status
You could use a Select property, but the dedicated Status property is superior for two reasons:
- Built-in Categories: It has predefined groups for
To-do,In progress, andComplete. This structure is essential for features like Kanban boards and progress tracking, which we'll explore later. - Default Option: You can set a default status (e.g., "To-do") for every new task created, which saves time and ensures consistency.
Priority
As shown in the video, using the Status property type for 'Priority' is a clever workaround. While a simple Select property with "High," "Medium," and "Low" options works, using the Status type allows you to set "Medium" as a default. This is a small detail that makes a template feel more professional and user-friendly, as it reduces manual data entry.

Test your understanding!
You've created a 'Priority' property using the Status type. A team member suggests it's confusing and that it should be a Select property instead. What's the main functional advantage you would lose by switching from a Status property to a Select property for your priority tags?
Show answer
The main functional advantage you would lose is the ability to set a default value. With a Status property, you can ensure every new task is automatically assigned a 'Medium' priority. A Select property does not have this capability, meaning the priority field would be empty for every new task until manually filled in.
✍️ Exercise: Build Your 'Tasks' Database
It's time to build the second pillar of our system. Follow these steps on your Project & Task Manager page.
Your Tasks:
-
1. Create the 'Tasks' Database:
- Below your 'Projects' gallery, type
/tableand selectTable view. - In the menu that appears, click the
+ New databasebutton. - Name your new database
Tasks.
- Below your 'Projects' gallery, type
-
2. Add and Configure Properties:
- Delete the default
Tagsproperty that Notion adds. - Status Property:
- Click the
+to add a new property. - Name it "Status" and select the
Statusproperty type. - Customize the options to your liking (e.g., rename "Not started" to "To Do," "In progress" to "Doing").
- Click the
- Due Date Property:
- Add a new property named "Due Date" and select the
Dateproperty type.
- Add a new property named "Due Date" and select the
- Priority Property (using the Status trick):
- Add a new property named "Priority" and select the
Statusproperty type. - Click on the property, select
Edit property. - Delete the "In progress" and "Complete" groups so you only have one group.
- Add three options within the remaining group:
High,Medium, andLow. - Assign colors you like (e.g., Red for High, Green for Medium, Blue for Low).
- Click the
...next toMediumand selectSet as default.
- Add a new property named "Priority" and select the
- Delete the default
-
3. Add Sample Tasks:
- Create 3-4 sample tasks to see your new properties in action. Examples:
Draft proposal for Template XDesign cover image for portfolioSchedule content for next week
- Fill in the
Status,Due Date, andPriorityfor each task. Notice how new tasks automatically get aMediumpriority.
- Create 3-4 sample tasks to see your new properties in action. Examples:
You now have a functional 'Tasks' database that is structured for efficiency and ready to be integrated with your projects.
Conclusion
Great job! You have now designed and built the operational core of our project management system. By creating a 'Tasks' database and thoughtfully configuring its properties, you've laid the groundwork for a powerful and organized workflow.
Key Takeaways:
- An inline table is the standard for a master 'Tasks' database.
- The
Statusproperty type is purpose-built for tracking progress and is superior to aSelectproperty for this use case. - Using the
Statusproperty type for 'Priority' is a pro-level technique that enables default values, improving user experience. - The three essential properties for any task are
Status,Priority, andDue Date.
Preview of the Next Lesson:
Our system currently has two powerful but separate databases: 'Projects' and 'Tasks'. The real magic of Notion begins when you connect them. In the next lesson, you will learn how to create relations between databases to link your tasks directly to their parent projects. This will allow you to see all tasks for a specific project, calculate project completion, and build truly integrated dashboards.