Hello! Welcome to the first lesson of our Capstone Project module.
In the previous modules, you've done the essential work of building three powerful, standalone systems: a Project & Task Manager, a Content Creation Hub, and a Personal Knowledge Management (PKM) system. You've learned how to structure databases, create relations, and even streamline data entry with templates. Now, it's time to bring everything together.
This lesson marks the beginning of your capstone project: building an integrated master dashboard. A dashboard is the central hub that gives you a high-level overview of everything important, pulling information from all your different systems into one place.
Today, our focus is on the most critical step in creating a professional-quality template: planning. Before we add a single block to the page, we will plan the dashboard's information architecture (what information to show and why) and its layout (how to arrange it for clarity and impact). This is the blueprint phase, and getting it right is the secret to designing systems that are not just functional, but truly intuitive and valuable—exactly what people look for in a template they're willing to pay for.
1. The Blueprint: Purpose, Architecture, and Layout
A great dashboard isn't just a collection of links and databases; it's a purposefully designed space that answers specific questions at a glance. Just as an architect wouldn't start building a house without a blueprint, we won't start building our dashboard without a clear plan.
This planning process can be broken down into three key questions:
- The WHY (Purpose): What is the main goal of this dashboard? What should it help me achieve every time I open it?
- The WHAT (Information Architecture): Based on its purpose, what specific pieces of information must be on this dashboard?
- The HOW (Layout): How should this information be visually arranged to be as clear and efficient as possible?
Let's start with the most important question: the "why."
2. Step 1: Define Your Dashboard's Purpose (The WHY)
Before you can decide what to put on your dashboard, you need to be crystal clear about what you want it to be. Is it a daily command center? A weekly review page? A project control room?
The following article provides excellent guidance on this first, crucial step. It emphasizes thinking "Use-Case First" to avoid building a cluttered, unfocused page.
How to build a Notion Dashboard like a Pro (plus 7 examples)
This article, 'How to build a Notion Dashboard like a Pro', explains the foundational principles of dashboard design. We'll start with its first key step.
Please read the section titled 'Step 1: Use-Case First'. Pay close attention to the example topics like 'Business', 'Side Hustle', and 'Self-Improvement' to get ideas for your own dashboard's primary function.
As the article suggests, your dashboard's purpose dictates everything that follows. For your goal of building an integrated personal and professional system, you might consider purposes like:
- The Daily Action Hub: Focused on what needs to be done today (tasks, content to post, meetings).
- The Weekly Command Center: Providing a broader view of the week's priorities, project progress, and content schedule.
- The Creator's Dashboard: Centered around your content creation workflow, from ideas to published pieces.
Decide on a primary purpose now. This will be your guiding star for the rest of the planning process.
3. Step 2: Plan the Information Architecture (The WHAT)
Information Architecture (IA) is about choosing what content to display and how to organize it logically. Now that you have a purpose, you can select the most relevant information from your existing systems.
A dashboard typically contains two types of content:
- Static Content: Items that don't change often. This includes navigation links to your main systems (Projects, Content Hub, PKM), quick links to frequently used websites, or daily checklists (e.g., a morning routine).
- Dynamic Content: Information that updates automatically. This is the heart of your dashboard. In Notion, this is achieved using Linked Views of your databases, filtered to show only the most relevant information.
The article you just read has a great section on this.
How to build a Notion Dashboard like a Pro (plus 7 examples)
Let's revisit the same article to see a breakdown of the different types of content you can place on your dashboard.
Read the section 'What to Put on a Notion Dashboard'. Focus on the distinction between 'Static Content' and 'Dynamic Content'.
Brainstorming Your Dynamic Content
Based on your dashboard's purpose, what information is critical to see at a glance? Here are some ideas for filtered views you might want to include:
- From your Task Manager:
- A list of tasks where
Due DateisToday. - A list of tasks where
PriorityisHigh.
- A list of tasks where
- From your Content Hub:
- A calendar view of content where
Publish DateisThis Week. - A board view of content where
StatusisIn Progress.
- A calendar view of content where
- From your PKM System:
- A list of notes where
Date Createdis in thePast WeekandStatusisNeeds Processing.
- A list of notes where
This planning stage is what the author of the article calls "$10K Work"—the strategic thinking that provides the most value.
4. Step 3: Structure Your Workspace for Scalability
A common mistake is trying to cram too much information onto a single dashboard. This leads to a cluttered, overwhelming experience. A professional approach, as you'll see, is to separate your "overview" from your "operations."
- Overview Page (Your Dashboard): This shows only the most critical, high-level information. It's for quick glances and summaries.
- Operational Pages (Your Core Systems): These are the dedicated pages for your Project Manager, Content Hub, and PKM, where the detailed work happens.
Your dashboard will provide the summary, and if you need more detail, you'll click a link to go to the relevant operational page.
This expert advice emphasizes creating a clean user flow, which is essential for sellable templates.
How to Design Intuitive and Scalable Notion Systems: Eva's Blueprint
This article from a Notion expert explains the importance of separating high-level dashboards from detailed workspaces.
Read the section that begins 'To avoid creating complex workspaces...' and ends '...applies this method to all of her clients’ workspaces.' Pay attention to the distinction between an 'Overview page' and 'Operational pages'.
A great way to implement this is to create a dedicated, private page or toggle called "Databases" where you store your original, source databases. Your dashboard will then only contain linked views of this data. This keeps your backend (the data) neatly separated from your frontend (the dashboard), making your system clean and easy to manage.
Watch how this is done in practice. The creator here builds a main dashboard page and creates the source databases as sub-pages within a "Databases" section, keeping them organized and out of the way.
Build a Small Business CRM in Notion - Full Tutorial
This video on building a CRM demonstrates a clean architectural setup. We'll focus on the initial page structuring.
Watch from 02:20 to 05:00. Notice how the creator makes a main 'Client CRM' dashboard page, then creates headings for layout, and finally creates the actual databases as separate sub-pages under a 'Databases' heading. This is the structure we're aiming for.
5. Step 4: Plan the Visual Layout (The HOW)
You've decided why you need a dashboard and what will be on it. Now, you can plan how to arrange it. The layout should guide the user's eye to the most important information first.
Take a look at these two examples for inspiration.
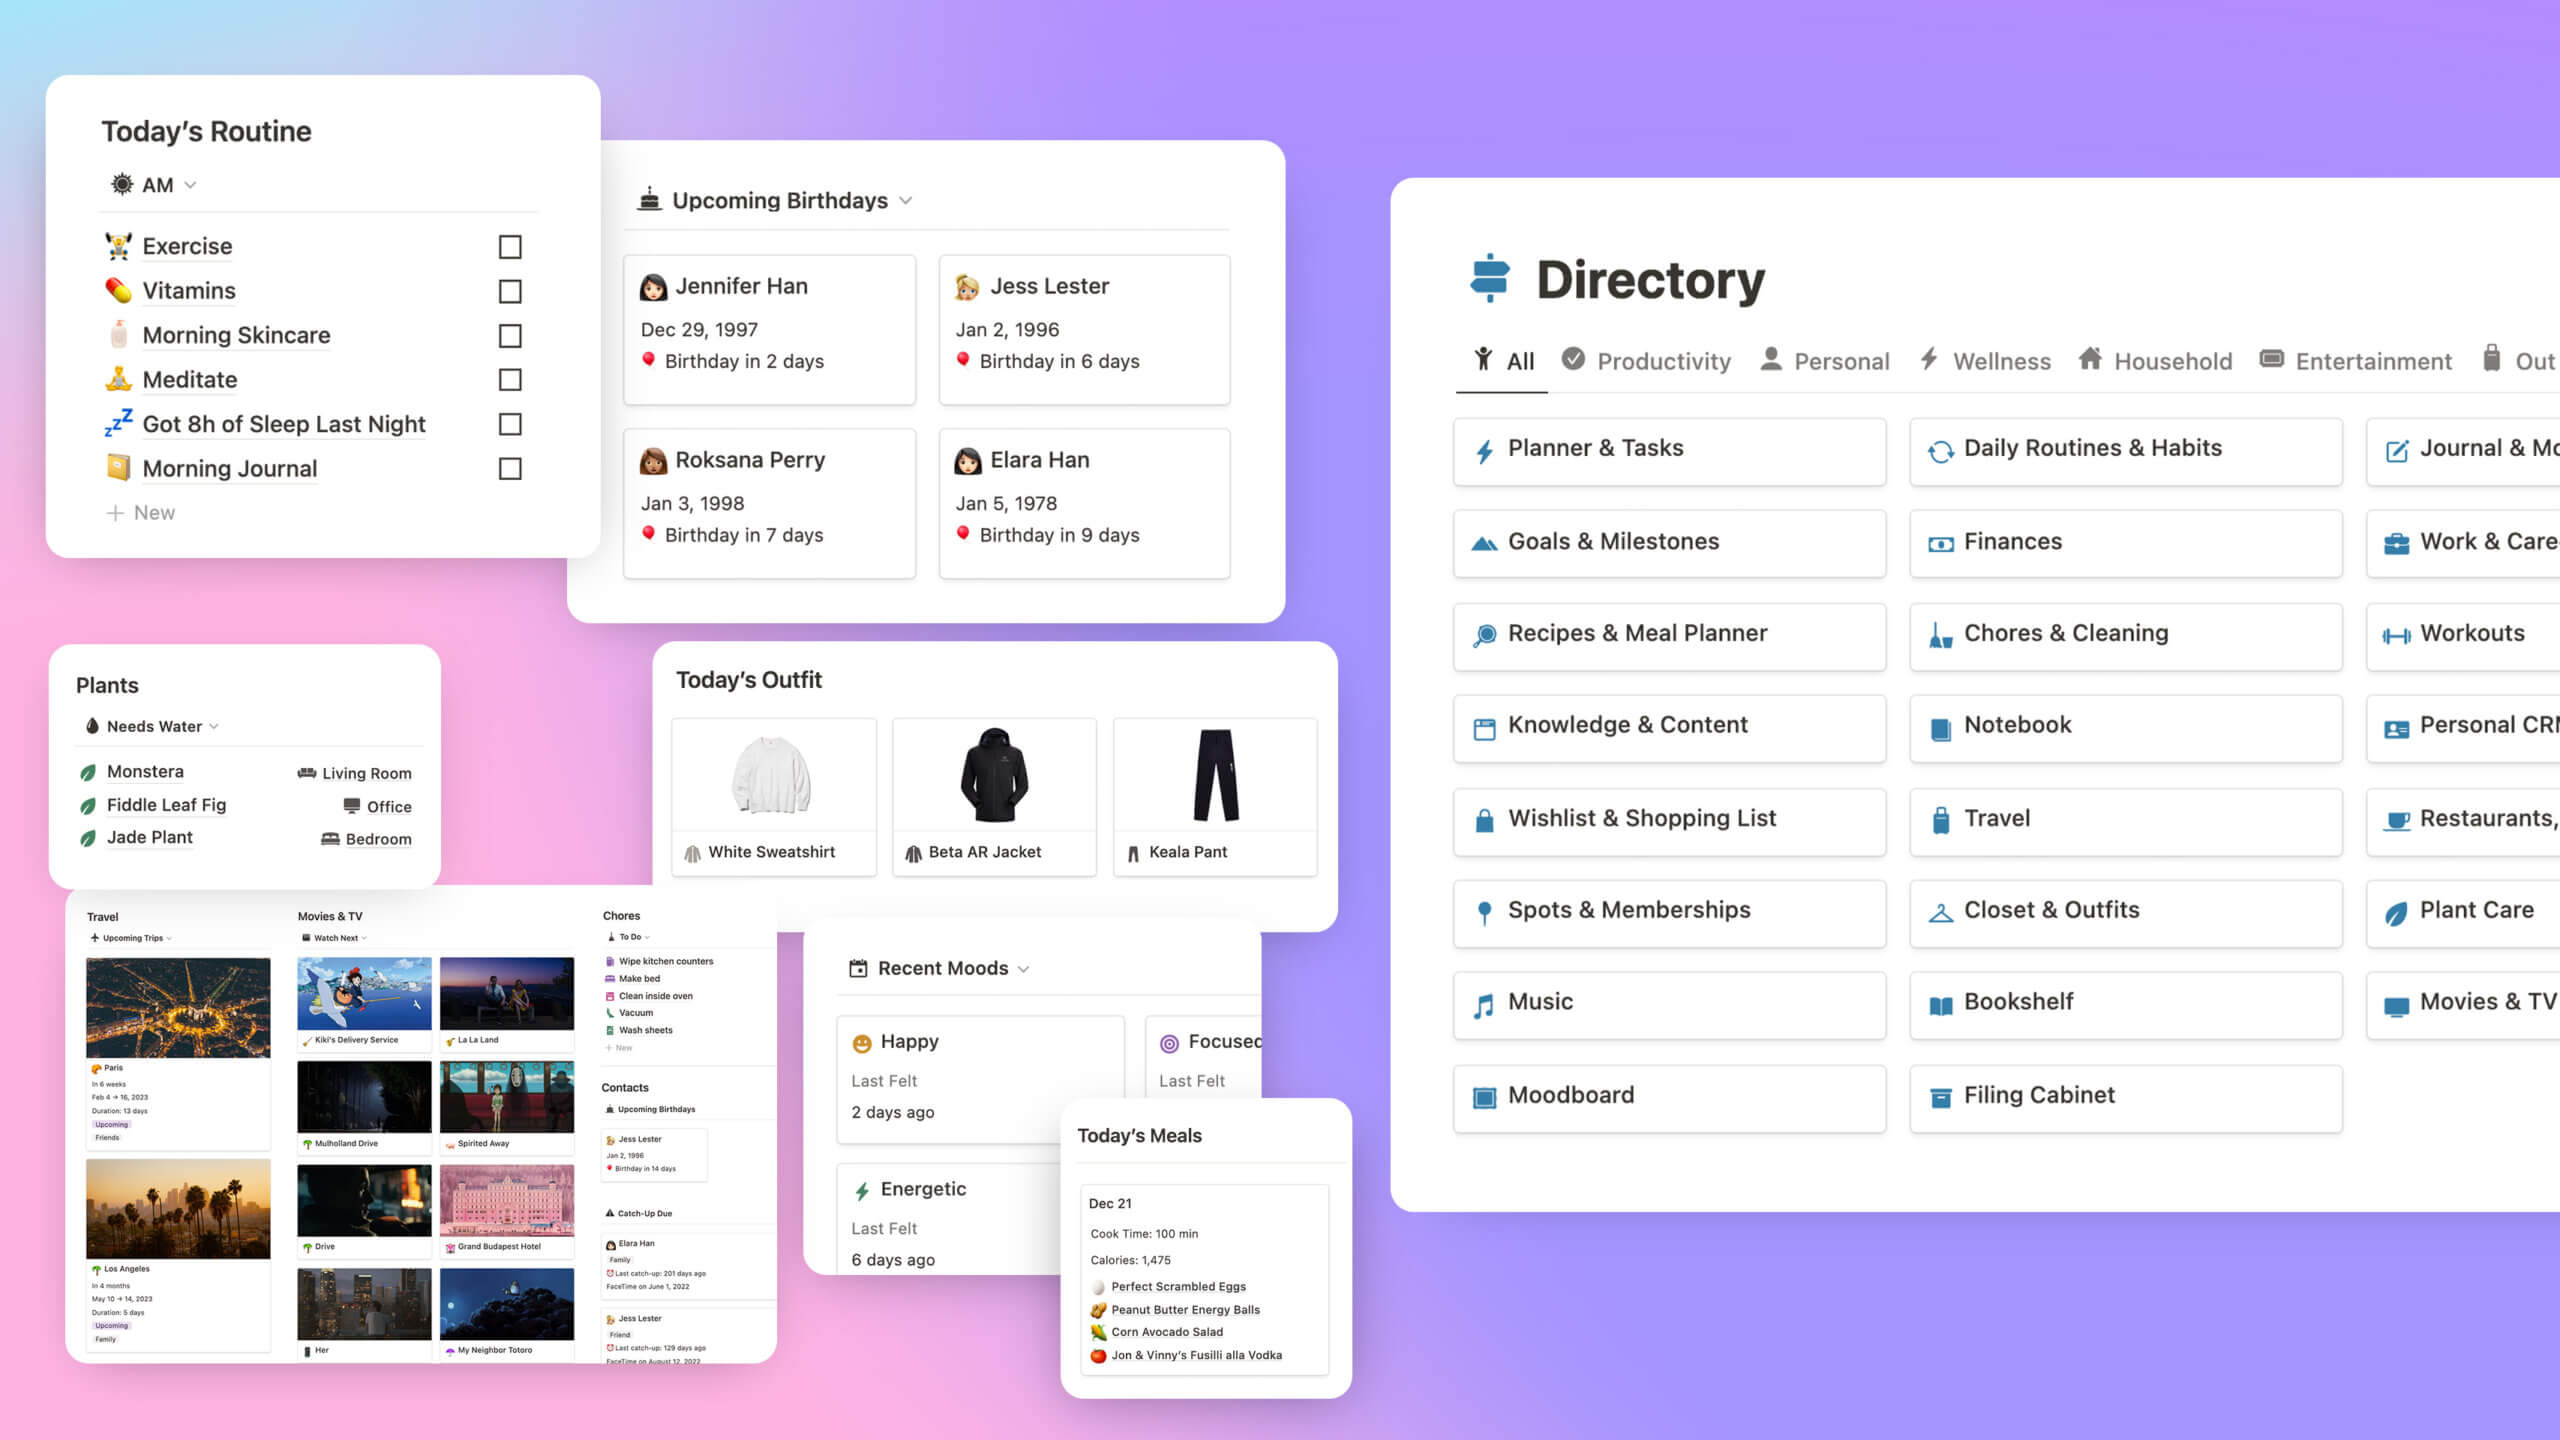

To create these layouts, you'll use basic building blocks to create structure and visual hierarchy:
- Columns: To place information side-by-side (
/columns). - Headings (H1, H2, H3): To give sections clear titles and create visual separation (
/h1, etc.). - Dividers: To draw a line between distinct sections (
/divider). - Callouts: To add instructions, tips, or important notes for the user (
/callout).
✍️ Exercise: Create Your Dashboard Blueprint
It's time to create the blueprint for your master dashboard. Open a new Notion page (or use a piece of paper) and complete the following planning checklist. Do not build the dashboard yet—just plan it.
-
1. Define the Purpose: Write a single sentence that defines your dashboard's primary goal. (e.g., "My dashboard will give me a clear overview of my tasks and content schedule for today.") Give it a name, like "Daily Command Center."
-
2. List Your Content (IA):
- Static Content: List at least 3 static items you want to include (e.g., Link to Project Manager, Link to Content Hub, a "Quick Capture" note area).
- Dynamic Content: List at least 3 key filtered views you will create. For each, specify the source database and the filter. (e.g., "View of 'Tasks' database filtered where 'Due Date' is 'Today'").
-
3. Sketch the Layout: Draw a rough sketch of your dashboard's layout. Will it have one, two, or three columns? What information will go in each column? Where will you place your headings? You can describe it in words, like:
- Two columns. Left column: 'Today's Tasks' at the top, 'Content Calendar' below. Right column: 'Project Progress' view and 'Recent Notes'.
-
4. Plan Your Architecture: Decide on your workspace structure. Will you create a separate "Databases" page to hold your source databases? (Hint: This is highly recommended).
Completing this blueprint is the most important work you'll do in this module.
Conclusion
Great job on laying the groundwork for your capstone project! You've moved beyond just using Notion features and have started thinking like a true system architect. By planning your dashboard's purpose, information architecture, and layout before building, you ensure the final product is focused, intuitive, and genuinely useful.
Key Takeaways:
- Plan Before You Build: The best dashboards start with a clear blueprint.
- Purpose-Driven Design: Your dashboard's "why" determines the "what" and "how."
- Information Architecture is Key: Choose dynamic and static content that directly serves the dashboard's purpose.
- Separate Overview from Operations: Use a main dashboard for high-level summaries and link to detailed pages for focused work. A clean backend with a dedicated "Databases" page is a professional standard.
Preview of the Next Lesson:
With our blueprint in hand, we're ready to start building. In the next lesson, you will create the dashboard page and use columns, headings, and dividers to construct the layout you just designed.