Hello! Welcome back to the capstone project module.
In the last lesson, you did the critical strategic work of creating a blueprint for your master dashboard. You defined its purpose, planned its information architecture, and sketched a visual layout. That plan is the key to building a professional, high-value Notion template.
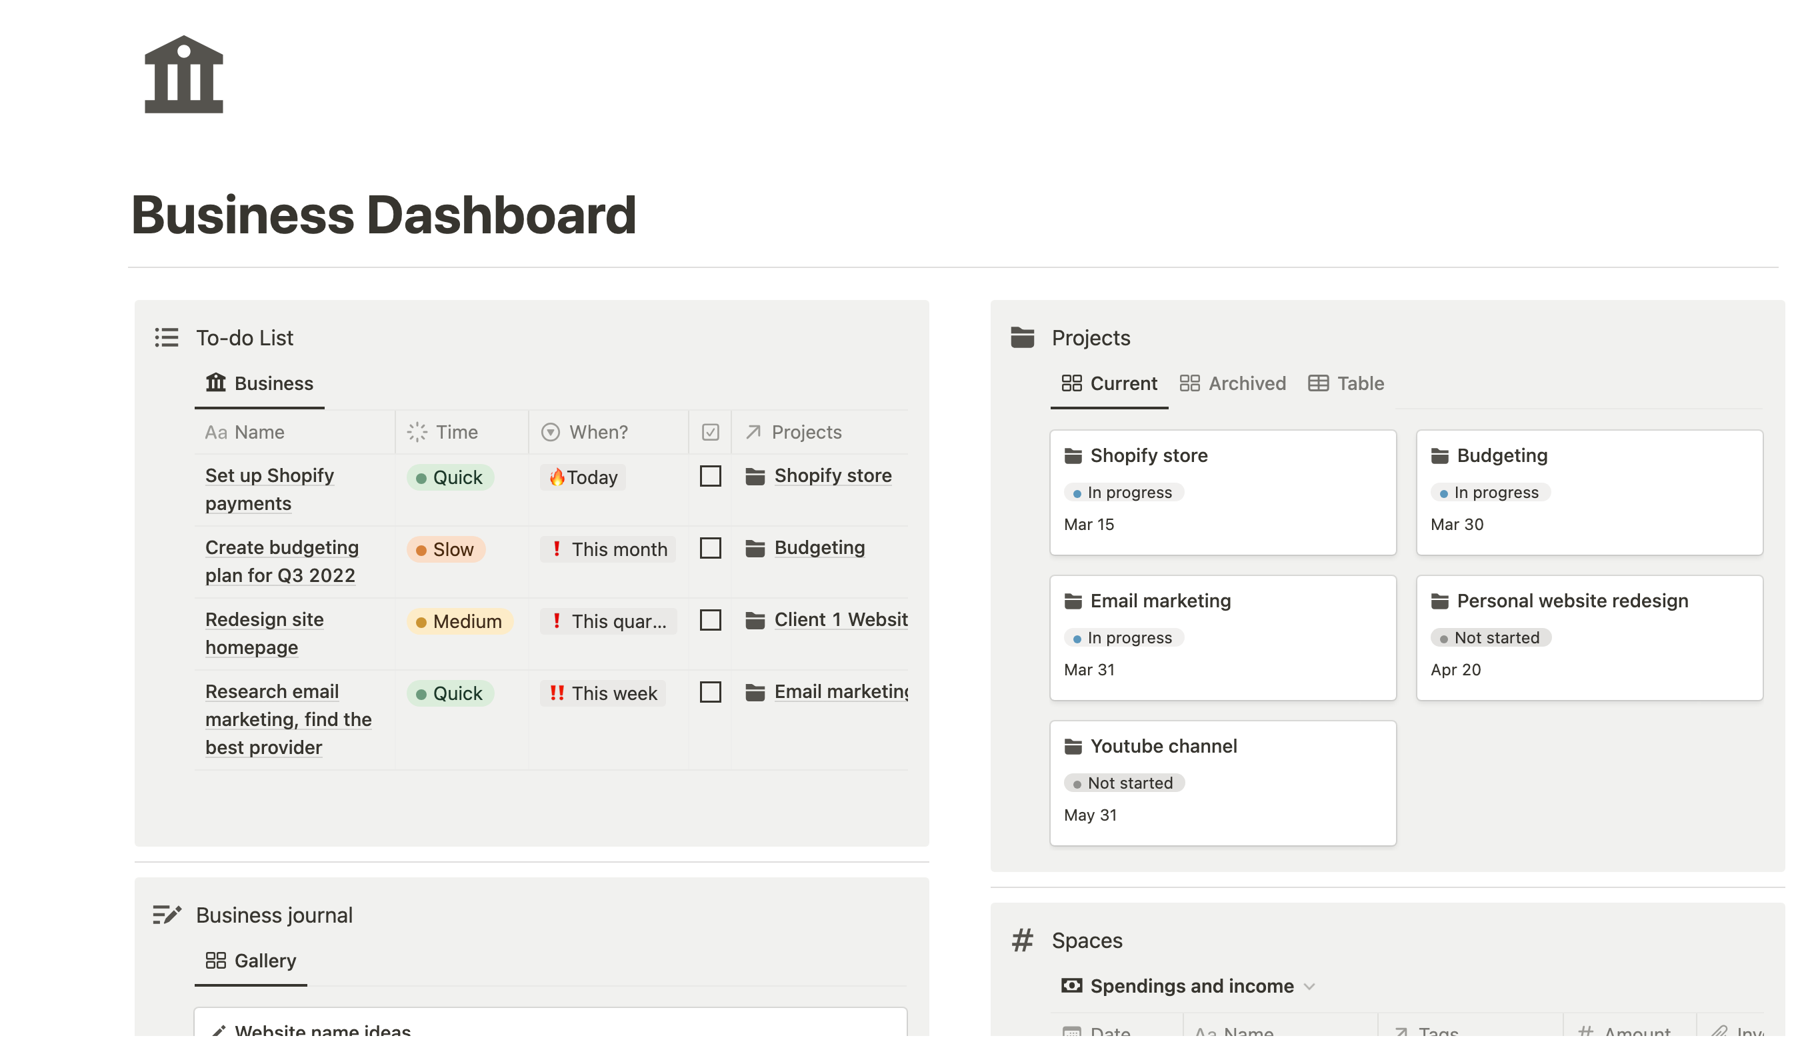
Today, we transition from architect to builder. The goal is to take your blueprint and construct the fundamental structure of your dashboard page. You will learn how to create a clean, organized layout using headings for hierarchy and columns for arranging information. This is the skeleton upon which we will hang all the dynamic information in the next lesson.
1. Setting the Stage: Your Dashboard Page
First, we need a canvas. We'll create a new page and configure it for a dashboard layout. For dashboards, it's almost always best to use the full width of the screen to maximize space.
Action Steps:
- Create a new page. Give it the name you decided on in your blueprint (e.g., "Command Center," "My Dashboard").
- Add an icon and cover if you wish. This is a key part of giving a template a polished, professional feel.
- Click the
•••icon in the top-right corner of the page and toggle onFull width. Your page content will now expand to fill the screen.
2. Creating Hierarchy with Headings
Headings are the signposts of your dashboard. They break the page into logical sections, making it easy for a user to understand what they're looking at. Your design and project management background has surely taught you the value of clear visual hierarchy, and in Notion, headings are the primary tool for this.
Based on your blueprint from the last lesson, start adding the main headings for your dashboard sections.
How to add headings:
- Slash Command: Type
/h1,/h2, or/h3and pressEnter. - Markdown: Type
#for H1,##for H2, or###for H3, followed by a space.
For most dashboards, Heading 2 (/h2) is a good choice for main sections, with Heading 3 (/h3) for sub-sections.
💡 Tip for Template Design: You can add background colors to your headings to make them stand out. After creating a heading, click the
⋮⋮block handle, go toColor, and choose a background color. A consistent and limited color palette makes a template look more professional.
3. Building Your Layout with Columns
Now it's time to create the core layout you sketched in your blueprint. In Notion, you create columns by dragging one block to the side of another. This is a fundamental skill for designing anything beyond a simple document.
The following video from Thomas Frank provides a perfect demonstration. It shows exactly how to take a list of headings and arrange them into a multi-column dashboard structure.
Notion Masterclass: Build a Personal Dashboard from Scratch
In this clip from his 'Notion Masterclass', Thomas Frank demonstrates how to establish the core layout of a personal dashboard.
Watch from 03:01 to 06:04. Pay close attention to how he: Adds H2 headings for his main sections. Drags one heading to the right of another to create the first two columns. Moves other content blocks into these columns. Adds a divider using --- for visual separation.
As you saw in the video, the process is intuitive:
- Click and hold the
⋮⋮block handle to the left of a block you want to move. - Drag it to the far left or far right of another block. A vertical blue line will appear, showing you where the new column will be created.
- Release the block to place it.
- You can then drag other blocks underneath the content in each column.
For a quick written reference on how columns, headings, and dividers work, you can consult Notion's official help documentation.
Format your page – Notion Help Center
This official Notion guide, 'Format your page', provides a concise summary of the layout tools we're using today.
Quickly review the sections on 'Columns', 'Headings', and 'Dividers'. It's a handy reference for the drag-and-drop mechanic and the different ways to add these blocks.
Test your understanding!
You have two heading blocks, "Tasks" and "Projects," one above the other. You want to place them side-by-side, with "Tasks" on the left and "Projects" on the right. What are the specific steps to do this?
Show answer
- Click and hold the
⋮⋮block handle next to the "Projects" heading. - Drag it to the right of the "Tasks" heading until you see a vertical blue line appear.
- Release the mouse button. The "Projects" block will snap into place, creating a two-column layout.
4. Professional Polish: Resizing and Mobile View
Creating columns is just the first step. To create a well-designed template, you need to refine the layout and consider the user experience on all devices.
Resizing Columns:
You can resize your columns by hovering your mouse over the gray vertical line that appears between them and dragging it left or right. Adjust your columns to give more space to more important sections.
Designing for Mobile:
This is a critical consideration for creating sellable templates. Multi-column layouts in Notion collapse into a single column on mobile devices. The blocks are stacked from left-to-right, then top-to-bottom. A poorly planned layout can become a frustratingly long scroll on a phone.
This article provides essential advice for making your layouts mobile-friendly.
How to Create Multi-Column Layouts in Notion - Thomas Frank
This article, 'How to Create Multi-Column Layouts in Notion', contains a crucial section on mobile design considerations.
Read the section titled 'Mobile Layout Considerations'. The tips here—using toggles and a Table of Contents block for navigation—are hallmarks of a professional, user-friendly template.
✍️ Exercise: Build Your Dashboard's Structure
It's time to build! Open the dashboard page you created and use the blueprint from the previous lesson to construct the layout.
- Create a new Notion page and set it to
Full width. - Add all the
H2orH3headings for the sections you planned (e.g., "Daily Tasks," "Content Pipeline," "Active Projects," "Quick Links"). - Drag and drop the headings to create the multi-column layout you sketched.
- If you planned to have static content (like links to your main databases), add those under the appropriate headings for now. You can use placeholder text like "Linked Task Database will go here."
- Add
Dividers(---) between sections to create clear visual separation. - Adjust the column widths to create a balanced and visually appealing layout.
Conclusion
Excellent work! You have now built the structural foundation of your master dashboard. By translating your blueprint into a tangible layout with columns and headings, you've taken a major step in creating your capstone project. You've learned not just the mechanics, but also the design considerations—like visual hierarchy and mobile responsiveness—that separate an amateur page from a professional template.
Key Takeaways:
- Dashboards should almost always be set to
Full widthto maximize space. - Headings (
/h1,/h2,/h3) create the essential visual structure and hierarchy. - Columns are created by dragging blocks to the left or right of other blocks.
- Professional template design requires thinking about mobile responsiveness, as columns will stack vertically on smaller screens.
Preview of the Next Lesson:
Our dashboard currently has a great structure, but it's static. In the next lesson, we will bring it to life. You will learn how to embed linked views of your Tasks, Projects, and Content Hub databases, and then filter them to display the dynamic, high-relevance information that makes a dashboard truly powerful.