Hello! Welcome back to the capstone project.
In the previous lesson, you built the essential architectural skeleton of your master dashboard. You created a new page, set it to full-width, and used headings and columns to establish a clean, organized layout based on your blueprint. Your dashboard has a professional structure, but its content is still static.
Today, we're going to bring that dashboard to life. This lesson focuses on populating your layout with dynamic, real-time information. You will learn how to embed linked views of your Tasks and Projects databases and, most importantly, how to apply filters to show only the most relevant information, such as tasks due today or currently active projects. This is the core technique for creating a dashboard that provides immediate value.
1. The Power of Linked Databases
Your Tasks and Projects databases are your single sources of truth. But you don't want to navigate to the full databases every time you need information. Instead, you want to see specific, context-aware snapshots of that data on your dashboard. This is achieved using Linked Databases (also called "Linked Views").
A linked database is not a copy; it's a portal to an original "source" database. You can place these portals anywhere in your workspace and customize each one with its own unique layout, filters, and sorts without affecting the original database or other linked views.
For a thorough explanation of this concept, which is fundamental to creating powerful Notion systems, please read the following guide.
Notion Databases: The Ultimate Beginner's Guide
This section from Thomas Frank's 'Notion Databases: The Ultimate Beginner's Guide' provides an excellent explanation of what Linked Databases are and how they allow you to create context-specific dashboards.
Please read the section titled 'Linked Databases'. Focus on understanding the relationship between a 'source database' and a 'linked view'. The example of creating a filtered task list within a project page is directly applicable to what we're doing today.
2. Embedding Your First Linked View
Now, let's add a linked view to your dashboard. The process begins with a simple slash command.
Action Steps:
- Navigate to your dashboard page from the last lesson.
- Click inside one of the empty columns you created (e.g., under your "Daily Tasks" heading).
- Type
/linked viewand selectLinked view of database.
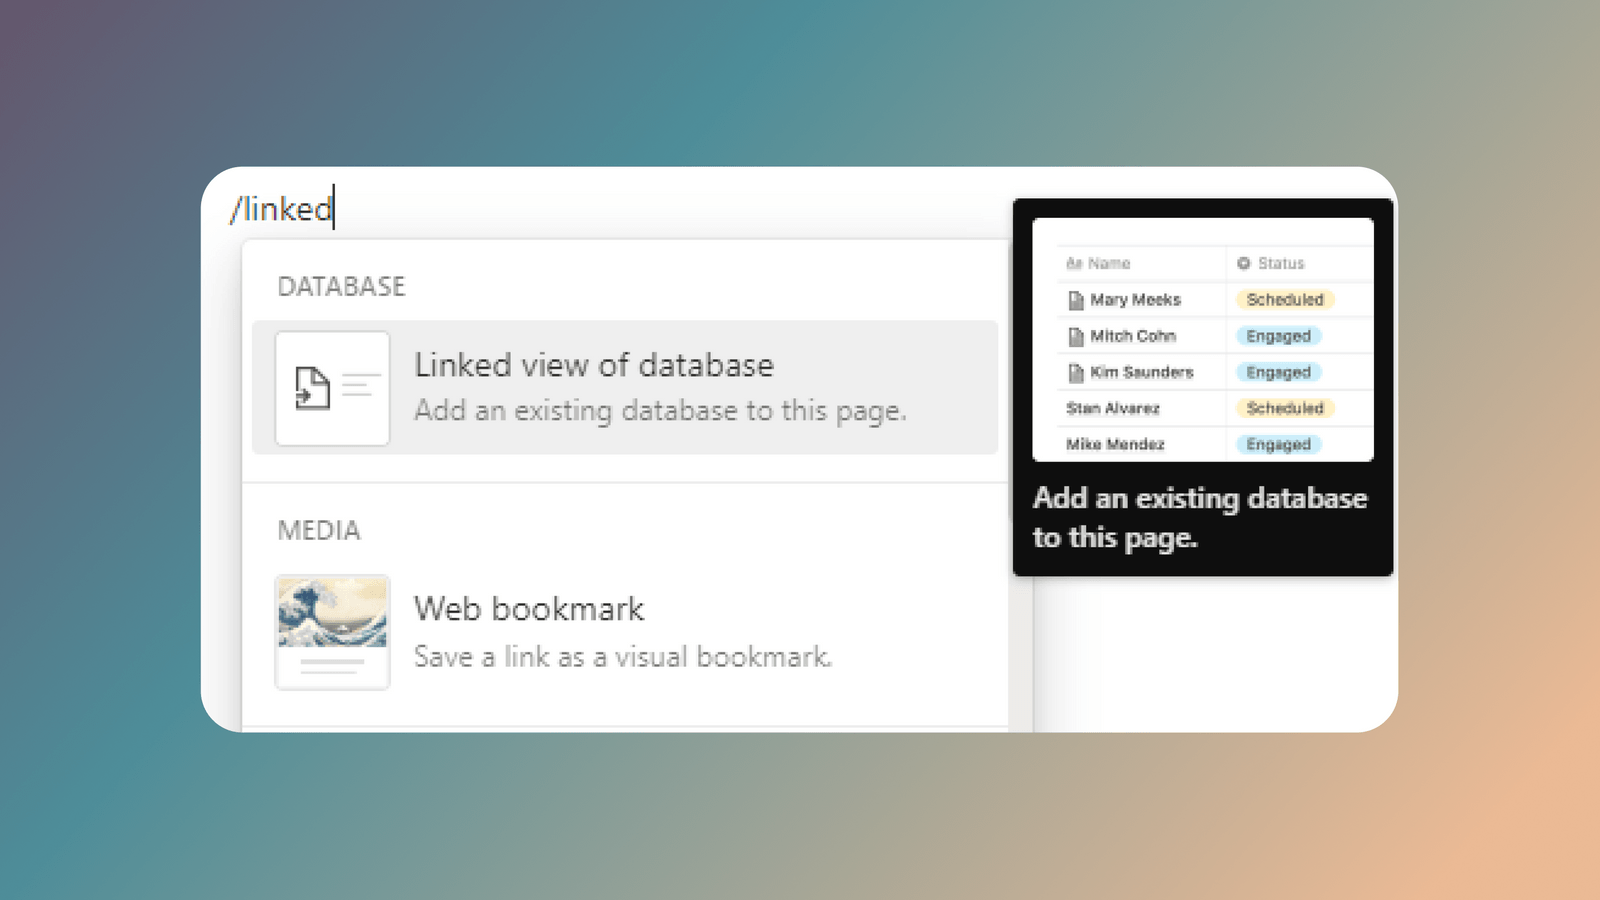
- In the menu that appears, search for and select your
Tasksdatabase. - Notion will ask if you want to copy an existing view or create a new one. Choose
New empty viewfor now. Give it a name like "Today's Tasks" and select theListlayout. - You will now see a live view of your
Tasksdatabase on your dashboard! To keep the design clean, you can hide the original database title by clicking the•••menu on the view and toggling offShow database title.
3. Filtering for Relevance
Your dashboard now shows all your tasks, which isn't very helpful. The goal of a dashboard is to surface what's important right now. We accomplish this with filters.
Filters let you set rules to show only the database entries that meet specific criteria. For our dashboard, we want to see tasks that are due today and aren't finished yet.
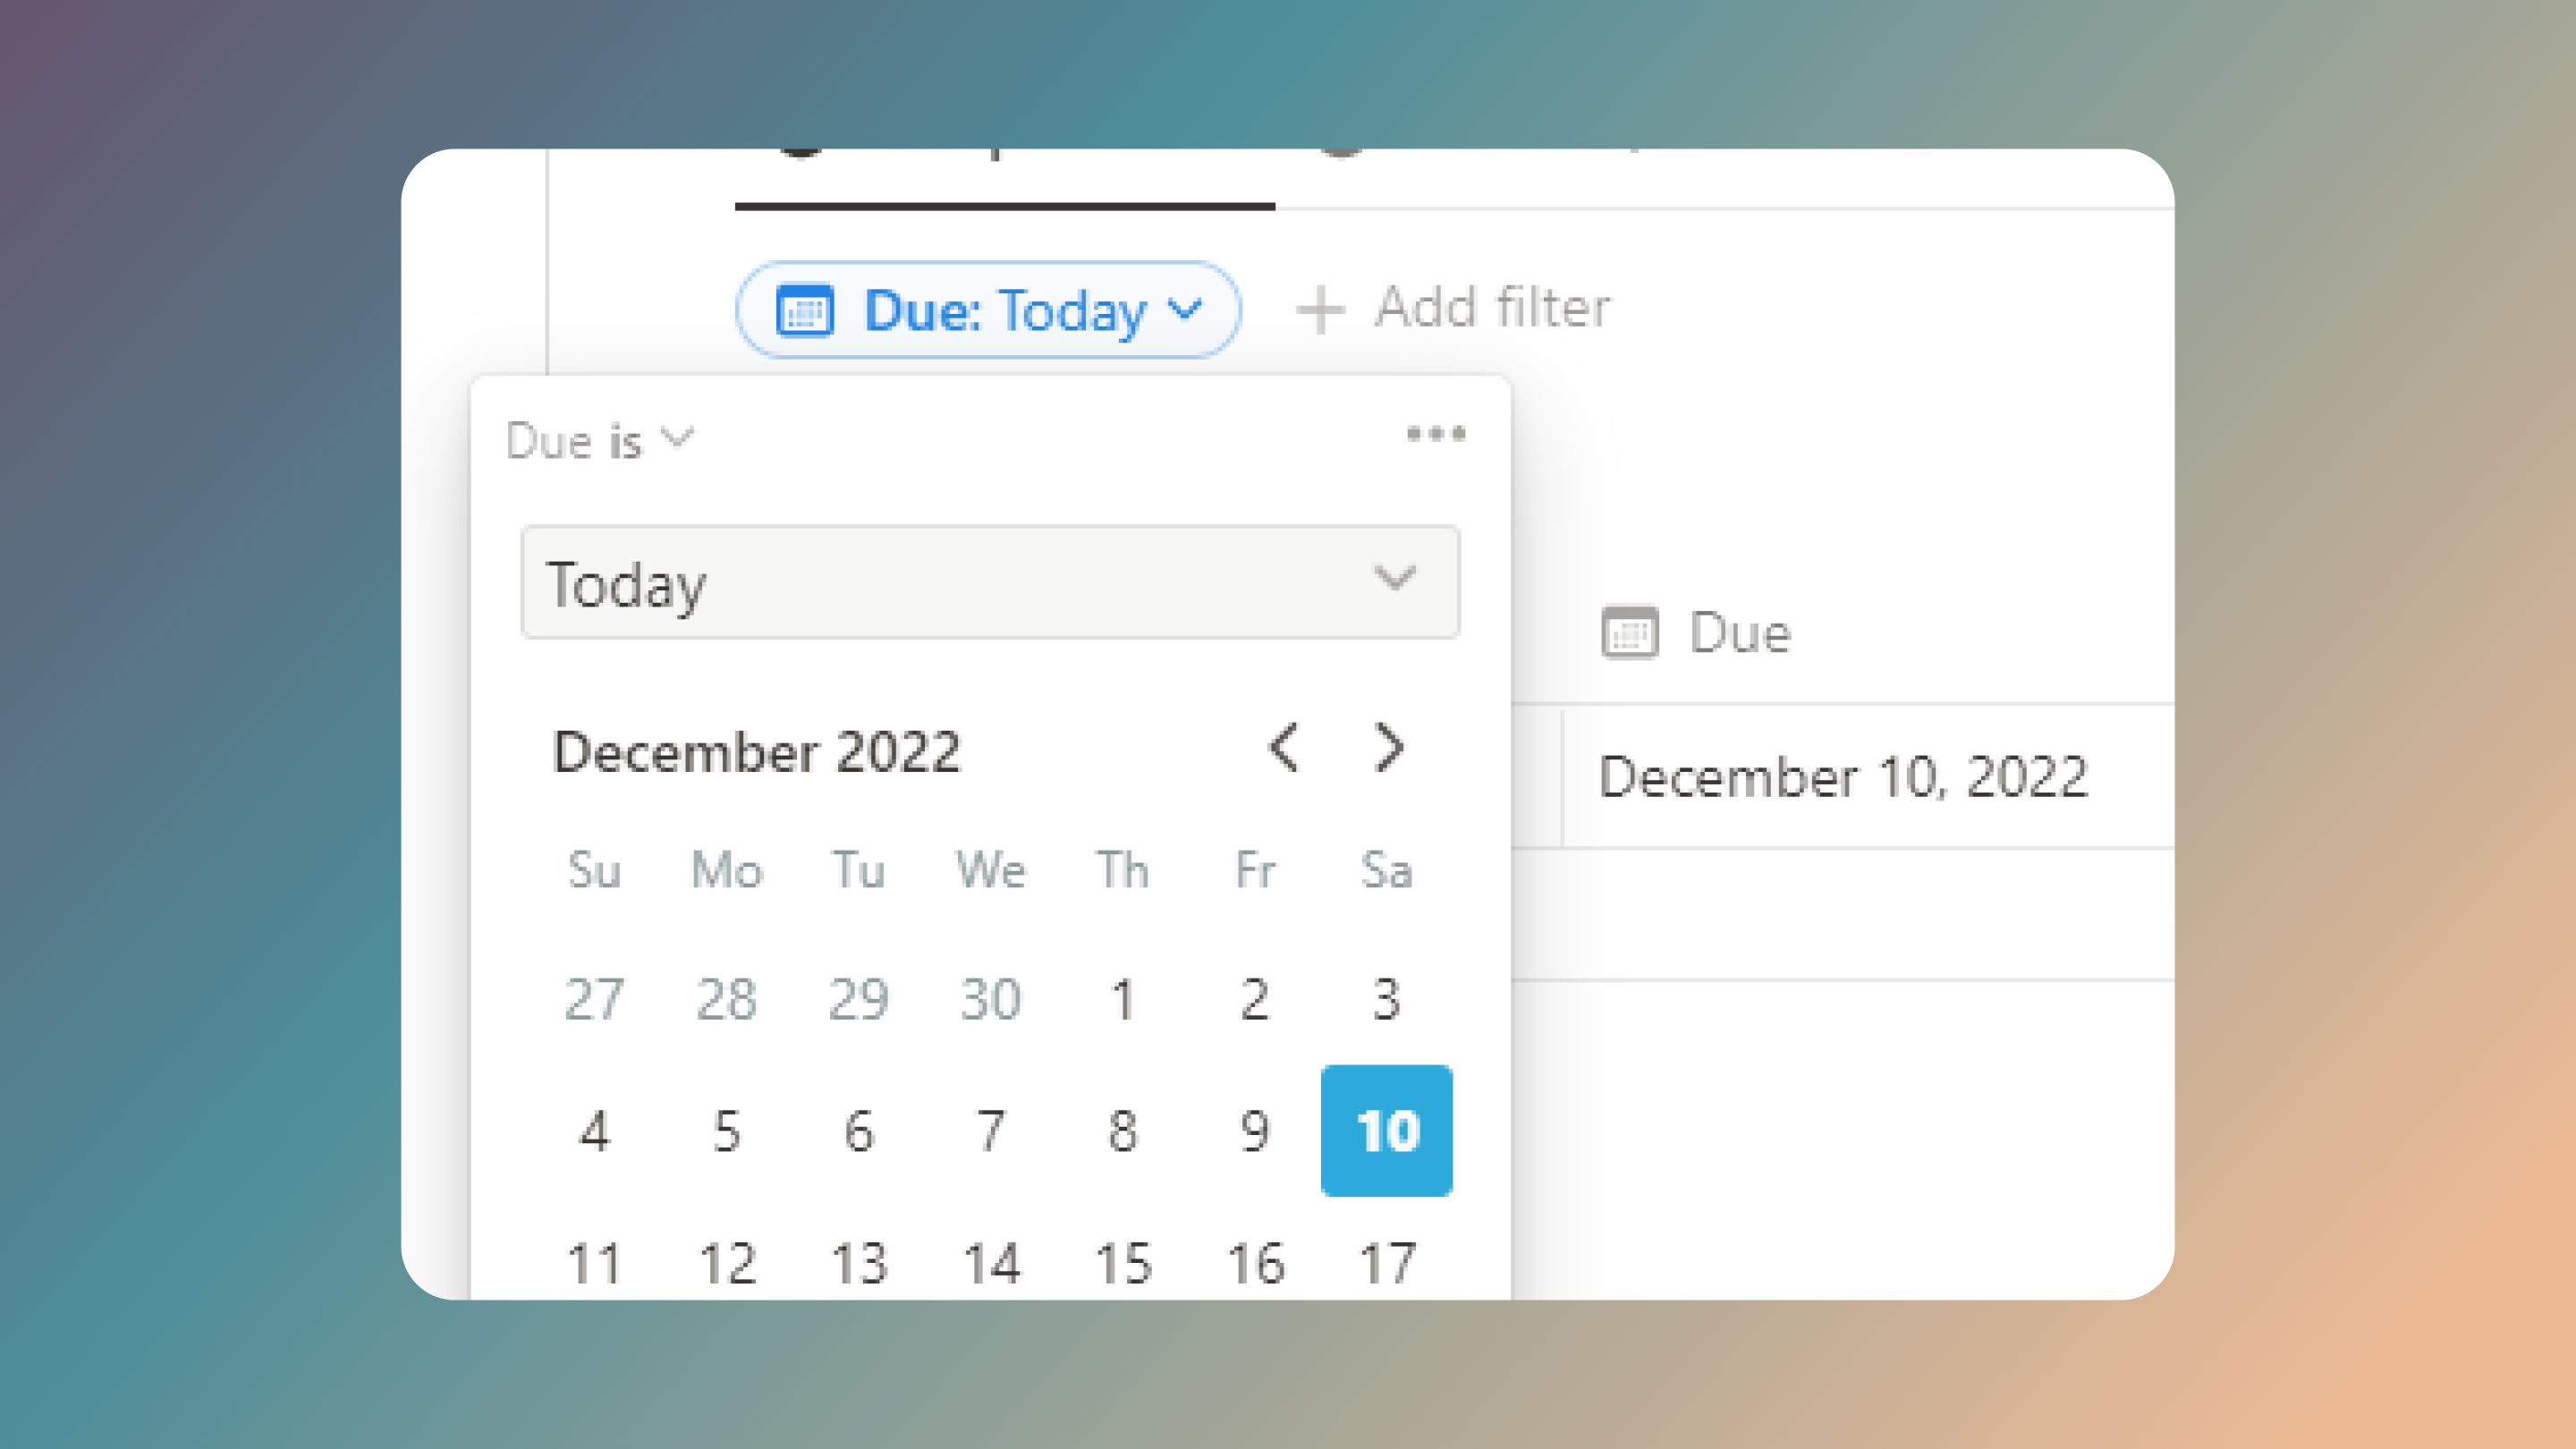
Let's set up the filters for your "Today's Tasks" view:
- Click the
Filterbutton at the top-right of your new linked view. - Add the first rule:
Due|is|Today. - Click
+ Add filterand add a second rule:Status|is not|Done.
That's it! The view will now dynamically update to show only the tasks that match both of those conditions.
The following resource provides a detailed guide on the different types of filters you can create. Understanding this is vital for your journey as a template creator.
Notion Databases: The Ultimate Beginner's Guide
To build on this, review the 'Filters' section of the same guide. It covers simple and advanced filters, which you'll use constantly when designing templates.
Read the section titled 'Filters', paying attention to the difference between 'Simple Filters' and 'Advanced Filters' (using AND/OR logic). This will give you the flexibility to create highly specific views.
Test your understanding!
You want to create a linked view of your Projects database that shows only high-priority, ongoing projects. Your Projects database has a Status property (with options "Not Started," "In Progress," "Done") and a Priority property (with options "Low," "Medium," "High"). How would you configure the filters?
Show answer
You would apply two filter rules with an AND condition:
Status|is|In ProgressPriority|is|High
4. Building the Full Dashboard View
Now that you understand the mechanics, let's watch a video that puts it all together in a dashboard context similar to the one you're building. This will help you visualize the final result and see the workflow in action.
How To Manage Your Projects in Notion (2025 Tutorial)
This video from Matthias Frank demonstrates how to build a project management dashboard by embedding and filtering linked views within a multi-column layout.
Watch from 32:17 to 36:58. Notice how he: Creates linked views for both Projects and Tasks. Arranges them in separate columns. Applies filters to the Tasks view to create a focused list of 'Today's Tasks' and 'Open Tasks'. Uses sorts to order the tasks by due date.
✍️ Exercise: Bring Your Dashboard to Life
It's time to populate the dashboard structure you built in the last lesson. Follow these steps to create your dynamic views.
- In the column designated for your tasks, embed a linked view of your
Tasksdatabase. - Rename the view to "Today's Tasks".
- Filter this view to show tasks where
Statusis notDoneANDDueis on or beforeToday. - Add a sort to order the tasks by
DuedateAscending. - In the column for your projects, embed a linked view of your
Projectsdatabase. - Rename the view to "Active Projects".
- Filter this view to show projects where
StatusisIn Progress. - (Optional) Add other linked views you planned in your blueprint, such as a view of projects that are "Not Started" or a view of tasks due "This Week."
Conclusion
Congratulations! Your dashboard is no longer just a static page; it's a dynamic, functional hub that surfaces the information you need, when you need it. You've mastered one of the most powerful features in Notion: combining linked databases with filters to create context-specific views. This skill is the absolute cornerstone of building valuable, sellable templates.
Key Takeaways:
- Linked Databases are views of a source database that can be placed and customized anywhere.
- The
/linked viewcommand is how you embed a database view on a page. - Filters are rules that hide entries you don't need to see, allowing you to create relevant views like "Due Today" or "Active Projects."
- Combining linked views and filters in a multi-column layout is the key to a powerful dashboard.
Preview of the Next Lesson:
Your dashboard now successfully integrates your task and project management systems. In the next lesson, we will complete the integration by embedding linked views from your Content Hub and PKM systems, creating a truly unified overview of all your important information.