Welcome back! In the last lesson, you built a powerful Kanban board to visualize and manage your content creation workflow. You now have a system for tracking content from idea to publication.
This lesson adds the final, and perhaps most visually satisfying, piece to your Content Creation Hub. We will use Notion's Gallery view to create a beautiful, dynamic portfolio of your published work. For a content creator and designer, this is a crucial feature. It not only provides a sense of accomplishment but is also a key element in creating a professional, sellable template that allows users to showcase their finished content.
By the end of this lesson, you will be able to set up and customize a Gallery view to serve as a visual portfolio for your published content.
1. What is a Gallery View?
A Gallery view displays items from your database as a collection of visual cards. Instead of rows in a table or cards in workflow columns, you get a grid of images, perfect for anything that benefits from a visual-first presentation.
Common uses include:
- Mood boards for design projects
- Recipe collections with food photos
- Team directories with headshots
- And, most relevant for us, a portfolio of published blog posts, videos, or design work.
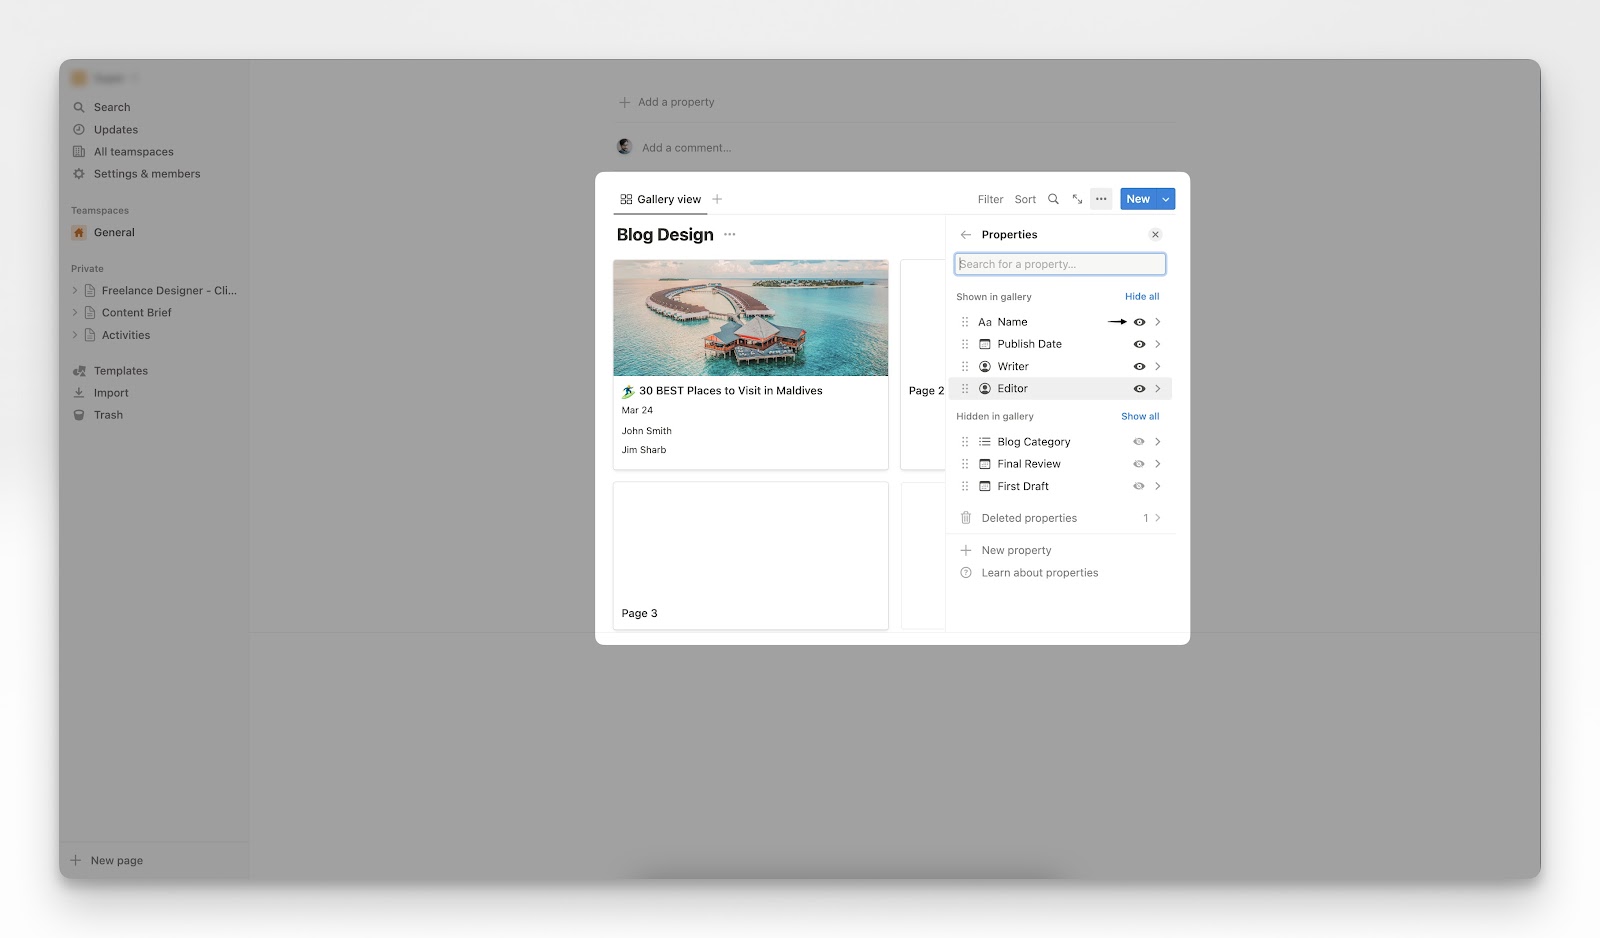
2. Creating and Customizing Your Gallery
The power of a Gallery view lies in its customization. You have precise control over what image is displayed, the size of the cards, and what information accompanies the visual.
The following video provides a quick but comprehensive overview of all the aesthetic controls available for a Gallery view. It will show you how to get started and introduce you to the key settings we'll be using.
Make your Notion AESTHETIC with Gallery View ✨
The video 'Make your Notion AESTHETIC with Gallery View' by The Organized Notebook is a fantastic, quick guide to all the customization options. It will show you how to control what images are shown and how to adjust the overall look.
Watch the full video (it's just over 3 minutes). Pay special attention to: The different 'Card Preview' options (Page Content vs. Page Cover) (01:07). The pro-tip on using a 'Files & Media' property for the preview (02:15). How to adjust card size and hide the card title for a cleaner look (01:56 & 02:58).
3. Key Settings for Your Visual Portfolio
As you saw in the video, creating an effective gallery involves more than just selecting the view type. Let's break down the three most important steps to turn your database into a polished portfolio.
A. Choosing Your Image Source (Card Preview)
This is the most important setting. It tells Notion which image to display on each card. You can find it under the ••• menu → Layout → Card preview.
You have three main options:
- Page Content: Notion will grab the first image it finds inside the page's body. This is quick but can be unpredictable.
- Page Cover: This uses the cover image you set at the top of each page. This offers more control and is a great option for a portfolio.
- Files & Media Property: This is the most robust method for template design. By creating a dedicated
Files & Mediaproperty (e.g., named "Thumbnail"), you can specify the exact image for the gallery card without affecting the page's main cover image. This separates the thumbnail from the page's internal aesthetic.

For a deeper dive into these options, you can consult this written guide.
10+ Best Tips to Create Gallery in Notion
The article '10+ Best Tips to Create Gallery in Notion' from The Organized Notebook provides a clear text-based explanation of the different customization settings.
Read 'Tip 3: Set up Card Preview' and 'Tip 4: Adjust Card Size'. These sections provide a great summary of the core layout options for making your gallery look just right.
B. Filtering for "Published" Content
A portfolio should showcase completed work. To achieve this, you need to filter your database to show only the content that has been published.
- Click the
Filterbutton at the top of your database. - Select your
Statusproperty. - Set the condition so that
StatusisPublished.
Now, your gallery will automatically display any content piece as soon as you drag it to the "Published" column on your Kanban board.
C. Adjusting Card Size and Properties
Fine-tune the look and feel of your gallery:
- Card Size (
Layout→Card size): Choose between Small, Medium, or Large to find the right density for your grid. - Visible Properties (
•••menu →Properties): Decide what information to show on each card. For a portfolio, showing thePlatformandPublish Dateadds valuable context. You can also hide theNameproperty for a minimalist, image-only grid.
Test your understanding!
You've created a gallery view for your content, but no images are appearing on the cards—you only see the page titles. What are the two most likely settings you need to check?
Show answer
- Card Preview Setting: Go to
•••→Layoutand check theCard previewsetting. It is likely set toNone. You need to change it toPage cover,Page content, or aFiles & Mediaproperty. - Image Source Content: If the
Card previewis already set correctly (e.g., toPage cover), check the actual database entries. It's possible that the items you expect to see simply don't have a cover image uploaded yet.
✍️ Exercise: Build Your Published Portfolio
Let's apply these concepts and build the final view for your Content Creation Hub.
Your Tasks:
-
1. Prepare Your Data:
- Go to your
Master Content Database. - For this exercise, let's use the
Page Covermethod. Open 2-3 of your content items that are marked asPublished. - For each one, click
Add coverand choose an image (from Unsplash, or upload your own). This will be your portfolio's visual.
- Go to your
-
2. Create the Gallery View:
- Add a new view to your database and name it "Published Portfolio".
- Select Gallery as the layout type.
-
3. Configure the View:
- Go to the
•••menu and selectLayout. - Set the
Card previewto Page Cover. You should see your cover images appear. - Experiment with the
Card size(Small, Medium, Large) to see what you prefer.
- Go to the
-
4. Apply the Filter:
- Click
Filterat the top of the database. - Create a filter where Status
isPublished. The gallery should now only show your published items.
- Click
-
5. Customize Card Properties:
- Go to the
•••menu and selectProperties. - Make the
PlatformandPublish Dateproperties visible. - Hide any properties you don't need to see in this view.
- Go to the
You should now have a clean, visual grid showcasing your completed work!
Conclusion
Excellent work! You have now completed the Content Creation Hub. By building Table, Calendar, Board, and now Gallery views, you've created a comprehensive and highly functional system for managing a content workflow from start to finish. You've mastered the core Notion skill of creating different views from a single data source to serve unique purposes.
Key Takeaways:
- Gallery view is for creating visual, card-based displays of your database items.
- The
Card previewsetting in theLayoutmenu is the key to controlling which images are displayed. - Combining a Gallery view with a Filter (e.g., for "Published" status) creates a dynamic, self-updating portfolio.
- Customizing card size and visible properties is essential for designing a clean and user-friendly template.
Preview of the Next Lesson:
With your project and content management systems built, we will shift focus from managing external output to organizing internal knowledge. In the next module, we'll begin Project 3: The Personal Knowledge Management (PKM) System. We'll start by building a flexible 'Notes' database to capture and connect your ideas.