Welcome back! In our last lesson, you mastered the calendar view, transforming your content database into a powerful scheduling tool. You now have a clear visual overview of when your content will be published.
This lesson focuses on a different, equally important question: where is each piece of content in your creation process? We will build a Kanban board to visually track your workflow from the initial idea to the final published post. For someone with a background in project management, the principles of a Kanban board will be familiar, but applying it within Notion is a key skill for creating powerful, sellable templates.
By the end of this lesson, you will be able to build and configure a Kanban board view to manage the entire progression of your content.
1. What is a Kanban Board?
A Kanban board is a visual project management tool designed to help you track work as it moves through a series of stages. In Notion, a board is simply another view of your database.
- Columns represent the different stages of your workflow (e.g.,
Idea,Drafting,Editing,Published). - Cards represent your individual work items—in our case, each piece of content in your database.
The primary benefit is the at-a-glance clarity it provides about your work in progress.
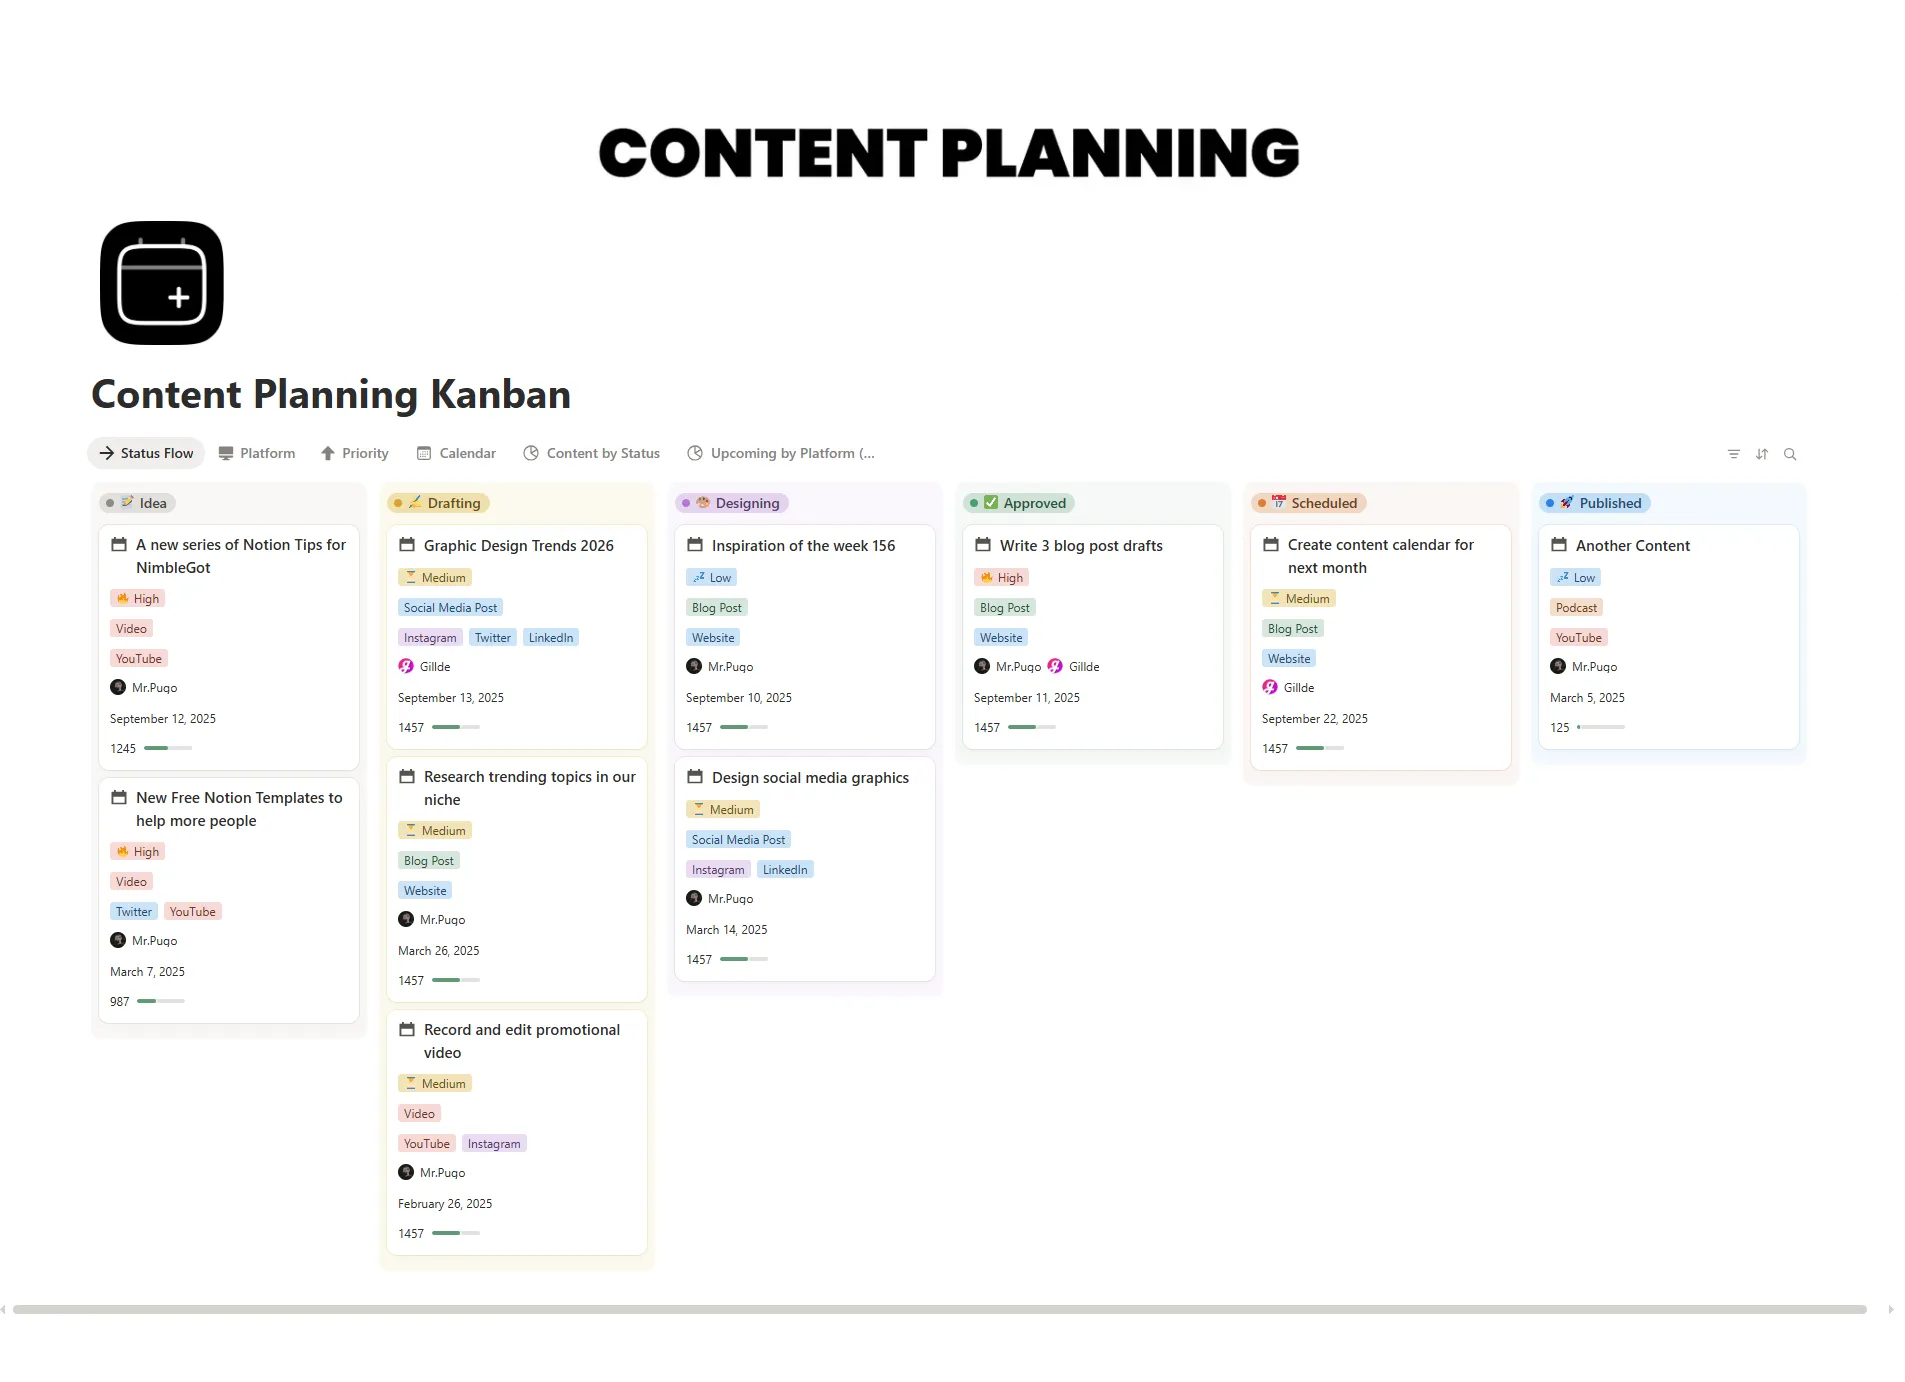
2. Creating and Configuring Your Board View
We will now create a new Board view for your Master Content Database. The most important step is telling Notion how to group the cards to create the columns for your workflow. This is where the Status property you created earlier becomes essential.
Let's watch a demonstration of how to turn a database into a progress-tracking board.
Content Calendar Notion Tutorial + free template 📅💡 how to use notion for content creators
The 'Content Calendar Notion Tutorial' video by Modern Millie, which we used in the previous lesson, has an excellent segment on creating a board view. This will walk you through the entire process, from creating the view to grouping it by status.
Watch from 17:25 to 20:24. Pay close attention to these key steps: Creating a new 'Board' view. The initial, incorrect grouping (e.g., by platform). Adding a 'Status' select property (which you have already done). Changing the 'Group by' setting to 'Status' to create the correct workflow columns. Reordering the columns into a logical sequence (e.g., 'New Idea' first).
Key Steps to Build Your Board:
- Add a New View: Navigate to your
Master Content Databaseand click the+icon next to your existing views. - Select Board Layout: Name the new view (e.g., "Content Pipeline") and select Board as the layout type.
- Group by Status:
- Click the
•••menu at the top right of your database. - Select
Group. - Change the
Group byoption from its default to yourStatusproperty.
- Click the
- Order Your Columns: The columns will appear in a default order. You can simply click and drag the column titles to arrange them logically, matching your content creation process (e.g.,
Idea→Outlining→Filming→Editing→Published).
For a written reference that breaks down these steps, you can review the following article.
How to create a basic content calendar in Notion
The article 'How to create a basic content calendar in Notion' provides a clear, step-by-step text guide for creating a board view. It's a great supplement to the video.
Read the section titled 'Create a Board View' (steps 76-85). This covers duplicating a view, changing the layout to 'Board', and setting the grouping options.
Test your understanding!
You've just created your board view, but the columns are "YouTube," "Instagram," and "Blog" instead of "Idea," "Drafting," and "Published." What is the most likely cause, and how do you fix it?
Show answer
The board is likely grouped by the Platform property instead of the Status property. To fix this, go to the ••• menu, select Group, and change the Group by setting from Platform to Status.
3. Customizing Your Kanban Cards
A well-designed template is not only functional but also visually clear. You can customize what information appears on your Kanban cards to make them more informative at a glance.
Key customizations include:
- Card Preview: Choose to show an image (from the page cover), a preview of the page's content, or nothing.
- Card Size: Adjust the size of cards (Small, Medium, Large) to fit your needs.
- Visible Properties: Just like with the calendar view, you can show or hide properties like
Publish Date,Platform, orAssigneedirectly on the card. - Color Columns: Add a colored background to each column based on the status color, which enhances visual organization.
EASY Kanban Board for your tasks in Notion | Step-by-Step Guide
This video from The Organized Notebook, 'EASY Kanban Board for your tasks in Notion', provides a focused look at all the layout and property settings you can adjust for a board view.
Watch from 01:22 to 05:22. This will guide you through: Layout Settings (01:22): Adjusting card preview, card size, and coloring columns. Properties (03:00): Adding new properties if needed and, more importantly, making existing properties (like Date or Tags) visible on the cards using the 'Properties' menu.
4. Using Your Board to Manage Your Workflow
Your Kanban board is an interactive workspace. The primary way to use it is by dragging and dropping cards from one column to the next as you make progress on a piece of content.
- When you drag a card from the
Ideacolumn to theDraftingcolumn, Notion automatically updates that item'sStatusproperty toDrafting. - This creates a seamless and intuitive way to manage your entire content pipeline without manually editing properties.
✍️ Exercise: Build Your Content Pipeline Board
It's time to build the second major view for your Content Creation Hub project.
Your Tasks:
-
1. Create the Board View:
- In your
Master Content Database, create a new view and name it "Content Pipeline". - Change the layout of this new view to Board.
- In your
-
2. Configure Grouping:
- Open the
Groupsettings and set the board to Group by yourStatusproperty. - Drag the columns into a logical order that reflects your ideal workflow (e.g., Idea → Scripting → Filming/Creating → Editing → Scheduled → Published).
- Open the
-
3. Customize the Cards:
- Open the
Propertiesmenu. - Make the
PlatformandPublish Dateproperties visible on the cards. - Experiment with changing the
Card sizeto see which you prefer.
- Open the
-
4. Color Your Workflow:
- Go to the
Groupsettings and toggle on Color columns. This will apply the colors you set for each status option.
- Go to the
-
5. Test the Workflow:
- Find a content idea that is currently in your
Ideastatus column. - Drag the card from the
Ideacolumn to theScripting(or next) column. - Switch back to your "Table" view and confirm that the
Statusfor that item has been updated automatically.
- Find a content idea that is currently in your
Conclusion
Fantastic work! You have now created the two most essential views for any content creation system: a calendar to visualize your schedule and a Kanban board to visualize your workflow. You've learned how to create different views of the same data source and configure them for specific purposes—a core concept in building advanced Notion templates.
Key Takeaways:
- A Kanban board is a view that organizes database items into columns based on a specific property, typically
Status. - The
Group bysetting is the key to configuring a board's columns. - Dragging cards between columns automatically updates the underlying property, making workflow management intuitive.
- Customizing cards by showing relevant properties provides critical information at a glance, increasing the template's usability.
Preview of the Next Lesson:
With your workflow and schedule visualized, there's one more view that will complete your content hub: a Gallery view. In the next lesson, we'll build a visual portfolio of your published work, which is perfect for showcasing your content and is a feature many users look for in a template.