Hello! Welcome back to our course.
In our last lesson, you mastered the fundamental local Git workflow: initializing a repository, staging changes with git add, and saving snapshots with git commit. You also learned the importance of writing clear, conventional commit messages. So far, all your work on my-git-project exists only on your local machine.
Today, we'll bridge the gap between your local computer and the cloud. This lesson directly addresses the learning outcome: to create a remote repository on GitHub and push a local repository to it. This is the final step in the basic version control cycle and is essential for backing up your code, collaborating with others, and deploying projects.
Let's get your local project onto GitHub.
1. What is a Remote Repository?
A remote repository is a version of your project that is hosted on the internet or a network. While the local repository is on your machine, the remote repository lives on a server, accessible to you and anyone you grant permission to. GitHub is the most popular service for hosting these remote repositories.
In the last lesson, we used a diagram that showed the workflow on your local machine. Now, let's complete that picture by adding the remote component.

Using a remote repository provides three key benefits:
- Backup: Your code is safe even if something happens to your computer.
- Collaboration: It's the central point where you and your team can share code.
- Accessibility: You can access your code from any machine with Git installed.
2. Step 1: Create a Repository on GitHub
Before we can push our code, we need a destination. Let's create an empty repository on your GitHub account.
Connecting Local Git Repository to GitHub: HTTPS and SSH
This video, 'Connecting Local Git Repository to GitHub', provides a clear visual guide for creating a new repository on the GitHub website.
Watch from 02:47 to 03:49. The video will walk you through logging into GitHub and creating a new, empty repository. Follow along on your own GitHub account.
Your Turn: Create the Repo
- Go to github.com and log in.
- Click the
+icon in the top-right corner and select "New repository". - Give your repository a name. A good practice is to use the same name as your local project folder, so let's call it
my-git-project. - You can add an optional description.
- Keep the repository Public for now.
- Crucially, do not initialize the repository with a README, .gitignore, or license file. Since we already have a project locally, we want to start with a completely empty remote repository to avoid conflicts.
- Click "Create repository".
After creating it, GitHub will show you a "Quick setup" page with some command-line instructions. This page is your guide for the next steps.
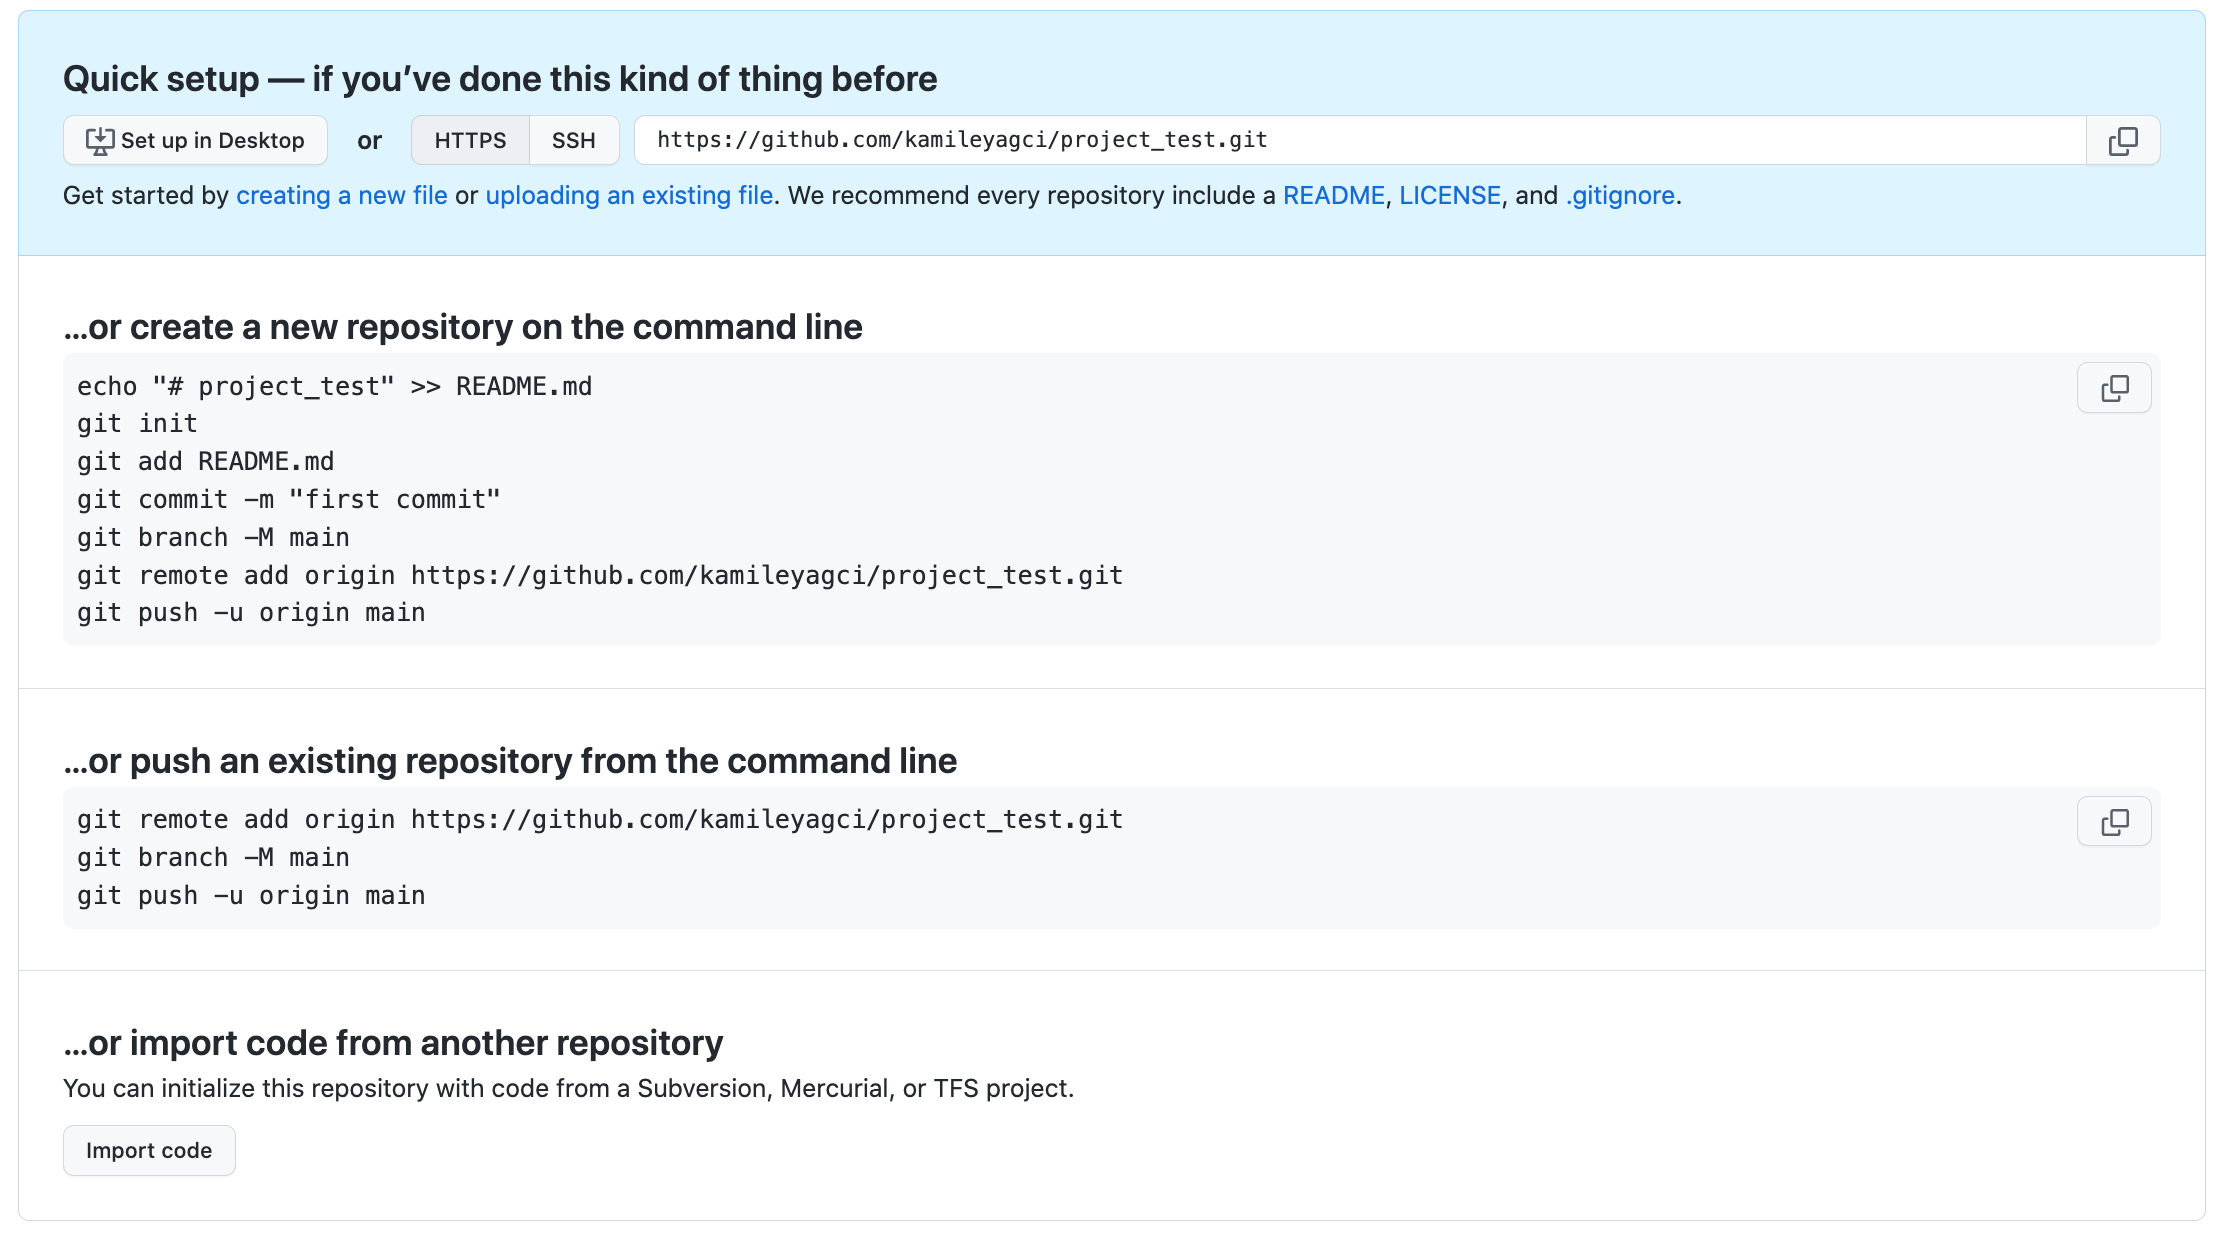
3. Step 2: Connect Your Local Repo to the Remote
Now we need to tell your local repository where its remote counterpart lives. We do this by adding a "remote" URL. GitHub gives you two options for this URL: HTTPS and SSH.
How to Push an Existing Project to GitHub - DigitalOcean
The article 'How to Push an Existing Project to GitHub' from DigitalOcean has an excellent, concise explanation of the difference between HTTPS and SSH authentication. Understanding this helps you choose the right method for your situation.
Read the section titled 'SSH vs HTTPS Authentication'. Focus on the pros and cons of each method.
For simplicity and ease of setup, we will use HTTPS for now. It works everywhere and is perfect for getting started.
Your Turn: Add the Remote
-
On your GitHub repository page, make sure the HTTPS option is selected, and copy the URL. It should look like
https://github.com/YourUsername/my-git-project.git. -
Open your Fedora terminal and navigate to your project directory if you're not already there:
cd path/to/my-git-project -
Use the
git remote addcommand to link your local repository to the remote one.originis the conventional shorthand name for the primary remote repository. You could name it something else, butoriginis the standard.
# Replace the URL with the one you copied from your GitHub page git remote add origin https://github.com/YourUsername/my-git-project.git -
To verify that the remote was added correctly, you can list the remotes:
git remote -vThis should show you the
originremote with the URL for both fetching (downloading) and pushing (uploading).
4. Step 3: Push Your Code to GitHub
With the connection established, the final step is to "push" your local commits to the origin remote.
The command for this is git push. For the very first push, we use a couple of extra flags to set things up correctly.
git push -u origin main
Let's break that down:
push: The command to send commits.-u(or--set-upstream): This is a crucial flag for the first push. It links your localmainbranch with the remotemainbranch. After you do this once, you can simply rungit pushin the future, and Git will know where to send the changes.origin: The name of the remote you're pushing to.main: The name of the local branch you are pushing.
Authentication: Using a Personal Access Token (PAT)
Years ago, you could use your GitHub password here, but for security reasons, GitHub now requires a Personal Access Token (PAT) for command-line operations over HTTPS. This is essentially a long, secure password created specifically for an application (like Git on your terminal).
The following video shows you exactly how to generate one.
Connecting Local Git Repository to GitHub: HTTPS and SSH
Let's return to the 'Connecting Local Git Repository to GitHub' video. It clearly explains why a PAT is needed and guides you through the process of creating one and using it to authenticate your push.
Watch from 04:35 to 07:55. Follow the steps carefully to generate a 'Classic' personal access token on your GitHub account. When selecting scopes, checking the 'repo' box is all you need for now. Make sure to copy your token and save it somewhere safe, like a password manager. You will not be able to see it again!
Your Turn: Push and Authenticate
-
In your terminal, inside your project folder, run the push command:
git push -u origin main -
Git will prompt you for your
Username. Enter your GitHub username and press Enter. -
It will then prompt you for your
Password. Paste your Personal Access Token here. Note that for security, nothing will appear on the screen as you paste. This is normal. Press Enter.
If all goes well, you'll see some output indicating that the objects were written and your local main branch is now set up to track the remote main branch.
- Go back to your browser and refresh your GitHub repository page. You should now see your
README.mdandfile1.txtfiles, along with your commit history!
Conclusion
Excellent work! You have successfully connected your local project to the world, completing the fundamental add -> commit -> push workflow that is at the heart of modern software development.
Here are your key takeaways from this lesson:
- A remote repository (like one on GitHub) serves as a backup and a central hub for collaboration.
- You create a new, empty repository on GitHub to serve as the destination for an existing local project.
- You can connect to a remote using HTTPS (simpler, uses a PAT) or SSH (more secure for frequent use, requires key setup).
- The
git remote add origin <URL>command links your local repo to the remote one. - The
git push -u origin maincommand sends your localmainbranch commits to the remoteoriginand sets up tracking for future pushes.
In our next lesson, we'll turn our attention to that README.md file. A good README is the front door to your project, and you'll learn how to write a clear and professional one using Markdown.