Hello! Welcome back to our module on Enterprise SEO.
In our last lesson, you built the crucial bridge between an old site and a new one by creating a comprehensive URL mapping and 301 redirect strategy. That map is the blueprint for preserving your site's hard-earned authority.
Today, we move from planning to verification. This is the final and most critical safety check before a new website or a major redesign goes live. Our learning outcome is to perform a pre-launch SEO audit on a staging environment to prevent critical issues. Think of this as the dress rehearsal before opening night—it's your last chance to find and fix problems that could be catastrophic in a live environment.
1. The Purpose of a Pre-Launch Audit
A site migration or launch is a high-stakes moment. All the strategic work you've done can be undone by a single misplaced line of code. The primary goal of a pre-launch audit is to catch these issues on the staging server, where they are relatively easy and cheap to fix, before they impact your live site's traffic, rankings, and revenue.
To understand the scope and importance of this audit, let's look at a professional overview.
Types and Purpose of Technical SEO Audits
The article 'Types and Purpose of Technical SEO Audits' by Four Dots clearly defines the 'Development and Launch Technical Audit' and highlights the severe consequences of skipping it.
Please read the sections 'Development and Launch Technical Audit' and 'What Breaks When You Skip Launch Audits'. Pay close attention to: The goal of preventing regressions and ensuring optimal performance from day one. The list of catastrophic failures, such as leaking a 'noindex' tag or blocking critical sections with robots.txt.
As the article makes clear, the difference between fixing an issue on a staging server versus a live production server is immense. A staging fix takes hours; a production fix can mean weeks or months of lost traffic and recovery time.
2. The Pre-Launch Audit Workflow: A Practical Checklist
A thorough pre-launch audit is a systematic process. Given your expertise with tools like Screaming Frog, we'll focus on a practical workflow that leverages its capabilities to conduct an efficient and deep analysis of the staging site.
Step 1: Crawling the Staging Environment
Staging sites are, by design, firewalled from the public and search engines. Your first task is to configure your crawler to gain access. This often involves bypassing standard restrictions.
The following resource provides a detailed, step-by-step guide for doing this with Screaming Frog.
How To Use The SEO Spider In A Site Migration
The guide 'How To Use The SEO Spider In A Site Migration' from Screaming Frog has an excellent section on the specifics of accessing and crawling a staging site.
Read the section titled '3) Crawl Staging Site'. It covers how to bypass common crawling blocks like robots.txt and authentication, and how to configure the SEO Spider to handle directives you might find on a development site.
Common access methods you'll need to handle include:
- HTTP Authentication: Use
Configuration > Authenticationto enter the username and password. - robots.txt Disallow: Use
Configuration > robots.txt > Ignore robots.txtto crawl the site. Remember to check that the liverobots.txtwill be correct! - IP Whitelisting: You may need to provide your IP address to the development team.
Once you have access, you can begin the audit itself.
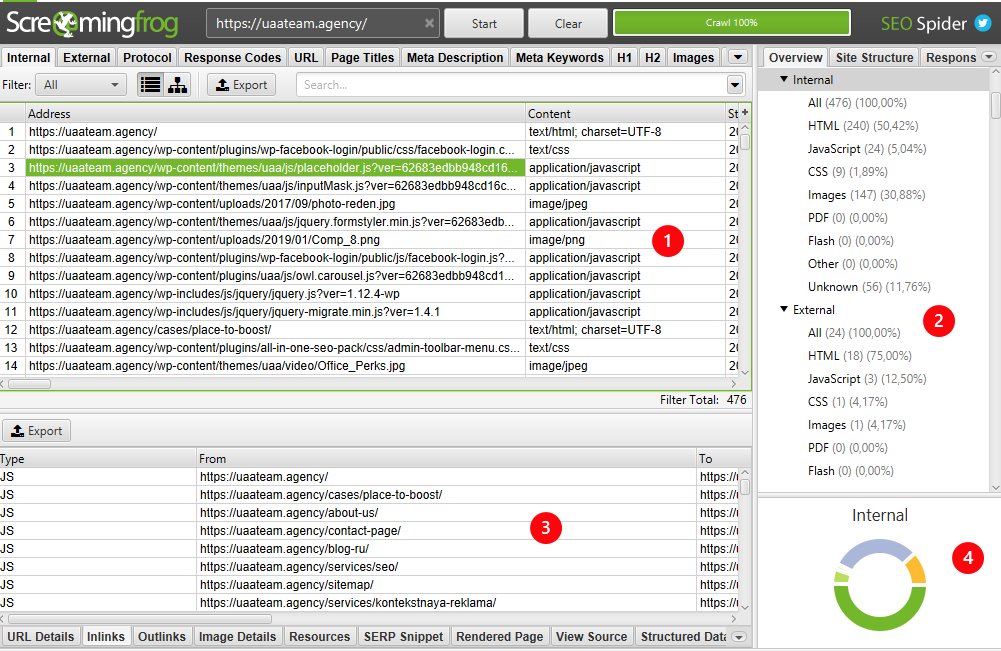
Step 2: The Critical Pre-Launch Checklist
This checklist is adapted from a launch-day QA list but is applied before launch. Run a full crawl of the staging site and verify the following:
-
Indexing and Crawling Instructions: This is the most critical check.
- Meta Robots: Crawl the site and check the
Directivestab. Ensure no key pages have anoindextag. A common mistake is forgetting to remove a site-widenoindextag used during development. - robots.txt: Check that the
robots.txtfile on staging allows crawling. More importantly, confirm with the dev team that the correct, permissiverobots.txtwill be deployed on launch. - Canonical Tags: Check the
Canonicalstab. Ensure all indexable pages have a self-referencing canonical tag pointing to the final, correct version of the URL.
- Meta Robots: Crawl the site and check the
-
Redirect Verification: Test the redirect map you created in the previous lesson.
- Switch Screaming Frog to
Mode > List. - Upload the list of old URLs (the 'source' column from your map).
- Run the crawl.
- Analyze the results: Every URL should return a
301status code and theRedirect URIcolumn should match the intended destination from your map. Check for 404s, redirect chains, or loops.
- Switch Screaming Frog to
-
On-Page & Content Comparison:
- Page Titles & Meta Descriptions: Have they been carried over correctly?
- Headings (H1-H6): Is the heading structure preserved?
- Content: Has the body content migrated correctly?
- Internal Links: Are all navigation, footer, and in-body links pointing to the new staging URLs (relative paths or absolute staging URLs)? There should be zero links pointing back to the old live domain. Check the
Response Codes > Client Error (4xx)report for broken internal links.
-
Structured Data:
- Go to the
Structured Datatab. Check for validation errors or warnings. Ensure all schema types (Product, Article, LocalBusiness, etc.) are present and correct.
- Go to the
-
Site Performance:
- Connect the PageSpeed Insights API under
Configuration > API Access. - Run a crawl analysis to get Core Web Vitals and performance metrics for key page templates. Compare this to the benchmark data you gathered from the old site.
- Connect the PageSpeed Insights API under
3. Advanced Analysis: Comparing Staging vs. Live
For large enterprise sites, checking every element manually is impossible. This is where you can leverage advanced crawler features to automatically pinpoint discrepancies between the live site and the staging environment.
The Screaming Frog guide provides a powerful workflow for this.
How To Use The SEO Spider In A Site Migration
Let's return to the Screaming Frog guide to explore two advanced features—URL Mapping and Change Detection—that are invaluable for enterprise-scale pre-launch audits.
Read the sections '4) Compare Live Vs Staging With URL Mapping' and '5) Identify Differences With Change Detection'. Focus on understanding: How URL Mapping allows you to compare two crawls with different URL structures (e.g., oldsite.com vs. staging.newsite.com). How Change Detection automatically flags changes in critical elements like page titles, H1s, canonicals, and even internal link counts for each page.
This comparison workflow allows you to move beyond simply "checking" the staging site to actively "validating" it against the known-good live site. Finding that 500 product pages have lost their H1 tag or that your key category pages have lost 30% of their internal links is the kind of critical insight that this process reveals before it can do any damage.
Test your understanding!
During a pre-launch audit, you use the "Change Detection" feature in Screaming Frog. You notice that 50 key product pages are flagged for "Inlinks Lost." What does this likely mean, and why is it a critical issue to fix before launch?
Show answer
"Inlinks Lost" means that these 50 product pages have fewer internal links pointing to them on the staging site compared to the live site. This is a critical issue because internal links are a primary way that search engines discover pages and understand site structure. A significant loss of internal links can reduce the flow of PageRank to these product pages, potentially causing them to drop in rankings after the migration. It could be caused by a change in the main navigation, removal of a cross-selling widget, or changes to category page layouts.
4. The Output: A Go/No-Go Decision
The result of your pre-launch audit is not just a list of issues; it's a clear, data-backed recommendation to stakeholders. Should the launch proceed as planned, be delayed until critical fixes are made, or be aborted entirely?
This framework helps you translate technical findings into a strategic business decision.
Types and Purpose of Technical SEO Audits
The Four Dots article concludes with a practical 'Go/No-Go Decision Framework' that helps structure your final recommendation.
Read the 'Go/No-Go Decision Framework' section. Understand the clear criteria for a 'Proceed,' 'Delay,' or 'Abort' decision. This is how you present your audit findings with authority.
Your job as the SEO expert is to identify and quantify the risk. If you've found a site-wide noindex tag, that's a clear "Delay." If you've found a few broken links and some missing meta descriptions, that might be a "Proceed" with a plan to fix them immediately post-launch. This framework gives you the language to communicate that effectively.
Conclusion
You now have a complete framework for conducting one of the most important tasks in technical SEO. By meticulously auditing a staging environment, you act as the final gatekeeper, protecting the site's organic performance from preventable technical disasters.
Key Takeaways:
- A pre-launch audit is a non-negotiable safety net to catch costly issues before they hit production.
- The most critical check is for indexing controls (
noindex,robots.txt,canonicaltags) and redirect verification. - Use crawlers like Screaming Frog to automate checks for redirects, on-page elements, and schema markup at scale.
- Advanced features like crawl comparison and change detection provide enterprise-level precision for validating a staging site against its live counterpart.
- The audit culminates in a clear, risk-based Go/No-Go recommendation to stakeholders.
You've planned the migration, mapped the URLs, and now audited the implementation on staging. You give the "go-ahead." What happens the moment you flip the switch? In our next lesson, we'll cover the final step: Execute a post-launch monitoring plan to track crawl data, indexing, and rankings after a site migration.