Hello! Welcome to your next lesson in the "Database Interaction with PDO" module.
In our last session, we answered the crucial question of why modern PHP developers use PDO. We learned that it provides a secure, portable, and consistent way to interact with databases. Now, it's time to move from the "why" to the "how."
Today's learning outcome is to establish a database connection using the PDO object. By the end of this lesson, you will be able to write the PHP code necessary to connect your application to a database, complete with modern best practices for configuration and error handling. This is the first practical step towards building the database-driven applications you aim to create.
1. The Anatomy of a Database Connection
To connect to a database with PDO, you need to provide four key pieces of information:
- Credentials: The username and password for your database server.
- Location & Type: The server address (host), the specific database name (dbname), and the type of database (e.g., MySQL).
- Character Set: The character encoding to use for the connection (almost always
utf8mb4for modern web apps). - Connection Options: Instructions for PDO on how to behave, most importantly how to handle errors.
We will assemble these pieces to create a robust and secure connection script.
2. Preparing the Connection Details
First, let's define our connection parameters as variables. Separating configuration from logic is a fundamental principle of clean code.
For a typical local development environment using something like XAMPP or MAMP, your credentials might look like this:
// 1. Connection Credentials
$host = '127.0.0.1'; // or 'localhost'
$db   = 'my_database'; // The name of the database you want to connect to
$user = 'root';
$pass = ''; // Often empty for local development

// 2. Character Set
$charset = 'utf8mb4';
Note: You'll need to create a database named my_database (or any name you choose) in your database management tool (like phpMyAdmin) for the connection to succeed.
3. The DSN: Describing the Data Source
The most unique part of a PDO connection is the Data Source Name (DSN). The DSN is a string that tells PDO which database driver to use and how to find the database. It combines the host, database name, and character set into a single, specially formatted string.
The format for MySQL is: mysql:host=...;dbname=...;charset=...
Using our variables from above, we construct the DSN like this:
$dsn = "mysql:host=$host;dbname=$db;charset=$charset";
To see a clear explanation of how the DSN is constructed and how it differs from older connection methods, watch this segment.
Connect To Database Using PDO In OOP PHP | Object Oriented PHP Tutorial | PHP Tutorial | mmtuts
The video 'Connect To Database Using PDO In OOP PHP' by Dani Krossing provides an excellent breakdown of the DSN.
Watch from 01:26 to 02:21 to understand the concept of the DSN, and then from 03:42 to 05:12 to see how the string is built from variables.
4. Setting Connection Options
Before we connect, we need to tell PDO how we want it to behave. The most critical setting is the error mode. In the last module, you learned to handle errors using exceptions. We will configure PDO to throw a PDOException whenever a database error occurs. This allows us to use try-catch blocks for robust error handling.
We define these settings in an array:
// 3. Connection Options
$options = [
    PDO::ATTR_ERRMODE            => PDO::ERRMODE_EXCEPTION,
    PDO::ATTR_DEFAULT_FETCH_MODE => PDO::FETCH_ASSOC,
    PDO::ATTR_EMULATE_PREPARES   => false,
];
PDO::ATTR_ERRMODE => PDO::ERRMODE_EXCEPTION: This is the crucial part. It tells PDO to throw exceptions on error.PDO::ATTR_DEFAULT_FETCH_MODE => PDO::FETCH_ASSOC: This is a convenience setting. It makes PDO return database rows as associative arrays (e.g.,['name' => 'John']) by default. We'll explore this more in the next lesson.PDO::ATTR_EMULATE_PREPARES => false: This is a security and performance setting. It tells PDO to use the database's native prepared statements instead of emulating them.
For a deeper dive into why these specific options are considered best practice, the following resource is excellent.
How to connect to MySQL using PDO
The article 'How to connect to MySQL using PDO' from phpdelusions.net is a trusted resource for modern PHP. This section explains the importance of the options array.
Read the section titled 'Connection options explained'. Focus on understanding the purpose of each option, especially PDO::ATTR_ERRMODE.
5. Creating the PDO Object
With all our pieces ready, we can now establish the connection. This is done by creating a new instance of the PDO class, wrapping it in a try-catch block to handle potential connection failures.
This is what the complete, robust connection script looks like:
<?php
// Connection parameters
$host = '127.0.0.1';
$db   = 'my_database';
$user = 'root';
$pass = '';
$charset = 'utf8mb4';

// DSN and Options
$dsn = "mysql:host=$host;dbname=$db;charset=$charset";
$options = [
    PDO::ATTR_ERRMODE            => PDO::ERRMODE_EXCEPTION,
    PDO::ATTR_DEFAULT_FETCH_MODE => PDO::FETCH_ASSOC,
    PDO::ATTR_EMULATE_PREPARES   => false,
];

// The actual connection
try {
     $pdo = new PDO($dsn, $user, $pass, $options);
     echo "Connected to the database successfully!";
} catch (\PDOException $e) {
     // If connection fails, a PDOException is thrown.
     // The error message can leak credentials, so in production,
     // you would log this error and show a generic message to the user.
     throw new \PDOException($e->getMessage(), (int)$e->getCode());
}
?>
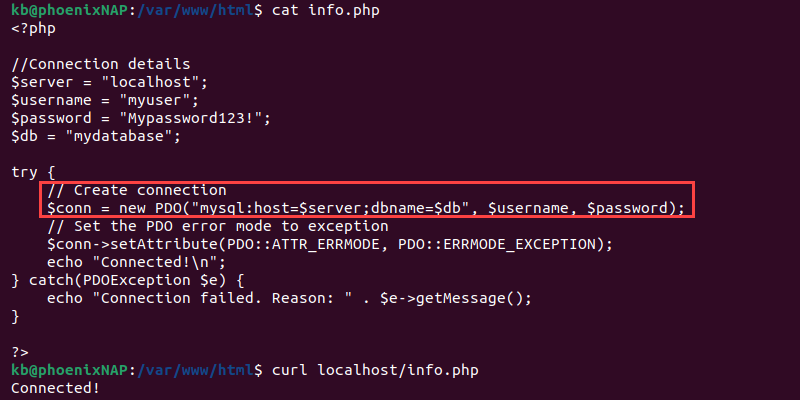
This structure is fundamental. The try block attempts the connection. If it fails for any reason (wrong password, database doesn't exist, etc.), the catch block takes over, preventing the script from crashing and giving you a chance to handle the error gracefully.
Now, let's watch a full demonstration of this process.
Connect To Database Using PDO In OOP PHP | Object Oriented PHP Tutorial | PHP Tutorial | mmtuts
Let's return to Dani Krossing's video to see the try-catch block being implemented in a practical example.
Watch from 05:12 to 10:12. This segment covers: Instantiating the new PDO object. Wrapping the code in a try-catch block. Setting the error mode attribute. Testing both a successful and a failed connection to see the error handling in action.
6. Closing the Connection
In PHP, the database connection is automatically closed when the script finishes executing. However, it's good practice to know how to close it manually. You do this by destroying the PDO object, ensuring all references to it are removed by setting the variable to null.
Connections and Connection management - PHP Manual
The official PHP Manual provides the definitive example on how to properly close a connection.
Read 'Example #3 Closing a connection'. This shows how to dereference both the PDO object and any statement objects derived from it.
// To close the connection:
$pdo = null;
You would typically do this at the end of your script after you are finished with all database operations.
Conclusion
Congratulations! You have now learned the complete process for establishing a robust and secure database connection in PHP using PDO. This is a skill you will use in every database-driven project you build.
Key Takeaways:
- A PDO connection requires credentials (
$user,$pass), a location ($host,$db), and a character set ($charset). - These details are combined into a Data Source Name (DSN) string.
- It is critical to set PDO options, especially
PDO::ATTR_ERRMODE => PDO::ERRMODE_EXCEPTION, to enable modern error handling. - The connection logic must be wrapped in a
try-catchblock to gracefully handlePDOExceptionfailures. - A successful connection gives you a
$pdoobject, which is your gateway to interacting with the database.
Preview of the Next Lesson:
With a connection established, the next logical step is to retrieve data. In our next lesson, "Execute SELECT queries and fetch results using various fetch modes," you will use your new $pdo object to run your first queries and see how PDO's flexible fetch modes make working with results easy.