Hello! Welcome back to your course on PHP mastery.
In the last lesson, we successfully established a connection to our database using the PDO object. You now have a $pdo variable that acts as a gateway to the database, complete with robust error handling. This is a fantastic foundation.
Today, we'll put that connection to work. Our goal is to execute SELECT queries and fetch results using various fetch modes. This is where you'll see how to pull data from your database tables and format it in ways that are easy to use in your PHP code. This is a core skill for building any dynamic web application that displays information from a database.
1. The Simplest Case: The query() Method
For SELECT statements that don't involve any variables or user input (e.g., fetching a static list of categories), you can use the query() method.
- You call
$pdo->query('SELECT ...'). - This method executes the SQL and returns a
PDOStatementobject. It does not return your data directly. - You then use "fetch" methods on the
PDOStatementobject to retrieve the rows of data.
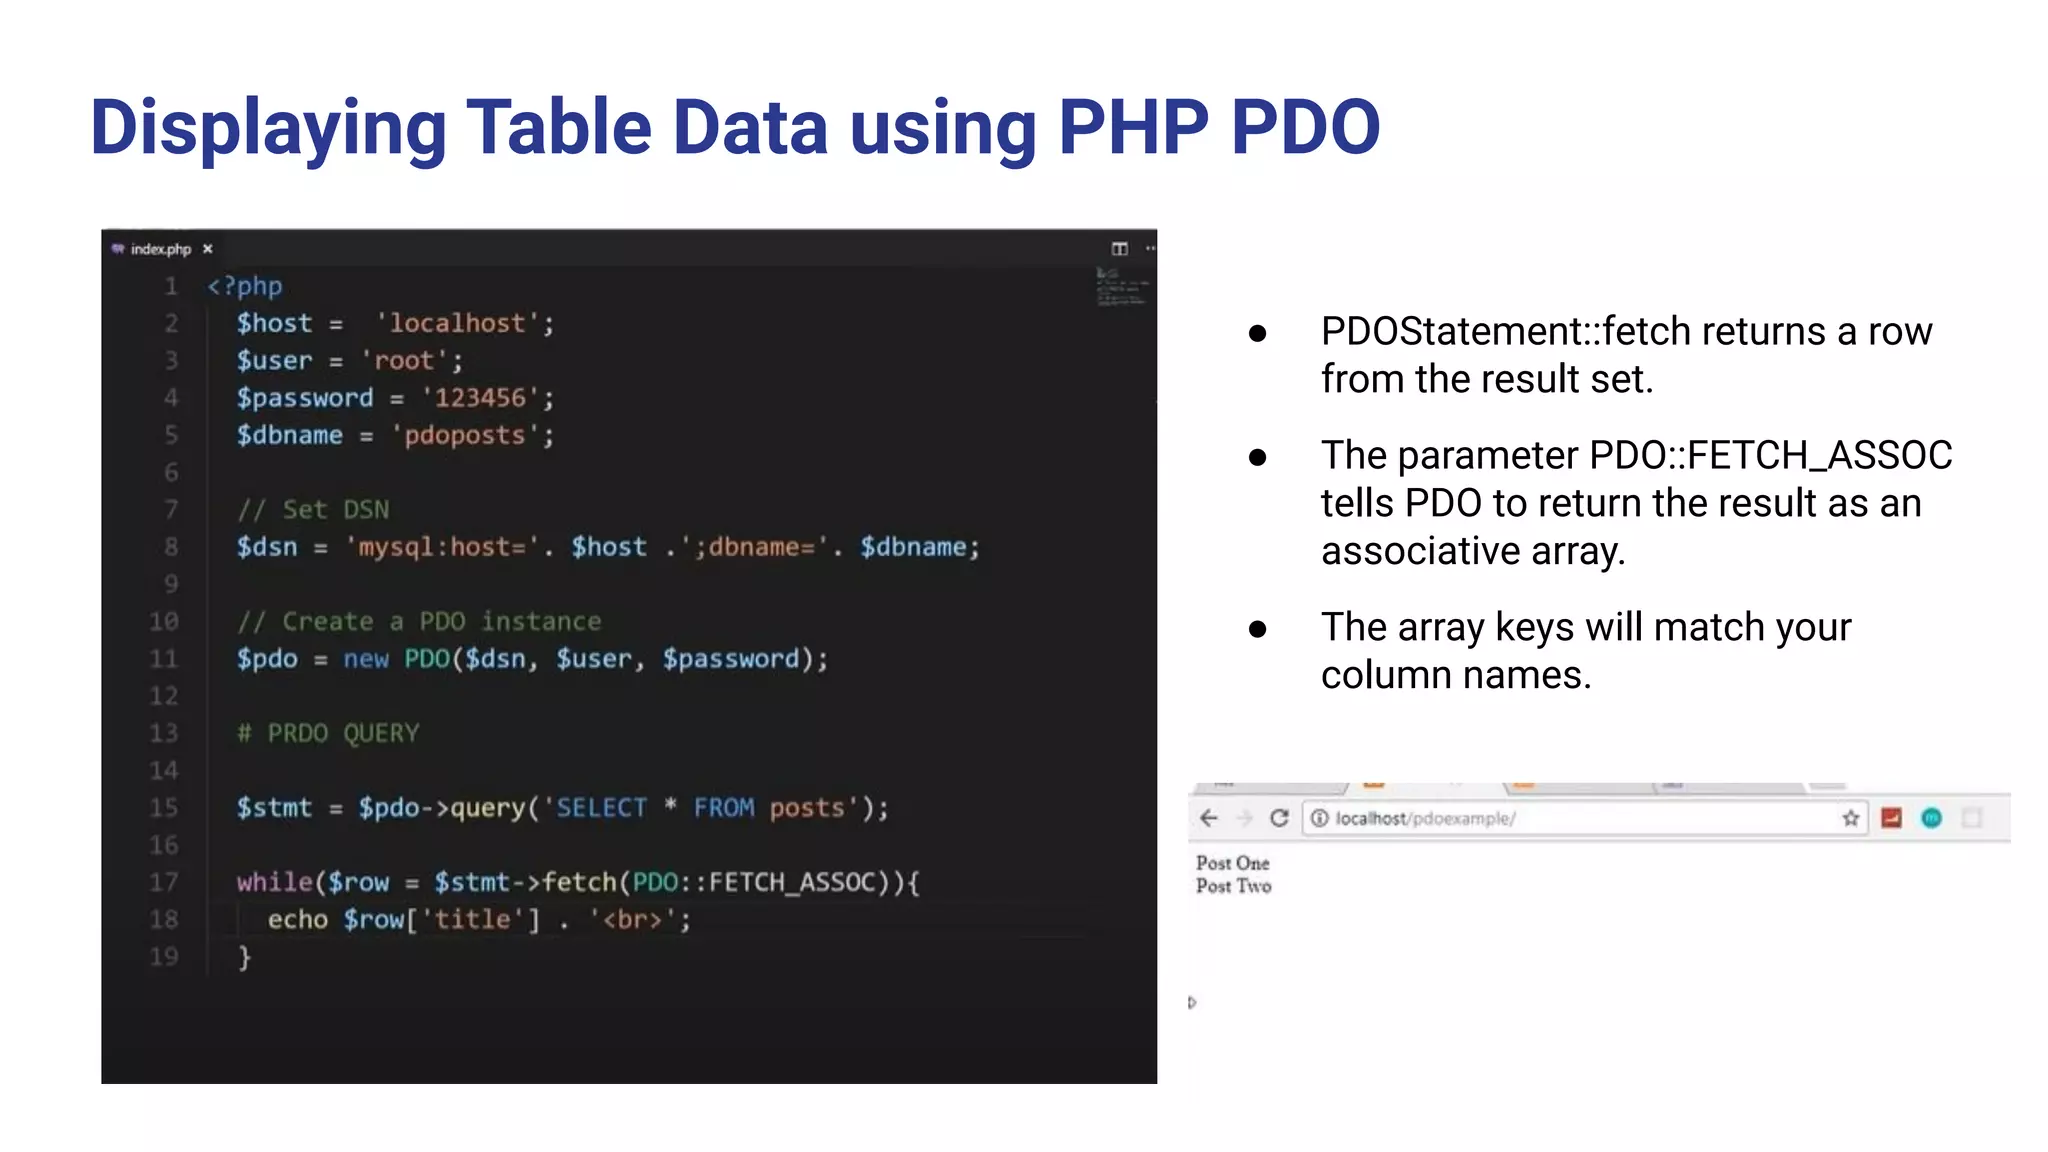
The most common way to get results is to loop through them one by one using the fetch() method. The loop continues as long as fetch() can retrieve a new row. When there are no more rows, fetch() returns false, and the loop terminates.
<?php
require 'database_connection.php'; // Assume this file contains your working $pdo object

$stmt = $pdo->query('SELECT id, title, author FROM posts');

// Loop through each row of the result set
while ($row = $stmt->fetch()) {
    echo $row['title'] . ' by ' . $row['author'] . '<br>';
}
?>
2. Controlling the Output: Fetch Modes
But what format is $row in? By default, it's an array with both numeric and string keys (e.g., $row[0] and $row['title'] both work). This is often redundant. PDO's fetch modes let us control the format of the result.
The two most important fetch modes are:
PDO::FETCH_ASSOC: Returns an associative array, where the keys are the column names from your database table. This is clean and easy to read. ($row['title'])PDO::FETCH_OBJ: Returns an anonymousstdClassobject, where the properties are the column names. This is common in object-oriented code. ($row->title)
You can specify the fetch mode directly in the fetch() call, like $stmt->fetch(PDO::FETCH_ASSOC). Remember in our last lesson, we set PDO::ATTR_DEFAULT_FETCH_MODE => PDO::FETCH_ASSOC in our connection options. This means if you don't specify a mode in fetch(), it will default to returning an associative array.
Let's watch a demonstration of how to run a simple query and fetch the results as both an associative array and an object.
The 'PDO Crash Course (PHP)' video from Traversy Media clearly shows how to use query() and then fetch the results. It also demonstrates how to switch between fetch modes.
Watch from 13:28 to 19:40. The video will cover: Executing a SELECT statement with the query() method. Looping through results with a while loop and fetch(). Using PDO::FETCH_ASSOC to get associative arrays. Using PDO::FETCH_OBJ to get objects. How to set a default fetch mode for your PDO connection.
For a more comprehensive look at the classic fetch modes, the following reading is an excellent reference.
The article 'PDO Fetch Modes' on phpdelusions.net is a fantastic resource that details the different ways you can retrieve data. Let's focus on the most common ones.
Read the section titled 'Classic Modes'. This will give you clear examples of PDO::FETCH_BOTH (the default), PDO::FETCH_NUM, PDO::FETCH_ASSOC, and PDO::FETCH_OBJ.
3. Fetching All Results at Once with fetchAll()
Sometimes, you just want to get all the results into a single variable. For this, you can use fetchAll(). Instead of returning one row at a time, it returns an array containing all the rows from the result set.
$stmt = $pdo->query('SELECT title, author FROM posts');

// Get all rows as an array of associative arrays
$posts = $stmt->fetchAll(PDO::FETCH_ASSOC);

// Now you can loop through the $posts array
foreach ($posts as $post) {
    echo $post['title'] . ' by ' . $post['author'] . '<br>';
}

// Or access a specific row and column
// echo $posts[0]['title'];
When to use fetch() vs. fetchAll()?
fetch()in a loop: More memory-efficient. It processes one row at a time, which is ideal for very large result sets where loading everything into memory could cause issues.fetchAll(): More convenient for smaller result sets when you know you'll need the full collection of data.
4. The Secure Way: Prepared Statements
The query() method is simple, but it has a major limitation: it is not safe for queries that include user input. Directly inserting variables into a query string makes your application vulnerable to SQL Injection attacks.
The secure, modern, and professional way to run queries with variables is to use prepared statements. This is a three-step process:
prepare(): Write your SQL statement with placeholders (like:authoror:id) instead of actual values. Send this template to the database server.execute(): Send the actual values for the placeholders to the database separately. The database engine safely combines the template and the values, preventing malicious SQL from being executed.fetch()/fetchAll(): Retrieve the results from the executed statement, just as you did withquery().
Let's see how to fetch all posts by a specific author. We'll use a named placeholder (:author).
// User input (e.g., from a form or URL)
$author = 'Brad';

// 1. Prepare the statement with a named placeholder
$sql = "SELECT * FROM posts WHERE author = :author";
$stmt = $pdo->prepare($sql);

// 2. Execute the statement, passing the values in an array
// The key in the array matches the placeholder name.
$stmt->execute(['author' => $author]);

// 3. Fetch all the results
$posts = $stmt->fetchAll(PDO::FETCH_ASSOC);

// Now $posts contains only the posts by 'Brad'
foreach ($posts as $post) {
    echo $post['title'] . '<br>';
}
This separation of SQL code and data is the cornerstone of preventing SQL injection. Now, let's watch a detailed walkthrough of using prepared statements to fetch data.
Let's return to the 'PDO Crash Course (PHP)' video. This part demonstrates both positional (?) and named (:name) parameters, which are the two types of placeholders you can use.
Watch from 21:25 to 28:38. Pay close attention to the 'Named Params' section (starting around 26:06), as this is the most common and readable approach. Notice how an associative array is passed to execute() to bind the values.
5. Fetching a Single Row
A very common task is to retrieve a single record from the database, for example, when you want to display the details of one specific blog post based on its ID.
The process is identical to the one above, but instead of using fetchAll(), you just use fetch() once.
// The ID of the post we want (e.g., from a URL like 'details.php?id=1')
$id = 1;

// 1. Prepare
$sql = "SELECT * FROM posts WHERE id = :id";
$stmt = $pdo->prepare($sql);

// 2. Execute
$stmt->execute(['id' => $id]);

// 3. Fetch the single row
$post = $stmt->fetch(PDO::FETCH_ASSOC);

// Now you can display the details of that single post
if ($post) {
    echo '<h1>' . $post['title'] . '</h1>';
    echo '<p>' . $post['body'] . '</p>';
} else {
    echo "Post not found.";
}
This pattern is fundamental for building "detail" pages in any web application. The video you've been watching has a perfect segment on this.
This final clip from the 'PDO Crash Course (PHP)' video shows exactly how to fetch a single post by its ID.
Watch from 28:38 to 31:21. Notice how fetch() is used without a loop to get just one record.
Conclusion
Great work! You have now learned how to retrieve data from a database using PHP PDO, which is a massive step towards your goal of building full web applications.
Key Takeaways:
- Use
$pdo->query()for simple, staticSELECTstatements with no variables. - For any query involving variables (like user input), always use the
prepare()->execute()workflow to prevent SQL injection. query()andprepare()both return aPDOStatementobject.- Use
fetch()(usually in awhileloop) orfetchAll()on the statement object to retrieve the data. - Fetch modes (
PDO::FETCH_ASSOC,PDO::FETCH_OBJ, etc.) control the format of the returned data, giving you flexibility in how you work with it.
Preview of the Next Lesson:
We've focused on SELECT queries today. In the next lesson, we will continue with prepared statements, but this time we'll learn how to use them to safely perform INSERT, UPDATE, and DELETE operations. This will complete your ability to perform all fundamental CRUD (Create, Read, Update, Delete) actions on your database.