Hello! In our last lesson, you created a concise, professional game plan document tailored for the coaching staff. Now, it's time to translate that plan for its most important audience: the players.
This lesson focuses on the learning outcome: Structure and produce a short video presentation to brief players on the set piece plan. We will adapt the strategic information from your game plan document into a dynamic, visual format. While the core information is the same, the delivery method must change significantly to ensure every player understands their specific role and is ready to execute it on match day.
1. The Player's Perspective: Principles of an Effective Briefing
Your audience is no longer a fellow coach who thinks in systems and high-level strategy. Your audience is now a group of players who need to know: "What do I have to do?" and "Why are we doing it this way?"
An effective player briefing is built on three pillars: brevity, clarity, and engagement.
- Brevity: Players have limited attention spans, especially in team meetings. Information overload is a real risk.
- Clarity: The message must be unambiguous. Visuals are key here.
- Engagement: The presentation must be professional and hold their attention to build confidence in the plan.
Let's ground these principles in professional practice.
Observing and Analysing Sport Using Video Analysis Software
The article 'Observing and Analysing Sport Using Video Analysis Software' provides research-backed reasons for keeping briefings short and focused.
Read the section starting 'Sharing data and video together seems to be the best way...'. Pay close attention to the recommended duration for a video debriefing and the statistic about how little information players retain. This highlights why your presentation must be ruthlessly efficient.
As the article notes, a debriefing should ideally last less than 20 minutes. With players retaining less than 20% of what's presented, your job is to make sure the most critical 20% sticks.
This is not just about post-match review; it applies directly to pre-match briefings. To see how this is managed in an elite environment, let's look at the workflow at a professional club.
Notts County FC • Video analysis and using @bepro_sport to improve players
The following video with Notts County FC's staff shows how they use video analysis throughout the match week, including pre-match briefings.
Watch the section from 00:19 to 01:05 to understand how video is used in the immediate pre-match context. Then, watch from 07:57 to 09:26 to see how they distribute specific clips to individuals and units, ensuring the information is targeted and digestible.
The key takeaways from these professional insights are:
- Use a mix of animated diagrams and real video clips.
- Keep the main team meeting short and to the point.
- Follow up with individual or unit-specific clips sent directly to players.
2. Structuring Your Video Presentation
A well-structured video tells a clear story. Drawing from the game plan document you created, a logical flow for a pre-match set piece briefing would be:
- Title Slide: Clear and simple (e.g., "Set Piece Plan vs. [Opponent]").
- Attacking Principles: One key message. What is our main goal when we have a set piece? (e.g., "Attack the far post space"). Show a diagram.
- Attacking Corner Routine:
- An animated diagram of the primary routine.
- A short video clip of the opponent's defensive weakness you are targeting.
- (Optional but powerful) A clip of your team successfully executing a similar movement in training.
- Defensive Principles: One key message. What is our number one priority in defence? (e.g., "Nullify their #9 and win the first contact").
- Defensive Corner Setup:
- An animated diagram showing the team's hybrid/zonal/man-marking setup.
- A short video clip of the opponent's most dangerous attacking routine. Use telestration to highlight their key player's movement.
- Key Individual Roles: A final summary slide reminding specific players of their critical tasks (e.g., "Player X: You are marking #9 on all corners," "Player Y: You are the primary blocker.").
This structure is concise and directly supports the principles outlined in the following resource.
10 Tips for Creating Better Sports Video Presentations with Nacsport
The article '10 Tips for Creating Better Sports Video Presentations' offers excellent advice on structure and content.
Read 'Tip 1. Keep Your Objectives Clear and Remember Your Audience', 'Tip 2. Define the Structure of the Presentation', 'Tip 4. Add More Elements to Augment Presentations', and 'Tip 9. Find the Right Length'. These tips reinforce the structure we've just outlined.
3. How to Produce Your Presentation
Now for the practical part. You don't need expensive, complex software to create a professional-looking presentation. Tools like Microsoft PowerPoint or Apple Keynote are powerful enough if you know how to use them.
The following video is a step-by-step tutorial on how to use PowerPoint for exactly this purpose. We'll break it down into key production stages.
How to do Opposition Analysis Presentations for Football - Using PowerPoint
This detailed tutorial from The Inverted Fullback will guide you through the technical process of building your presentation.
You will watch this video in sections as we go through the production steps below. For now, just have it ready.
Step 1: Set Up Your Tactical Board
First, you need a canvas. Start by setting a football pitch as your background and creating simple, clear icons for players.
Action: Watch the first part of the tutorial (00:13 - 03:07). This covers:
- Setting a pitch image as the slide background.
- Creating player icons using shapes, team kits, and adding numbers.
Step 2: Animate Your Routines
This is where your static diagrams come to life. You need to show player movements and the ball's trajectory clearly.
Action: Watch the animation section of the tutorial (03:40 - 05:35). Focus on:
- The 'Morph' transition to show overall team shape changes between slides.
- Custom path animations to show specific player runs and the path of the ball.
This is how you bring a diagram like the one below to life, showing exactly how the attacking players move to create space.

Step 3: Add Tactical Details and Telestration
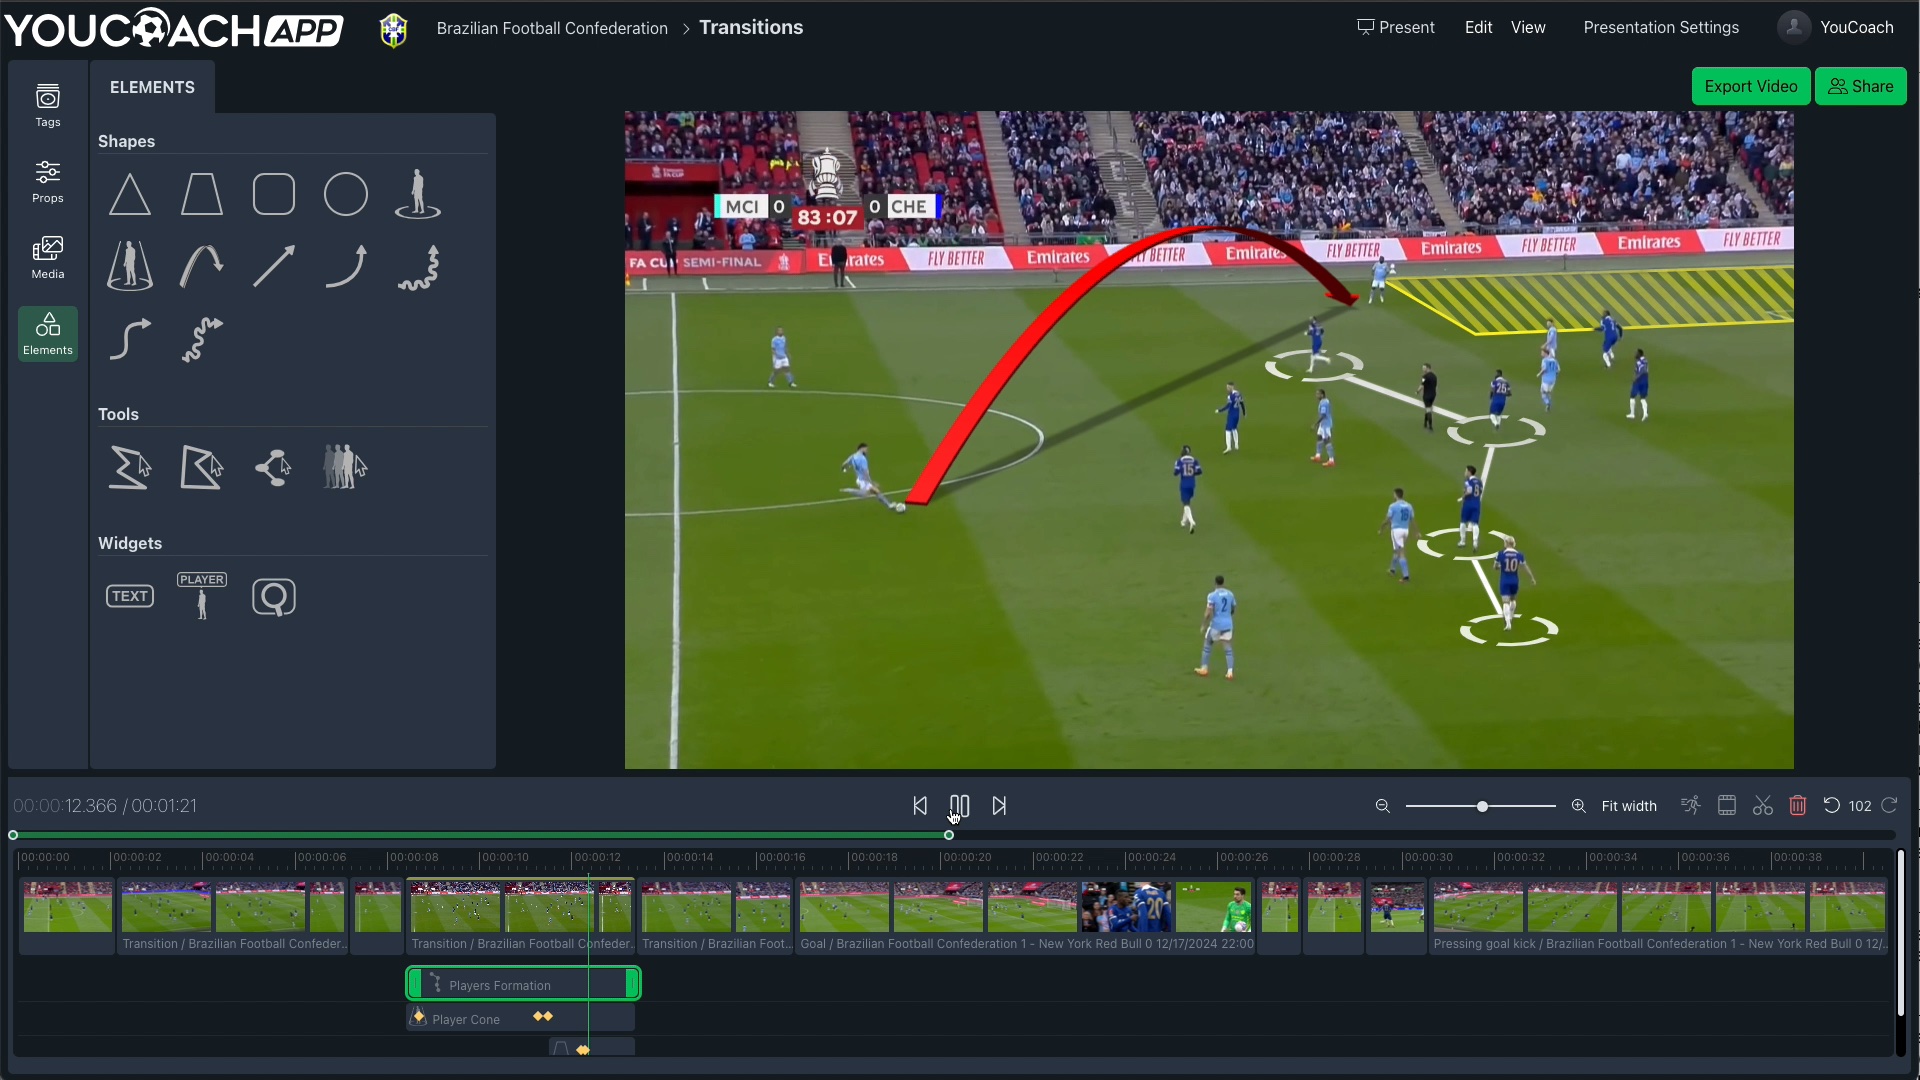
Use shapes and lines to highlight key tactical elements, just as you would on a physical whiteboard. This is often called "telestration."
Action: Watch the next segment of the tutorial (05:35 - 07:25). This shows you how to:
- Add tactical lanes or zones.
- Layer shapes so players appear "on top" of the zones.
- Draw circles to highlight a specific player or a 2v1 situation.
Remember the advice from the Bepro article: use these tools to simplify the message, not to add clutter. A few clear lines are better than a dozen confusing ones.
Step 4: Embed Match Footage
This is the most critical step. Your analysis and claims about the opposition are validated when you show players the proof.
Action: Watch the final relevant part of the tutorial (07:25 - 08:39). Learn how to:
- Insert a video clip (e.g., a saved clip of an opponent's corner).
- Set the video to play in full screen when clicked.
This allows you to seamlessly switch from your animated diagram of the routine to the real-world example of the weakness you're exploiting, creating a powerful one-two punch of information.
Conclusion
You now have the principles and the practical skills to transform a text-based game plan into a compelling video presentation for players. This is a core competency for any modern set piece coach, bridging the gap between complex analysis and clear, on-field execution.
Key Takeaways:
- Player briefings must be different from staff briefings: Prioritise brevity, visual clarity, and a focus on individual roles.
- Structure your video logically: Move from general principles to specific routines, always linking your plan back to an opponent's tendency.
- Combine animated diagrams and real video: Use animations to teach your routine and opponent footage to provide the "why."
- Master the tools: Basic presentation software is powerful enough to create professional-level briefings if you use features like animation and video embedding effectively.
Preview of the Next Lesson:
Your pre-match preparation is now complete. You have a plan documented for the staff and a video briefing ready for the players. But what happens when the opponent does something unexpected during the game? In our next and final lesson of this module, we will address how to identify potential in-game tactical adjustments for set piece situations, moving you from planner to reactive, in-game problem solver.