Welcome back! In our first lesson, we explored the "why" behind learning C, establishing its crucial role in everything from embedded systems to high-performance computing. You now have a conceptual map of what a programming language is and why C is the perfect starting point for your goals. Today, we transition from theory to practice.
This lesson is about setting up your digital workshop. To build anything, a craftsperson needs their tools. For a C programmer, the two most essential tools are a code editor and a compiler. By the end of this session, you will have installed and configured both on your computer, making you ready to write, compile, and run your very first C program. This setup process can sometimes be a hurdle for beginners, but we'll walk through it methodically, ensuring you understand not just what to do, but why you're doing it.
The Programmer's Workshop: Editor and Compiler
Before we install anything, let's clarify what these two tools are for. Imagine you're a chef with a brilliant new recipe (your C code).
Set Up C Development Environment: Complete 2025 Guide
This article from SyntaxPathways uses a great analogy to explain the components of a development environment. It will help you build a mental model of how your tools work together.
Read the section "What Exactly Is a C Development Environment?". Pay close attention to the roles of the three components: the text editor, the C compiler, and the runtime environment.
To summarize that excellent analogy:
-
Code Editor (Your Kitchen Counter & Notebook): This is where you write your code. We'll use Visual Studio Code (VS Code), a modern, powerful, and highly popular editor. It's like a smart notebook that highlights your ingredients, suggests corrections, and keeps everything organized.
-
C Compiler (Your Translator): This is the most crucial tool. It translates your human-readable C code into the binary machine code that your computer's processor can actually execute. We'll install the GCC toolchain (or its close relative, Clang on macOS), which is the industry standard.
-
Terminal (Your Stage): This is the command-line interface where you'll instruct the compiler to do its job and where your compiled programs will run. VS Code has a handy integrated terminal, so you can do everything in one place.
Now, let's start building your workshop, beginning with the code editor.
Step 1: Installing Visual Studio Code (The Editor)
VS Code is our editor of choice because it's free, runs on every major operating system, and has a massive ecosystem of extensions that make it incredibly versatile.
First, download the correct installer for your operating system.

Set Up C Development Environment: Complete 2025 Guide
This guide provides a clear walkthrough for installing VS Code and the one essential extension we need.
Follow the instructions in the section titled "Installing VS Code for C Programming". Focus on two key parts: Step 1: Download and Install VS Code: Go to the official website and run the installer. The default options are perfectly fine. Step 2: Essential C/C++ Extension: Once VS Code is open, you must install the extension that teaches it how to understand C. Follow the instructions to find and install the "C/C++" extension from Microsoft.
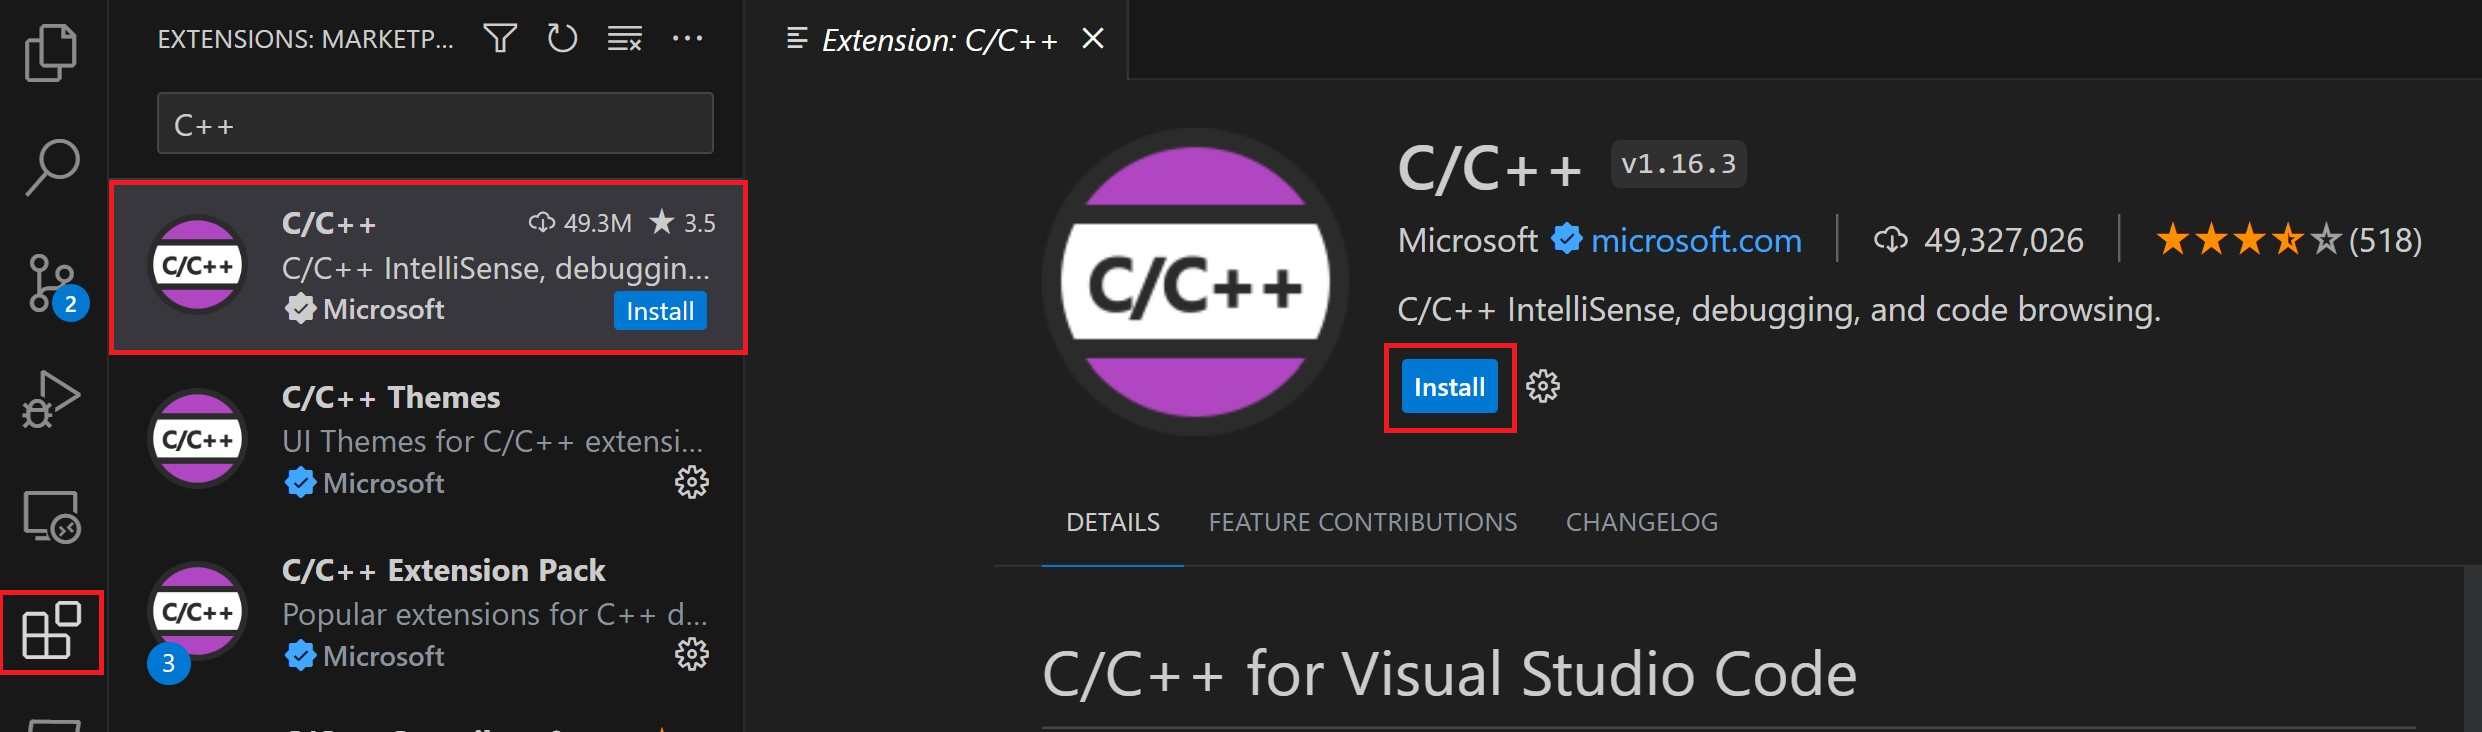
With VS Code and the C/C++ extension installed, your "notebook" is ready. Now for the most important part: the compiler.
Step 2: Installing the C Compiler Toolchain
This is the make-or-break moment where many beginners get stuck. The process is different depending on your operating system, so please follow the section that applies to you. We'll be installing the GCC (GNU Compiler Collection), or its macOS equivalent, Clang.
The video below gives a good overview of the process for all three operating systems before we dive into the specific text-based instructions.
Start C programming in 15 minutes! ⚙️
This video from Bro Code quickly demonstrates how to check if you already have a compiler and provides the one-line commands for installation on Mac and Linux.
Watch the segment from the overview that covers checking for an existing compiler and the installation commands for Mac and Linux. You can skip the Windows part in the video, as we will follow a more modern text guide for that.
Now, let's follow the detailed, step-by-step instructions for your system.
Set Up C Development Environment: Complete 2025 Guide
This is the most critical part of the setup. This guide provides the best and most up-to-date instructions for each operating system. Please read only the section for your operating system (Windows, macOS, or Linux).
Find the section titled "How to Install GCC Compiler" and follow the instructions carefully for your specific OS: If you are on Windows: Follow the subsection "Install GCC Windows: Complete MinGW-w64 Setup". Use Method 1: MSYS2 (Recommended for 2025). This is the most complex installation, so follow each step precisely, especially the pacman command and adding the compiler to your system's PATH. If you are on macOS: Follow the subsection "macOS: Installing Command Line Tools". This is the simplest installation; it's a single command that you run in the Terminal. If you are on Linux: Follow the subsection "Linux: Using Package Managers". Find the command for your specific distribution (e.g., Ubuntu/Debian, Fedora, Arch) and run it.
A Crucial Note for Windows Users: The most common point of failure is correctly setting the PATH environment variable. This variable tells your computer's terminal where to find the gcc.exe compiler you just installed. If you miss this step or do it incorrectly, your system won't be able to find the compiler, and you'll see a "gcc is not recognized..." error. When the guide tells you to add C:\msys64\ucrt64\bin to your PATH, do it carefully and be sure to restart VS Code and any open terminals afterwards for the change to take effect.
Step 3: Avoiding Common Setup Mistakes
After helping countless beginners, the author of the SyntaxPathways guide has cataloged the most common frustrations. Reading this short section will help you sidestep these issues entirely.
Set Up C Development Environment: Complete 2025 Guide
This section is pure gold. It outlines the exact problems that trip up beginners and tells you how to avoid them.
Please read the entire section "Common Mistakes". Pay special attention to Mistake #1 (Not Restarting Terminal) and Mistake #4 (Forgetting File Extensions), as these are extremely common.
Conclusion
You've made it through the most technical, and often most frustrating, part of learning to program. Let's recap what you've accomplished:
- You've learned that a C development environment consists of a code editor (to write code) and a compiler (to translate it for the computer).
- You installed Visual Studio Code, a professional-grade editor, and enhanced it with the official Microsoft C/C++ extension.
- You installed the appropriate C compiler toolchain for your operating system: MinGW-w64 for Windows, Clang for macOS, or GCC for Linux.
- You learned about common pitfalls, especially the importance of the PATH variable on Windows, and how to avoid them.
Your digital workshop is now fully equipped. You have all the tools necessary to transform your ideas into programs that your computer can run.
Preview of the next lesson: The setup is complete. It's time for your first "quick win." In the next lesson, you will write, compile, and run the traditional first program: "Hello, World!". We will use the tools you just installed to bring your code to life and then break down each line of the program to understand exactly how it works.