Introduction
In our previous lesson, we established the vocabulary of database access control by learning the GRANT and REVOKE commands. You now understand the syntax for assigning and removing permissions. Today, we transition from syntax to strategy. This lesson is a hands-on exercise in applying the Principle of Least Privilege (PoLP), a cornerstone of cybersecurity that you are already familiar with from your work as a security analyst.
Our objective is to configure a database user for a sample application, granting it only the precise permissions required for its function—no more, no less. This is a fundamental task for both securely deploying new applications and for hardening existing systems. By the end of this lesson, you will have a practical framework for creating minimally-privileged users, a skill that is directly applicable to database security, administration, and auditing.
Defining the Application Scenario
To apply PoLP effectively, you must first understand the application's requirements. Let's consider a hypothetical e-commerce application. This application interacts with a database named ecom_db which contains several tables, but for our user, we're concerned with three:
products: Contains product information like name, description, and price.customers: Stores customer profile data like name, email, and shipping address.orders: Holds records of customer purchases, linking customers to products.
The application user, which we will name app_user, needs to perform the following actions:
- Read product information to display on the website (
SELECTonproducts). - Read a customer's own profile information (
SELECToncustomers). - Allow a customer to update their own profile (
UPDATEoncustomers). - Create new orders when a purchase is made (
INSERTonorders). - Read a customer's order history (
SELECTonorders).
Crucially, this app_user should not have permission to:
- Change product prices (
UPDATEonproducts). - Delete customers or products (
DELETE). - Modify the database structure (
ALTER,DROP). - Access any other tables (e.g., a hypothetical
employeestable).
This detailed list of "cans" and "cannots" is our blueprint for crafting the GRANT statements.
Step 1: Creating the Application User
Before we can grant permissions, we need a user account. The syntax for creating a user varies slightly between database systems, but the concept is the same. The two most common open-source databases are MySQL and PostgreSQL.
In MySQL, user accounts are tied to a host, which specifies where the user can connect from. This is a powerful, built-in network access control feature. For example, 'app_user'@'localhost' can only connect from the server itself, while 'app_user'@'%' can connect from any IP address. For security, it's always best to be as specific as possible.
How to Create a MySQL User and Grant Privileges (Step-by-Step)
This article from DigitalOcean provides a clear guide to user management in MySQL.
Focus on the section "Creating a New User". Pay close attention to the CREATE USER 'username'@'host' IDENTIFIED BY 'password'; syntax and the explanation of different authentication plugins.
In PostgreSQL, the concept is called a "role". A role can be a user, a group, or both. A role that can log in is effectively a user.
Use Roles and Permissions in PostgreSQL on a VPS
This comprehensive DigitalOcean guide explains PostgreSQL's powerful role-based access control system.
Read the section "Creating and Managing Roles". Note how CREATE ROLE role_name WITH LOGIN; is used to create a user, and that CREATE USER is simply an alias for this.
For our scenario, let's assume we are creating a local application user. The commands would be:
MySQL:
CREATE USER 'app_user'@'localhost' IDENTIFIED BY 'a_very_secure_password';
PostgreSQL:
CREATE ROLE app_user WITH LOGIN PASSWORD 'a_very_secure_password';
(or simply CREATE USER app_user WITH PASSWORD 'a_very_secure_password';)
Step 2: Granting Minimal Privileges
With our app_user created, we can now execute the core task of this lesson: granting the precise permissions identified in our scenario. We will build our GRANT statements piece by piece.
Based on our blueprint:
- Allow reading from the
productstable. - Allow reading and creating
orders. - Allow reading and updating
customers.
This translates to the following SQL commands:
For MySQL:
-- Grant permissions on the products table
GRANT SELECT ON ecom_db.products TO 'app_user'@'localhost';

-- Grant permissions on the orders table
GRANT SELECT, INSERT ON ecom_db.orders TO 'app_user'@'localhost';

-- Grant permissions on the customers table
GRANT SELECT, UPDATE ON ecom_db.customers TO 'app_user'@'localhost';
For PostgreSQL, there's an additional layer of security. You must also grant permission to connect to the database itself and to use the schema where the tables reside. This is an excellent example of granular control.
-- 1. Grant permission to connect to the database
GRANT CONNECT ON DATABASE ecom_db TO app_user;

-- 2. Grant permission to use the 'public' schema (or whichever schema tables are in)
GRANT USAGE ON SCHEMA public TO app_user;

-- 3. Grant the specific table-level privileges
GRANT SELECT ON products TO app_user;
GRANT SELECT, INSERT ON orders TO app_user;
GRANT SELECT, UPDATE ON customers TO app_user;
The following readings provide complete, real-world examples of setting up minimally-privileged roles for different use cases.
Use Roles and Permissions in PostgreSQL on a VPS
Let's look at a complete workflow for a typical web application user in PostgreSQL from the DigitalOcean tutorial.
Please review the section "Example: Setting Up a Web Application Role". This reinforces the multi-step process in PostgreSQL: granting CONNECT, USAGE, and then specific table privileges.
How to Create a MySQL User and Grant Privileges (Step-by-Step)
This FAQ from the MySQL guide gets straight to the point.
Read the short section titled "How do I create a MySQL user with limited privileges?". It shows a concise example of granting a limited set of privileges on a specific database.
Notice the stark contrast between these surgical GRANT statements and the dangerous GRANT ALL PRIVILEGES ON *.*. An attacker who compromises our app_user can only perform the specific actions we've allowed, drastically limiting the potential damage.
Step 3: Verifying the Configuration
As a security analyst, you know that configuration must always be followed by verification. How do we confirm that our app_user has the correct permissions and, just as importantly, lacks the incorrect ones?
We can do this in two ways:
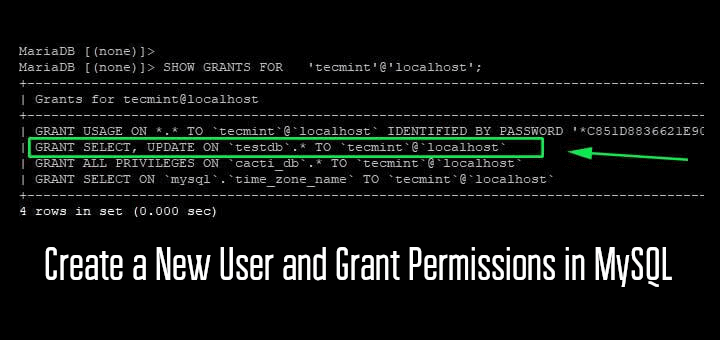
- Audit the grants: Use
SHOW GRANTS FOR 'app_user'@'localhost';(in MySQL) or\z table_name(in PostgreSQL) to inspect the applied permissions. - Test the user: Log in as the
app_userand attempt to perform allowed and disallowed actions. This is a practical, hands-on way to confirm your security posture.
The following video demonstrates this verification process perfectly. The instructor creates a user, grants SELECT, and then logs in as that user to show that SELECT works but INSERT fails. This is exactly the kind of testing you would perform.
Grant and Revoke SQL Statements | SQL Tutorials
The video "Grant and Revoke SQL Statements" by iNeuron Intelligence provides an excellent step-by-step demonstration of this entire workflow.
Please watch the following segments to see the process in action: First, the instructor creates a new user. Next, they log in as this user and show that it has no access to any databases by default. This confirms the "default deny" principle. Then, they log back in as the admin and grant SELECT permission on a specific table. Finally, they log in as the user again to verify the permissions. They show that a SELECT query now succeeds, but an INSERT query fails with a "command denied" error. This is PoLP in action.
This testing loop—configure, then verify—is a critical habit for ensuring security policies are correctly implemented.
Conclusion
In this lesson, you moved from theory to practice, applying the Principle of Least Privilege to a realistic database security task. You learned to translate application requirements into a specific set of minimal permissions and implement them using the CREATE USER and GRANT commands.
Key Takeaways:
- Define Requirements First: Before writing any SQL, clearly define what actions a user must be able to perform.
- Create a Dedicated User: Always create a separate, unprivileged user for your applications. Never use the
rootorpostgressuperuser. - Grant Surgically: Assign permissions on the most specific objects possible (e.g., a table, not the whole database) and grant only the necessary privileges (
SELECT,INSERT, etc.). - Verify Everything: After configuring permissions, always test them by logging in as the new user and attempting both allowed and disallowed actions.
- Database Nuances Matter: Be aware of system-specific requirements, such as PostgreSQL's need for
CONNECTandUSAGEgrants.
You are now equipped to create secure user accounts that significantly reduce your application's attack surface. In the next lesson, we will flip the script. Instead of creating a secure configuration, you will learn how to "Audit a database configuration to identify and document overly permissive access settings," putting on your security analyst hat to find and flag vulnerabilities in an existing system.