Welcome back! In our previous lesson, we prepared your Excel environment for automation by enabling the Developer tab and discussing the critical macro security settings. You now have the keys to the automation engine, and today, we're going to turn the ignition for the first time.
This lesson directly addresses your goal of learning to automate repetitive work. We will focus on using the Macro Recorder, a fantastic tool that watches your actions in Excel and writes the automation script for you. You will record your first macro to automate a simple, repetitive formatting task—a common requirement when preparing raw data for financial analysis. This is your first practical step from being a user who tells Excel what to do one step at a time, to a professional who teaches Excel how to do the work on its own.
The Macro Recorder: Your Personal Scribe
Before you start writing complex code, Excel provides an incredibly useful tool called the Macro Recorder. Think of it as a scribe that meticulously notes down every click and keystroke you make, and then translates those actions into Visual Basic for Applications (VBA) code.
This process allows you to create powerful automations without writing a single line of code yourself. For an accountant, this could mean recording the process of formatting a freshly exported trial balance, cleaning up a sales data dump, or preparing a standard header for a monthly report.
The "Record Macro" button is located in the "Code" group on the Developer tab, which you enabled in our last session.

The Recording Process: From Clicks to Code
Recording a macro involves four simple steps: start, record, stop, and test. Before you begin, it's wise to plan the exact sequence of actions you want to automate. Any mistakes or unnecessary steps you make during the recording will be included in the macro.
This article from Microsoft Support provides a great overview of the process.
This official guide clearly outlines the steps for recording a macro and introduces the dialog box you'll use to configure it.
Read the introduction to see a relevant accounting example. Then, focus on the step-by-step instructions under the heading Record a macro. Pay attention to the options available when you first start recording.
When you click "Record Macro," a dialog box appears. This is where you configure your macro's identity.
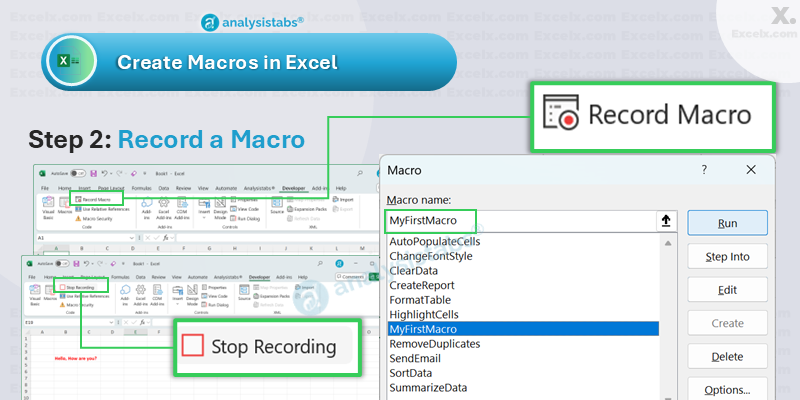
Let's break down these options, which are crucial for organizing your automated tasks.
Kickstart Excel Macros: 3 Steps to Boost Productivity
This article, written with finance professionals in mind, gives excellent context for each setting in the Record Macro dialog box.
Please read the section from Step 1 to Step 2. Focus on understanding the three choices for where to store your macro: This Workbook, New Workbook, and the Personal Macro Workbook.
For now, we will store our macros in This Workbook. The Personal Macro Workbook is a powerful concept we will revisit later; it's a hidden file where you can store macros that you want to be available in any Excel file you open.
A Critical Skill: Recording for Dynamic Data
In accounting, you rarely work with data that is the same size every time. A list of daily transactions, an inventory report, or an accounts payable ledger will have a different number of rows each time you run the report. If you record a macro that is only set up to work on, say, 100 rows of data, it will fail when you have 150 rows.
This is the most common pitfall for beginners. The key to creating robust, reusable macros is to record your actions in a way that accommodates a variable amount of data. The secret? Use keyboard shortcuts instead of the mouse to select your data ranges.
The following video from Leila Gharani is one of the most important you will watch. It brilliantly demonstrates the "wrong way" (static selection) and the "right way" (dynamic selection) to record a macro.
How to Create & Use Excel Macros (Real world example)
This video provides a clear, real-world example of creating a chart from datasets of varying lengths. The principle it teaches is fundamental to all macro recording.
First, watch the demonstration of the wrong way to record, from this section. Here, the data is selected by dragging the mouse. Next, see why this is wrong when the macro is run on a larger dataset from this clip. Now, watch the correct way to record from this part. Notice the use of keyboard shortcuts: Ctrl+Shift+Down and Ctrl+Shift+Right. This is the key takeaway. Finally, see the successful result when the new, correctly recorded macro is run on the larger dataset from this segment.
The core principle is to start at a known anchor point (like cell A1) and then use keyboard shortcuts to extend the selection to the end of the data, whatever that may be. This makes your macro flexible and truly useful for real-world accounting tasks.
Let's Record Your First Formatting Macro
Now, it's your turn to put this into practice. Let's imagine you have just exported a raw list of transactions and you want to quickly format it for better readability.
Your Task:
Create a new, blank Excel workbook. On Sheet1, enter the following simple data starting in cell A1:
| Date | Description | Account | Amount |
|---|---|---|---|
| 2024-05-01 | Office Supplies | 6150 | 150.75 |
| 2024-05-02 | Client Payment | 4100 | -1200 |
| 2024-05-03 | Internet Service | 6230 | 85 |
| 2024-05-04 | Software License | 6180 | 450 |
Now, you will record a macro named Format_Transactions to perform these steps:
- Make the header row (row 1) Bold.
- Apply the Accounting number format to the "Amount" column.
- AutoFit the width of all columns so the content is fully visible.
Follow these steps carefully:
- Click on cell A1. This is your anchor point.
- Go to the Developer tab and click Record Macro.
- In the dialog box:
- Macro name:
Format_Transactions(remember, no spaces!) - Store macro in:
This Workbook - Description:
Applies standard formatting to a transaction list.
- Macro name:
- Click OK. The recorder is now active.
- Select the header row: With A1 selected, press
Ctrl+Shift+Right Arrow. - On the Home tab, click the Bold button.
- Select the Amount column data: Click on cell D2, then press
Ctrl+Shift+Down Arrow. - On the Home tab, in the "Number" group, select "Accounting" from the dropdown.
- Select all columns: Click the column header for column 'A', hold
Shift, and click the column header for column 'D'. - On the Home tab, go to
Format > AutoFit Column Width. - Click on any cell, for example, F1, to deselect everything. This is good practice.
- Go to the Developer tab and click Stop Recording.
Congratulations! You have just recorded your first macro. To test it, you can undo all your formatting changes, go to a different sheet, paste the raw data again, and then we will run the macro in the next lesson.
Remember to save your file! As we covered previously, you must save it as an Excel Macro-Enabled Workbook (.xlsm) to keep your new macro.
How to Create & Use Excel Macros (Real world example)
As a final reminder, this short clip shows what happens if you try to save a standard .xlsx file and how to choose the correct .xlsm format.
Watch from this point. Always click "No" on the warning and change the file type.
Conclusion
In this lesson, you've transitioned from theory to practice by recording your first Excel macro. You have learned how to use the Macro Recorder to automate a sequence of actions, and critically, how to record those actions in a dynamic way that works on datasets of varying sizes—an essential skill for any accounting professional.
Key Takeaways:
- The Macro Recorder translates your mouse clicks and keystrokes into a reusable script.
- Always plan your steps before you start recording to avoid capturing errors.
- Use the Record Macro dialog box to name your macro, assign an optional shortcut, and decide where to store it.
- To create robust and flexible macros, use keyboard shortcuts (like
Ctrl+Shift+Arrow Keys) to select data ranges, not the mouse. - Always save workbooks with macros as
.xlsmfiles.
You now have a recorded macro waiting to be used. In our next lesson, we will explore the different ways you can run your macro, including assigning it to a button on your worksheet for true one-click automation.