Welcome to the next stage of your Excel automation journey. In our last two lessons, you mastered two fundamental VBA skills: looping through every worksheet in a workbook and dynamically finding the last row of a dataset. Today, we will combine these powerful techniques to achieve a task that is central to accounting and financial analysis: consolidating data from multiple sheets into one single master sheet.
Imagine you are a financial controller for a company with several regional offices. Each month, you receive a separate Excel sheet with sales data from "North," "South," and "East" divisions. Your first task is to combine all this data into one consolidated list to get a complete picture of company performance. Doing this by hand is not only tedious but also carries a high risk of copy-paste errors. This lesson will teach you how to build a VBA macro to perform this consolidation instantly and accurately.
By the end of this lesson, you will be able to write a macro that automatically gathers data from multiple worksheets and stacks it neatly in a designated summary sheet, handling details like headers and finding the correct place to paste new data every time.
The Strategic Blueprint for Consolidation
Before writing any code, it's essential to map out the logical steps our macro needs to perform. This process is like creating a flowchart for our automation.
- Prepare a Destination: We need a single worksheet, let's call it "Master," where all the consolidated data will live. Our macro should be smart enough to either create this sheet if it doesn't exist or clear it before running to ensure we start fresh.
- Iterate Through Source Sheets: The macro must loop through all worksheets in the workbook.
- Apply Exclusion Logic: During the loop, it needs to identify and skip the "Master" sheet itself. We don't want to copy data from the destination sheet back onto itself.
- Handle Headers Intelligently: A major challenge is avoiding duplicate headers. The headers from the first source sheet should be copied, but for all subsequent sheets, only the data rows should be copied.
- Copy the Source Data: For each valid source sheet, the macro will select the relevant block of data.
- Find the Next Empty Row: On the "Master" sheet, the macro will use the
End(xlUp)method you learned previously to find the first available empty row. - Paste and Repeat: The copied data is then pasted into this empty row, and the loop continues to the next sheet.
This sequence ensures a clean, robust consolidation every time.
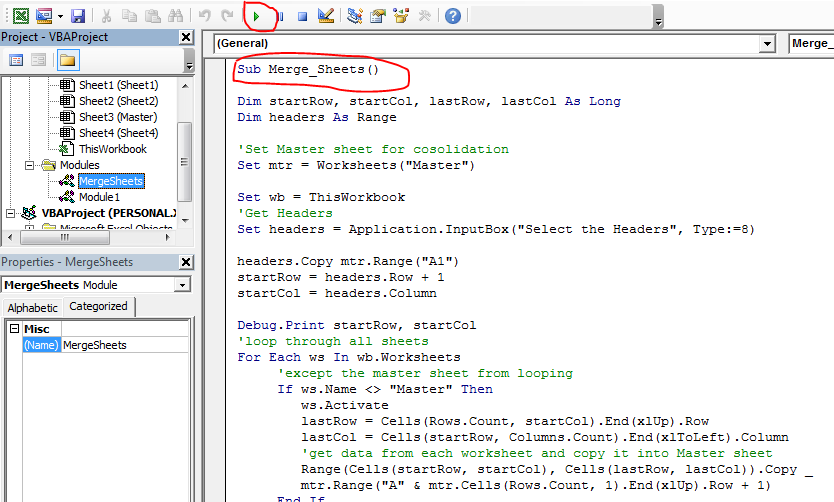
Building the Macro: Key VBA Techniques
Let's look at the core components of the VBA code required to execute our strategy. We'll combine concepts you've already seen with a few new tricks.
Looping and Skipping Sheets
First, we need the For Each...Next loop to go through the worksheets. Inside it, an If statement is crucial for making sure we don't try to copy data from our own destination sheet.
VBA to Consolidate data from Multiple Sheets - Excel VBA Example by Exceldestination
This video from Excel Destination provides a clear, step-by-step walkthrough of building a consolidation macro. Let's start with the foundational logic of the loop.
Please watch the segment from looping and skipping. The presenter explains how a For loop is used to iterate through all sheets and how an If statement inside the loop is used to exclude the "master sheet" from the operation. This is the basic control structure for our macro.
Copying Data and Managing Headers
The trickiest part is copying the headers only once. A clean way to do this is to have the macro check if it's processing the very first sheet in the loop. If it is, it copies the entire data range (including headers). If not, it copies the data range but offsets it by one row to exclude the header.
The Offset and Resize methods are perfect for this.
Range.Offset(1, 0): This refers to a range that is shifted down by one row and zero columns.Range.Resize(NumberOfRows, NumberOfColumns): This allows you to change the size of a range.
By combining them—sourceRange.Offset(1, 0).Resize(sourceRange.Rows.Count - 1)—we can select a range that starts from the second row and has one less row than the original, effectively selecting everything but the header.
Now, let's see a practical implementation of this logic.
How to Merge Multiple Excel Sheets into One Sheet with VBA
This article from Excel Insider contains a great code example that, despite a confusing title, merges sheets row-wise and correctly handles the header problem.
Please read the code provided under the section heading Merging Multiple Sheets Column-wise. Don't be confused by the heading; the code performs a row-wise merge. Focus on these key lines: The If i = 0 Then...Else...End If block. This demonstrates how to treat the first sheet differently. rng.Offset(1).Resize(rng.Rows.Count - 1).Copy. This is the exact technique used to copy data while skipping the header row on subsequent sheets. The line nextCol = mergedSheet.Cells(mergedSheet.Rows.Count, 1).End(xlUp).Row + 1. This is a direct application of the skill from our last lesson to find the next empty row on the destination sheet. Note that the variable is named nextCol but is being used to find a row number.
The Complete Consolidation Macro
Now, let's synthesize these concepts into a single, robust, and well-commented macro. This code is designed to be a reusable tool. It creates a master sheet named "Consolidated_Data", clears it, then loops through all other sheets, copying headers from the first valid sheet and only data from the rest.
Sub ConsolidateAllSheets()
    ' Purpose: Consolidates data from all other worksheets into a single
    '          "Consolidated_Data" sheet. It handles headers correctly.

    Dim ws As Worksheet
    Dim masterWS As Worksheet
    Dim destRow As Long
    Dim sourceRange As Range
    Const MASTER_SHEET_NAME As String = "Consolidated_Data" ' Use a constant for the name

    ' Turn off screen updating to make the macro run faster and smoother
    Application.ScreenUpdating = False

    ' --- STEP 1: PREPARE THE MASTER SHEET ---

    ' Check if the master sheet already exists.
    ' We use "On Error Resume Next" to prevent an error if the sheet doesn't exist.
    On Error Resume Next
    Set masterWS = ThisWorkbook.Sheets(MASTER_SHEET_NAME)
    On Error GoTo 0 ' Reset error handling

    ' If the sheet doesn't exist (masterWS is Nothing), create it at the end.
    If masterWS Is Nothing Then
        Set masterWS = ThisWorkbook.Sheets.Add(After:=ThisWorkbook.Sheets(ThisWorkbook.Sheets.Count))
        masterWS.Name = MASTER_SHEET_NAME
    End If

    ' Clear all previous data and formatting from the master sheet.
    masterWS.Cells.Clear

    ' --- STEP 2: LOOP, COPY, AND PASTE DATA ---

    ' Loop through every worksheet in the current workbook.
    For Each ws In ThisWorkbook.Worksheets

        ' Make sure the current sheet is not the master sheet itself.
        If ws.Name <> MASTER_SHEET_NAME Then
            ' Define the source data range. .UsedRange is a good general starting point.
            Set sourceRange = ws.UsedRange

            ' Only proceed if the source sheet actually has data.
            If Not sourceRange Is Nothing And sourceRange.Rows.Count > 0 Then

                ' Find the last-used row in Column A of the master sheet.
                destRow = masterWS.Cells(masterWS.Rows.Count, "A").End(xlUp).Row

                ' Logic to handle the header row.
                If destRow = 1 And IsEmpty(masterWS.Range("A1")) Then
                    ' Case 1: Master sheet is empty. Copy the entire source range (with headers).
                    sourceRange.Copy Destination:=masterWS.Range("A1")
                Else
                    ' Case 2: Master sheet already has headers. Find the next empty row.
                    destRow = destRow + 1

                    ' Copy the source range, but offset by 1 row to skip the header.
                    sourceRange.Offset(1, 0).Resize(sourceRange.Rows.Count - 1).Copy Destination:=masterWS.Range("A" & destRow)
                End If

            End If
        End If
    Next ws

    ' --- STEP 3: FINALIZE ---

    ' AutoFit the columns on the master sheet for better readability.
    masterWS.Columns.AutoFit

    ' Turn screen updating back on.
    Application.ScreenUpdating = True

    ' Let the user know the process is complete.
    MsgBox "Data consolidation is complete. See the '" & MASTER_SHEET_NAME & "' sheet."

End Sub
This macro effectively automates the entire consolidation process. By combining looping, conditional logic, and the dynamic End(xlUp) method, you've created a powerful tool that can save hours of manual work and eliminate costly errors.

Conclusion
In this lesson, you have successfully combined several VBA skills to build a practical and powerful automation tool. You have learned how to create a macro that consolidates data from multiple sources into a single master sheet—a task fundamental to financial reporting and analysis.
Key Takeaways:
- A robust consolidation macro requires a clear logical plan: prepare a destination, loop through sources, handle headers, find the next empty row, and paste.
- Use
If ws.Name <> "MasterSheetName" Thento prevent the macro from processing its own destination sheet. - Manage headers by using an
If/Elsestatement within your loop to treat the first paste operation differently from subsequent ones. - The
Range.Offset(1, 0).Resize(Range.Rows.Count - 1)combination is a powerful way to select a data range while excluding its first row (the header). - The
Cells(Rows.Count, "A").End(xlUp).Row + 1pattern is the essential component for dynamically stacking data blocks one after another without overwriting.
In our next lesson, we will build on this. Now that you can consolidate data into a single list, the next logical step is to compare it against another list to find differences. We will write a macro to perform a two-way reconciliation between two lists of transactions, an essential procedure for tasks like reconciling bank statements or intercompany accounts.