Hello! Welcome back to our Roblox game-making adventure. In our first lessons, you got to know the basic tools in Roblox Studio and learned how to create, move, resize, and color individual parts. That's like learning how to use toy building blocks. Today, we're going to start using those blocks to build something exciting: the actual obstacle course for your Obby!
Our goal for this lesson is to build the first section of your race track. We will create a series of floating platforms that you can jump between. We'll also learn how to make sure the jumps are not too hard or too easy. Finally, we'll lay down a giant floor underneath everything. For now, it will be a safety net, but later in the course, we'll turn it into a hazard that sends players back to their last checkpoint if they fall.
Let's get building!
Building the Platform Path
Every journey begins with a single step, and our Obby begins with a single platform. We'll start by making a starting area and then build a short jumping path from it. A great trick for building things quickly in Roblox Studio is to duplicate objects you've already made. This copies the part and all its properties, saving you a lot of time.
The video below from the AlvinBlox channel is a great demonstration of how to duplicate parts to create a simple jumping challenge.
🔥 How to Make an Obby on Roblox Studio | Beginners Scripting Tutorial 🎮
Watch this video to see how to duplicate a platform, move it to create a gap for a jump, and then repeat the process to build a short path.
Pay close attention to the section from this part of the video. You'll see how to right-click and duplicate (or use the shortcut Ctrl+D on Windows / Cmd+D on Mac) and then use the Move and Scale tools to position the new platforms.
Now, try it yourself!
- Create a
Partto be your starting platform. Use the Scale tool to make it large enough to stand on comfortably. - Create a smaller
Partfor the first jump. - Now, use the duplicate trick you just saw to create a path of 4-5 platforms.
The Most Important Rule: Anchoring
If you were to test your game right now, something strange would happen: all the new platforms you just built would fall out of the sky! This is because, by default, Roblox physics affects every new part. To make our platforms stay in the air, we need to anchor them.
The next video from CodeBro29 shows exactly what happens when you forget to anchor your parts and then how to fix it.
How to make your FIRST Roblox Game (Make Robux)
This short clip is a perfect reminder of why anchoring is so important.
Watch from the beginning of the clip to see the parts fall, and then see how to select multiple parts at once (by holding the Shift key while clicking) and anchor them all with a single click.
After watching, make sure all the platforms you've created are anchored. You can select a part and look in the Properties window to see if the Anchored box is checked, or you can use the Anchor button in the toolbar.
For a quick reference, the guide below shows a picture of the Anchor button.
Create-Your-First-Civil-and-Safe-Game. ...
This document shows a clear image of the Anchor button in the toolbar.
Read the section Anchoring Parts In Place. Notice the picture that shows what the button looks like when a part is anchored (highlighted) versus not anchored.
Making the Jumps Just Right
Now that you have an anchored path, how do you know if a player can actually make the jumps? The only way to know for sure is to test it!
Press the Play button to jump into your game and try running through your course.
- Can you make all the jumps?
- Is one of them too far?
- Is one of them so easy it's not fun?
This is a huge part of being a game designer: playing your own game and making adjustments. If a jump is too hard, click Stop, use the Move tool to bring the platform a little closer, and then Play again to test it. Keep adjusting and testing until your path feels good to play.
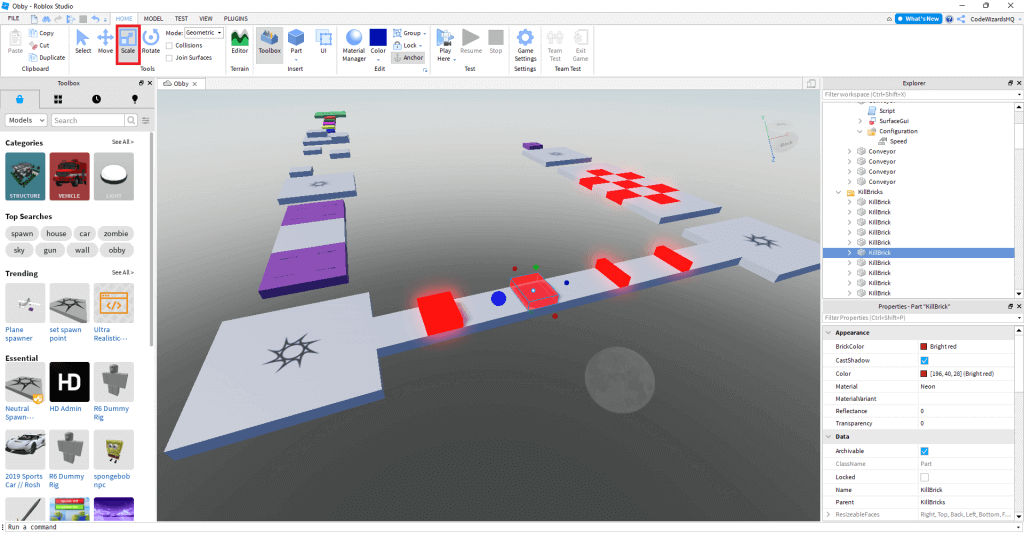
Later, you might want to change how high or far players can jump. These settings are found in the game's 'World' properties, but for now, we'll stick with the default jump power.

The Hazard Floor
What happens if a player misses a jump? They fall forever! We need to build a floor underneath our course to catch them. In a future lesson, we will write a script to make this floor a "hazard" (like lava or acid) that resets the player to their last checkpoint. For today, we just need to build the floor itself.
- Insert a new
Partinto the Workspace. - Use the Move tool to position it below your jumping platforms.
- Use the Scale tool to make it very, very wide and long, so it covers the entire area under your course. You can make it fairly thin.
- Change its
ColorandMaterialin the Properties window. A bright red or orange with theNeonmaterial is a classic choice for a hazard floor. - Most importantly: don't forget to Anchor it!
The idea of using a single large part for a hazard floor is a common technique in many Obby games.
How to Make a Roblox Obby (2026): Full Build + Working Scripts
This article mentions how to create a hazard floor. We won't add the script today, but the building idea is what we need.
Find the section "Step 3: Add Kill Bricks / Lava" and read the paragraph that starts with this sentence. It confirms our idea of using one big part. You can ignore the parts about scripting for now.
Key Takeaways
Great work today! You've taken the basic skill of creating parts and used it to build the foundation of your game's first level.
Here’s what we accomplished:
- We built a traversable platform path using the Move, Scale, and Duplicate tools.
- We learned the critical importance of Anchoring parts to stop them from falling.
- We saw how to Play test our course to make sure the jump distances are fair.
- We created a large hazard floor that is now ready for scripting in a later lesson.
Next Time
Our Obby now has a path, but it doesn't have a start or a finish, or the special gates that make your game unique. In our next lesson, we will add all of those key elements, placing the five checkpoint gates and setting up the victory area for players who complete the race. See you then