Hello and welcome back! Last time, you did an amazing job building the first part of your Obby's race track, creating a path of platforms and a big floor underneath. It's like you've built the basic roads for a city. Today, we're going to add the important landmarks: the starting line, the finish line, and the five special gates that players must pass through.
Our goal in this lesson is to place all the key areas of your game in the right order. We'll set up a proper SpawnLocation for players to start, build five visually unique gates to act as checkpoints, and create a finish pad leading to a final victory area. For now, these will just be physical objects, but placing them correctly is the essential next step before we can bring them to life with scripts.
Let's get our race course organized!
The Starting Line
Every race needs a starting line. In Roblox, the place where players first appear in your game is called a SpawnLocation. Your project probably started with one, a grey block with a spiral logo on it. Our first job is to make sure it's positioned correctly at the very beginning of the platform path you built in our last lesson.
If you can't find your SpawnLocation, don't worry! You can easily add a new one from the Toolbox.
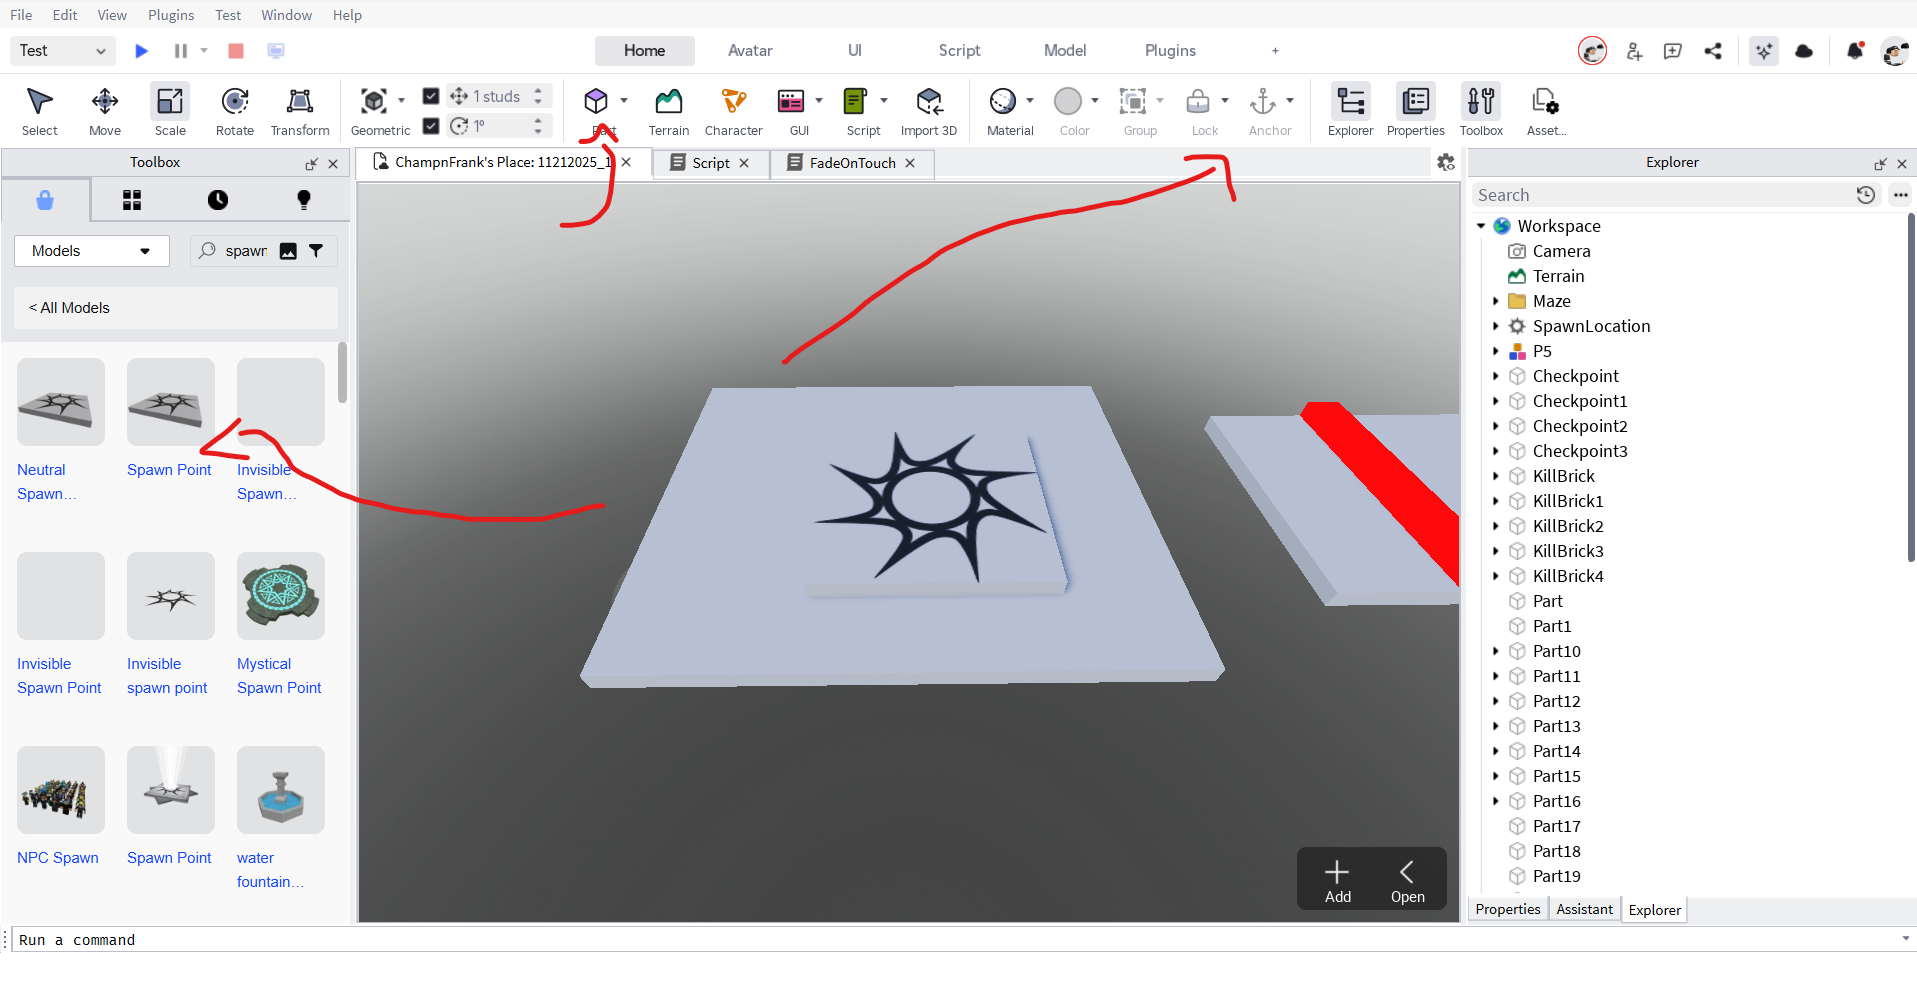
Now, let's place it.
- Find the
SpawnLocationin your game. If you need to add one, just search for "Spawn Point" in the Toolbox and drag one into your world. - Use the Move tool to place it right at the beginning of your Obby course, before the first jump. This is where every player will begin their journey.
- Optional: You can customize it! Select the
SpawnLocation, go to the Properties window, and find theDecalinside it in the Explorer. You can delete the decal to remove the spiral logo. You can also change theSpawnLocation'sBrickColoror make it transparent by setting itsTransparencyto 1.
Having one main SpawnLocation is the standard way to start an Obby.
How to Make a Roblox Obby (2026): Full Build + Working Scripts
This guide explains why having a single starting point is important.
In the section "Step 1," read the short paragraph about the SpawnLocation to understand its role as the official start of your game.
Building Your Five Checkpoint Gates
Now for the most important part of your game: the five gates! Later, we will write scripts so that players have to pass through these gates in the correct order. For today, our job is just to build them and place them.
It's a great idea to make each gate look different so players can easily tell them apart. You could use different colors, materials, or even slightly different shapes.
Let's start by building Gate 1.
- Place your first gate a few jumps after the
SpawnLocation. You can build it however you like! A simple arch is a great start: create two tall, thinPartsfor the sides, and onePartacross the top. - Make it stand out. Change its
Colorto something bright. - Very Important: Make sure all parts of your gate are Anchored so they don't fall!
- Organize your work: In the Explorer window, select all the parts that make up your first gate, right-click, and choose "Group". Rename the new "Model" to
Gate1. This keeps your workspace tidy.
Now, repeat this process to build four more gates (Gate2, Gate3, Gate4, and Gate5). Place them along the platform path you built, with some jumping challenges between each one. Remember to make each one look unique!
The video below gives a nice example of creating a checkpoint part that looks special. You can use a similar idea for your gates.
How to make your FIRST Roblox Game (Make Robux)
Watch how the creator makes a checkpoint stand out visually. You can apply the same ideas to your gates.
Focus on the part where a simple block is turned into a glowing green checkpoint pad. Watch from this section to see how color, material, and naming are used to define a special game object.
Using simple, named Parts for checkpoints is a powerful technique that gives us full control when we start scripting.
How to Make a Roblox Obby (2026): Full Build + Working Scripts
This professional guide explains the best way to set up checkpoints for a game like ours.
Read the section titled "Why checkpoints must be Parts, not SpawnLocations". Focus on the main idea explained in the first paragraph: the reliable pattern. This is exactly what we are doing by building our gates as unique, named models.
The Finish Line and Victory Area
After a player passes through Gate 5, they should be near the end of the race. Let's build the final two areas.
- The Finish Pad: Create one more special
Partand place it after the last gate. This will be the finish line. You could make it a checkered pattern, give it aNeonmaterial to make it glow, or make it a different shape. Name this partFinishPadin the Explorer. - The Victory Area: Right after the
FinishPad, build a large, fun platform. This is where players who complete the Obby can hang out and celebrate. Be creative! You can make it a huge multi-colored dance floor or a peaceful garden. For now, just a large, anchored platform will do. We can decorate it more later.
Let's Review the Course
Your Obby now has a complete structure! Let's do a quick Play test to run through it. Click the Play button and check the following:
- Do you spawn at the
SpawnLocationat the start? - Can you run and jump along the path?
- Are the five gates placed in the correct order (1, 2, 3, 4, 5)?
- Is the finish pad and victory area at the very end?
Remember, touching the gates or the finish pad won't do anything yet. We're just checking that the physical layout of your race course makes sense.

Key Takeaways
Fantastic work today! You have successfully laid out the entire structure of your Obby game. This is like drawing the map for a treasure hunt before writing the clues.
Here’s a summary of what you've accomplished:
- You placed a
SpawnLocationto create a clear starting line. - You built and placed five visually distinct gates that will serve as our ordered checkpoints.
- You organized your gate parts into named Models in the Explorer, which is great practice.
- You created a finish pad and a victory area to give your race a proper ending.
Next Time
You've built the stage, and now it's time to learn how to make the magic happen. In our next lesson, we will dive into the world of scripting! We’ll look at our very first Luau script and discover how it can detect when a player touches a part. We'll connect these new ideas to concepts you may already know from Scratch, like events and variables. Get ready to bring your Obby to life