Hello! In our last lesson, we took our first steps into coding with Luau, the language of Roblox. We saw how scripts can react to events, like a part being touched, and how to use print() messages to see what our code is doing. This was a bit like using event blocks and variables in Scratch.
Today, we're going to use that new knowledge to create something you can see right in the game! We'll set up a visible counter to track each player's progress. Specifically, we will create a server script that gives every player who joins your game a "Checkpoint" number that starts at zero. This number will appear in a list on the side of the screen, which is the first big step toward building our Obby's checkpoint system.
What are Leaderstats?
In many Roblox games, you've probably noticed a list in the top-right corner of the screen that shows all the players in the game and their scores, cash, or level. This is called a leaderboard, and in Roblox, it's created using a special feature called leaderstats.

Let's start by watching a short video that explains what leaderstats are and why they are useful.
Playerstats - Roblox Beginners Scripting Tutorial #16 (2025)
Watch the beginning of the video "Playerstats" from the BrawlDev channel.
The creator gives a great overview of what leaderstats (or player stats) are and shows where they appear in the game. Watch the section from the introduction.
Our goal is to create a stat called "Checkpoint" that will show up right next to the player's name.
Creating the Leaderboard Script
Just like in our last lesson, we need a script to make things happen. This script will have one job: to set up the leaderboard for every player who joins the game. Because this needs to work for everyone in the game, we will put it in a special folder called ServerScriptService. Scripts in this folder run on the Roblox server, which manages the whole game.
- In the Explorer window, find ServerScriptService.
- Hover over it, click the ⊕ button, and select Script from the menu. You can rename this new script to something like "LeaderboardScript" so you remember what it does.
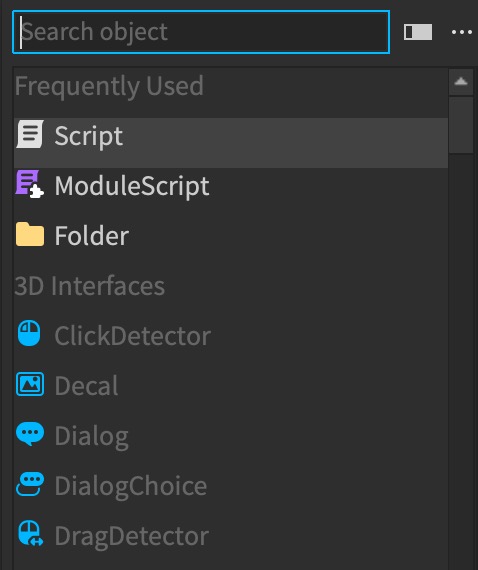
Now, let's learn how to write the code for this script. We'll use the official Roblox documentation as our guide.
In-experience leaderboards | Documentation - Roblox Creator Hub
This guide shows the fundamental steps to set up a leaderboard. We'll focus on creating the script and the special leaderstats folder.
Please read the first part of the guide. Focus on the code that sets up the leaderboard. Pay close attention to the name of the folder: leaderstats.
Understanding the Code
The code you just saw might seem a bit complex, but let's break it down. It follows a pattern we'll use a lot: Event → Function.
- The Event:
Players.PlayerAdded:Connect(...)
This is the event.PlayerAddedfires every single time a new player joins your game. Think of it like a "When player joins" block in Scratch. - The Function:
leaderboardSetup(player)
This is the block of code that runs when the event happens. Theplayerin the parentheses is a variable that automatically holds the information for the player who just joined.
Inside the function, we do two things:
local leaderstats = Instance.new("Folder")
This line creates a new, empty Folder object.leaderstats.Name = "leaderstats"
This is the most important step! We name the folderleaderstatsin all lowercase letters. Roblox automatically looks for a folder with this exact name to build the leaderboard.leaderstats.Parent = player
This line moves the newleaderstatsfolder and places it inside the player object, making it part of that specific player.
Adding the Checkpoint Counter
Now that we have the special leaderstats folder, we need to put our counter inside it. For this, we'll create another new object called an IntValue. As the name suggests, it's designed to hold an integer, which is a whole number like 0, 1, 5, or 100.
Let's add to our script.
In-experience leaderboards | Documentation - Roblox Creator Hub
This next section of the guide shows how to add a number value to the leaderboard. The example uses "Gold," but we will adapt it for our "Checkpoint" counter.
Read the section titled "Add stats". Notice how it creates an IntValue, gives it a name, sets its starting value, and parents it to the leaderstats folder.
The Complete Script
Let's combine everything we've learned into one final script. Open your LeaderboardScript in Roblox Studio and replace the default "Hello, world!" text with the code below. I've changed the names from the examples to match our Obby game.
-- Get the Players service, which manages all players in the game
local Players = game:GetService("Players")

-- This function will run for each player who joins
local function setupLeaderstats(player)
	-- Create a Folder to hold the stats
	local leaderstats = Instance.new("Folder")
	leaderstats.Name = "leaderstats" -- Must be named "leaderstats"
	leaderstats.Parent = player

	-- Create an IntValue to store the checkpoint number
	local checkpoint = Instance.new("IntValue")
	checkpoint.Name = "Checkpoint"  -- This name will appear on the leaderboard
	checkpoint.Value = 0            -- Start the player at checkpoint 0
	checkpoint.Parent = leaderstats -- Put it inside the leaderstats folder
end

-- Connect the function to the PlayerAdded event
Players.PlayerAdded:Connect(setupLeaderstats)
This script now does everything we need: when a player joins, it creates a leaderstats folder for them, and inside that folder, it places a number value named "Checkpoint" which starts at 0.
Test Your Game!
It's time to see our work in action.
- Click the Play button at the top of Roblox Studio to start a test session.
- Look at the top-right corner of your game window. You should see the player list with your name, a column titled "Checkpoint," and the number
0next to your name. - Click the Stop button.
If you start and stop the game multiple times, you'll see that the "Checkpoint" value always resets to 0. This is perfect for our Obby, as we want players to start from the beginning each time they play a new session.
To see how Roblox organizes this, you can even check the Explorer window while the game is running. Look for a folder named Players, expand it, and you'll find an object with your username. Inside that, you will find the leaderstats folder and your Checkpoint IntValue that our script created!
The video below quickly demonstrates the whole process, from creating the script to testing the result. It's a great way to confirm you've done everything correctly.
Playerstats - Roblox Beginners Scripting Tutorial #16 (2025)
This part of the "Playerstats" video shows the complete process. The creator uses "Coins" as an example, but the steps are identical to what we did for "Checkpoint".
Watch how the script is built from creating the folder and then how the number value is added from parenting it. The creator also shows you where to find the new objects in the Explorer window during the test.
Conclusion
Great work! You've just written a script that directly affects the player's user interface. This is a huge step forward.
Here are the key takeaways from today's lesson:
- Roblox has a built-in leaderboard system that works with a special folder named
leaderstats. - We use a script in
ServerScriptServiceto manage game-wide logic. - The
Players.PlayerAddedevent lets us run code for every player who joins the game. IntValueobjects are used to store and display whole numbers on the leaderboard.
In our next lesson, we will make our Obby interactive. We'll give each of our five gates a number and write a script that checks if a player touches them in the correct order. When they do, we'll update the "Checkpoint" value you just created