Hello! In our last lesson, we adapted the InstructPix2Pix pipeline, a powerful method for editing images using natural language commands. We saw how its dual-guidance mechanism allows us to balance fidelity to the original image with the strength of the text-guided edit.
Many editing techniques, including inpainting, SDEdit, and even localized instruction-based edits, rely on masks to define the area of effect. While powerful, this approach frequently introduces visual artifacts. Your learning outcome for this lesson is to debug boundary artifacts and consistency issues in masked editing techniques. We will systematically explore why these problems occur and build a practical toolkit of parameters, settings, and workflows to achieve seamless, high-quality results.
Part 1: Anatomy of an Inpainting Artifact
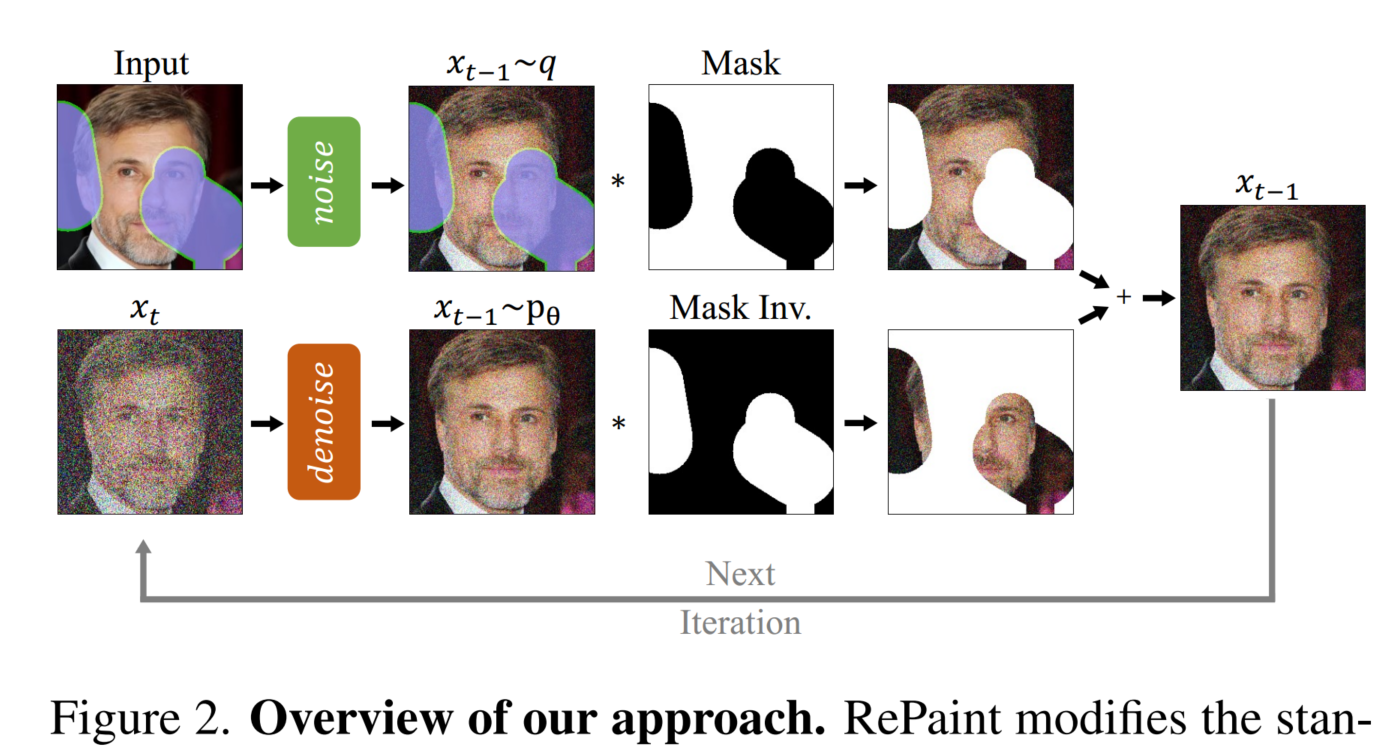
At its core, inpainting is a conditional generation task. The model must generate new content within a masked region that is consistent with the surrounding unmasked context. When this delicate balance fails, two main categories of artifacts emerge:
- Boundary Artifacts: These are noticeable seams or edges where the generated patch meets the original image. They can manifest as shifts in color, abrupt changes in texture, or misaligned structures. This is fundamentally a "stitching" problem.
- Consistency Issues: These are problems within the generated patch itself. Even if the boundary is smooth, the new content might not fit the overall scene. Common issues include:
- Lighting Inconsistency: The generated object has shadows or highlights that contradict the scene's global lighting.
- Style/Texture Mismatch: The patch has a different artistic style, noise pattern, or texture (e.g., a photorealistic patch in a painted image).
- Structural Incoherence: The perspective or scale of the generated content doesn't align with the rest of the image.
The following reading provides a clear overview of these challenges and lays the groundwork for the solutions we'll discuss.
Inpainting: Selective image editing
The documentation 'Inpainting: Selective image editing' from Runware.ai clearly explains the inpainting process and the common challenges that arise. We will refer back to this resource throughout the lesson.
Please read the sections 'How inpainting works', 'Visible boundaries', 'Lighting inconsistency', and 'Style mismatch'. Focus on understanding why each of these problems occurs. This will build the intuition needed for effective debugging.
Part 2: The Debugging Toolkit: Parameters and Settings
When you encounter these artifacts, your first step is to diagnose the likely cause and adjust the generation parameters. Think of these as a set of levers you can pull to influence the outcome.
1. The Mask Itself
The properties of the mask are often the first place to look.
- Mask Blur / Feathering: A hard, pixel-perfect mask edge gives the model no room for error. Softening the mask edge by a few pixels (a "blur" or "feather") creates a transition zone, allowing the model to blend the new content more gradually with the original. As noted in the Runware.ai guide, a 4-8 pixel feather is a good starting point.
- Mask Content (
fill,original,latent noise,latent nothing): In tools like AUTOMATIC1111's web UI, this setting determines the initial state of the masked area before denoising begins. It has a profound impact on the result.
Stable Diffusion Basics - Inpainting - All Settings Explained plus How to Solve Common Problems
To see these settings in action, let's watch a segment from the video 'Stable Diffusion Basics - Inpainting' by SiliconThaumaturgy. It provides a practical demonstration of how different Mask Content options behave.
Watch from 02:50 to 04:42. Pay attention to the distinction between original (modifying existing content) and the other options like latent noise (generating new content).
original: Use this when you want to modify what's already there (e.g., "make the red car blue"). It preserves the underlying structure and color information.latent noise/latent nothing: Use these when you want to replace content entirely (e.g., adding an object where there was none). They fill the area with noise or a neutral color, forcing the model to generate from scratch based on the prompt and context.fill: This option attempts to fill the mask with colors averaged from the surrounding pixels, which can sometimes provide a better starting point than pure noise for blending.
2. Generation Parameters
These are the core diffusion process parameters you're already familiar with, but they have specific implications for inpainting.
- Denoising Strength (
strength): This is the most critical parameter. It controls the trade-off between respecting the original content (at low strength) and adhering to the prompt (at high strength).- Symptom: The edit is too subtle, or the original object is still visible. Solution: Increase strength.
- Symptom: The edit is jarring, inconsistent, and ignores the surrounding context. Solution: Decrease strength.
- For replacing content, a strength of 0.7-0.9 is often a good range. For subtle modifications, you might use 0.4-0.6.
- CFG Scale: Higher values force stricter adherence to the prompt. If your inpainted object looks good but doesn't quite match the description, try increasing the CFG scale. Be cautious, as very high values can lead to stylistic clashes with the unmasked area.
- Steps: More steps can improve boundary integration and detail, giving the model more iterations to refine the transition. If you see minor boundary issues, increasing steps from 20 to 30-40 can help.
- Scheduler: Schedulers can influence the final look.
- Stochastic Schedulers (e.g.,
Euler Ancestral,DPM++ 2M SDE): Introduce randomness that often helps create more natural-looking textures and better blending, especially for organic surfaces. - Deterministic Schedulers (e.g.,
DDIM): Produce more predictable results and can be better for preserving sharp details in architectural or geometric edits.
- Stochastic Schedulers (e.g.,
3. Model Selection
The model itself plays a huge role.
Stable Diffusion from Scratch in PyTorch | Conditional Latent Diffusion Models
Not all models are created equal for inpainting. The video 'Stable Diffusion from Scratch' by ExplainingAI explains why models are specifically fine-tuned for this task.
Watch from 02:59 to 03:12. The key insight is that inpainting models are explicitly trained with additional context: the masked original image. This helps them generate more harmonious results.
- Base Models: Can perform inpainting, but since it's not their primary training objective, they often struggle with boundary consistency.
- Inpainting Models: These models have been fine-tuned on a dataset of masked images. They are architecturally identical but have learned to better handle boundary transitions and integrate new content. If you're getting persistent seams with a base model, switching to its corresponding inpainting version is a primary debugging step.
Part 3: Advanced Workflows for Seamless Integration
Sometimes, simply tweaking parameters isn't enough. Complex edits require a more strategic, iterative workflow. The following resource is an exceptionally detailed guide written from the perspective of an experienced practitioner, perfectly suited for building deep, practical knowledge.
Stable Diffusion, Subject-Oriented Inpainting
The guide 'Stable Diffusion, Subject-Oriented Inpainting' by GitHub user DarkStoorM is a masterclass in advanced inpainting. It details a professional workflow for achieving hyper-detailed, artifact-free images. We'll focus on the core concepts that are broadly applicable for debugging.
This is a dense resource. Here's how to approach it: Read the 'Inpainting Settings' section to solidify your understanding of Mask Blur, Masked Content, and especially the Inpaint Area options (Whole Picture vs. Only Masked). Pay close attention to 'Mask Relation To Target Size (important!)' and the 'Super Detailing' concept. This explains why the 'Only Masked' setting is so powerful. Skim the 'Workflow explanation' section to see how these concepts are assembled into a process. Finally, read 'Quality Inspection - First Pass'. This is a prime example of a systematic debugging process: identifying and listing all artifacts before proceeding.
Let's distill the two most powerful workflow concepts from that guide for debugging artifacts:
1. The "Only Masked" vs. "Whole Picture" Trade-off
This setting, found in many UIs, dictates how the model processes the image.
Whole Picture: The model processes the entire image at the target resolution, but only the masked area is changed.- Pro: Provides maximum context, leading to better lighting and style consistency.
- Con: Computationally expensive. The resolution of the actual area being inpainted is limited by the overall image size, which can lead to a lack of detail (
Missing detailsartifact).
Only Masked: The model crops the masked area (plus optional padding), upscales it to the full target resolution, performs inpainting, and then scales it back down.- Pro: Focuses all the model's resolution on the edit, enabling incredible detail (the "Super Detailing" technique). Much more efficient for high-res images.
- Con: Less global context. This can cause lighting/style inconsistencies if the
Only Masked Paddingis too small.
Debugging Strategy: If your inpainted area lacks detail or looks blurry, you are likely limited by the resolution of the mask in Whole Picture mode. Switch to Only Masked, set your target resolution (e.g., 1024x1024), and use the Only Masked Padding parameter (e.g., 32-64 pixels) to give the model enough surrounding context to ensure consistency.
2. Multi-Stage Inpainting
As the guide demonstrates, complex edits are rarely perfect in one shot. An iterative approach is far more effective.
- First Pass (Broad Strokes): Use a larger mask to establish the main subject or change. Don't worry about perfect boundaries. The goal is to get the core content right. In this stage, you might use
Whole Picturemode to ensure good overall composition and lighting. - Quality Inspection: Systematically identify all remaining artifacts, just as the author does in the guide. Look for bad seams, inconsistent lighting, blurry textures, etc.
- Second Pass (Refinement): Create smaller, more precise masks to target the specific artifacts you identified.
- To fix a visible boundary, create a thin mask directly over the seam and re-run the inpainting, perhaps with a lower denoising strength and a dedicated inpainting model.
- To fix missing details on an object, use a tight mask around it with the
Only Masked"Super Detailing" technique. - To fix lighting, you might use a broader, feathered mask over the object and use a context-aware prompt (e.g., "...with soft light from the upper left").
This iterative loop of Inpaint -> Inspect -> Refine is the key to moving from mediocre results to professional-quality, seamless edits.
Test your understanding!
You are trying to replace a small, blurry logo on a character's shirt in a high-resolution (4K) image with a new, highly-detailed one. You use a precise mask and the prompt "a detailed eagle logo". However, the resulting logo is still blurry and lacks detail.
Based on the concepts in this lesson, what is the most likely cause of this issue, and what is your primary debugging step?
Show answer
The most likely cause is a resolution bottleneck. You are probably using the Whole Picture inpainting mode. Even though the overall image is 4K, the small masked area for the logo might only be 100x100 pixels. The model is trying to generate a detailed logo within this tiny pixel budget, resulting in a blurry mess.
The primary debugging step is to switch to Only Masked mode. This will take the 100x100 pixel masked region, upscale it to your full target generation size (e.g., 1024x1024), generate a highly detailed logo at that resolution, and then downscale and blend it back into the original image. You should also add some Only Masked Padding to provide context from the shirt's texture and lighting.
Conclusion
In this lesson, we've built a comprehensive framework for diagnosing and fixing the common visual problems that arise in masked editing. By moving from simple parameter tuning to advanced, iterative workflows, you can gain precise control over your results.
Key Takeaways:
- Diagnose First: Artifacts fall into two main categories: boundary artifacts (seams) and consistency issues (lighting, style, structure).
- The Debugging Toolkit: You have a range of tools at your disposal:
- Masking: Use blur/feathering for smoother blends.
- Parameters: Tune
strength,CFG Scale, andstepsto balance prompt adherence and context preservation. - Models: Use inpainting-specific models for their superior boundary handling.
- Advanced Workflows: For the best results, adopt professional workflows:
- Use "Only Masked" mode with padding for high-detail work ("Super Detailing").
- Employ a multi-stage, iterative process of broad edits followed by targeted refinement passes to hunt down and eliminate artifacts.
Next Lesson Preview:
Today, we focused on making the edit itself look good and blend seamlessly with its immediate surroundings. However, another class of problems can arise where the edit inadvertently damages the global structure or content of the original image. In our next lesson, we will address this by learning how to debug the preservation of structure and content in guided editing techniques, ensuring your edits are not only seamless but also non-destructive to the parts of the image you want to keep.