Hello! Following our last session on inpainting, we're now ready to tackle a closely related and equally powerful technique: outpainting.
In the previous lesson, we focused on filling in masked regions inside an image for object removal and replacement. We saw how specialized inpainting models use extra conditioning channels to blend new content seamlessly. Today, we'll leverage that same core idea to expand an image beyond its original boundaries.
Your learning outcome is to implement outpainting for seamless image extension. We will start by framing outpainting as a clever application of the inpainting pipelines you're already familiar with. Then, we'll dive into practical techniques to ensure the generated extensions are coherent and seamlessly integrated with the original image.
From Inpainting to Outpainting: A Shift in Perspective
Outpainting, sometimes called "uncropping," is the process of extending an image by generating new content around its edges. The goal is to create a larger picture that looks like it was the original all along.
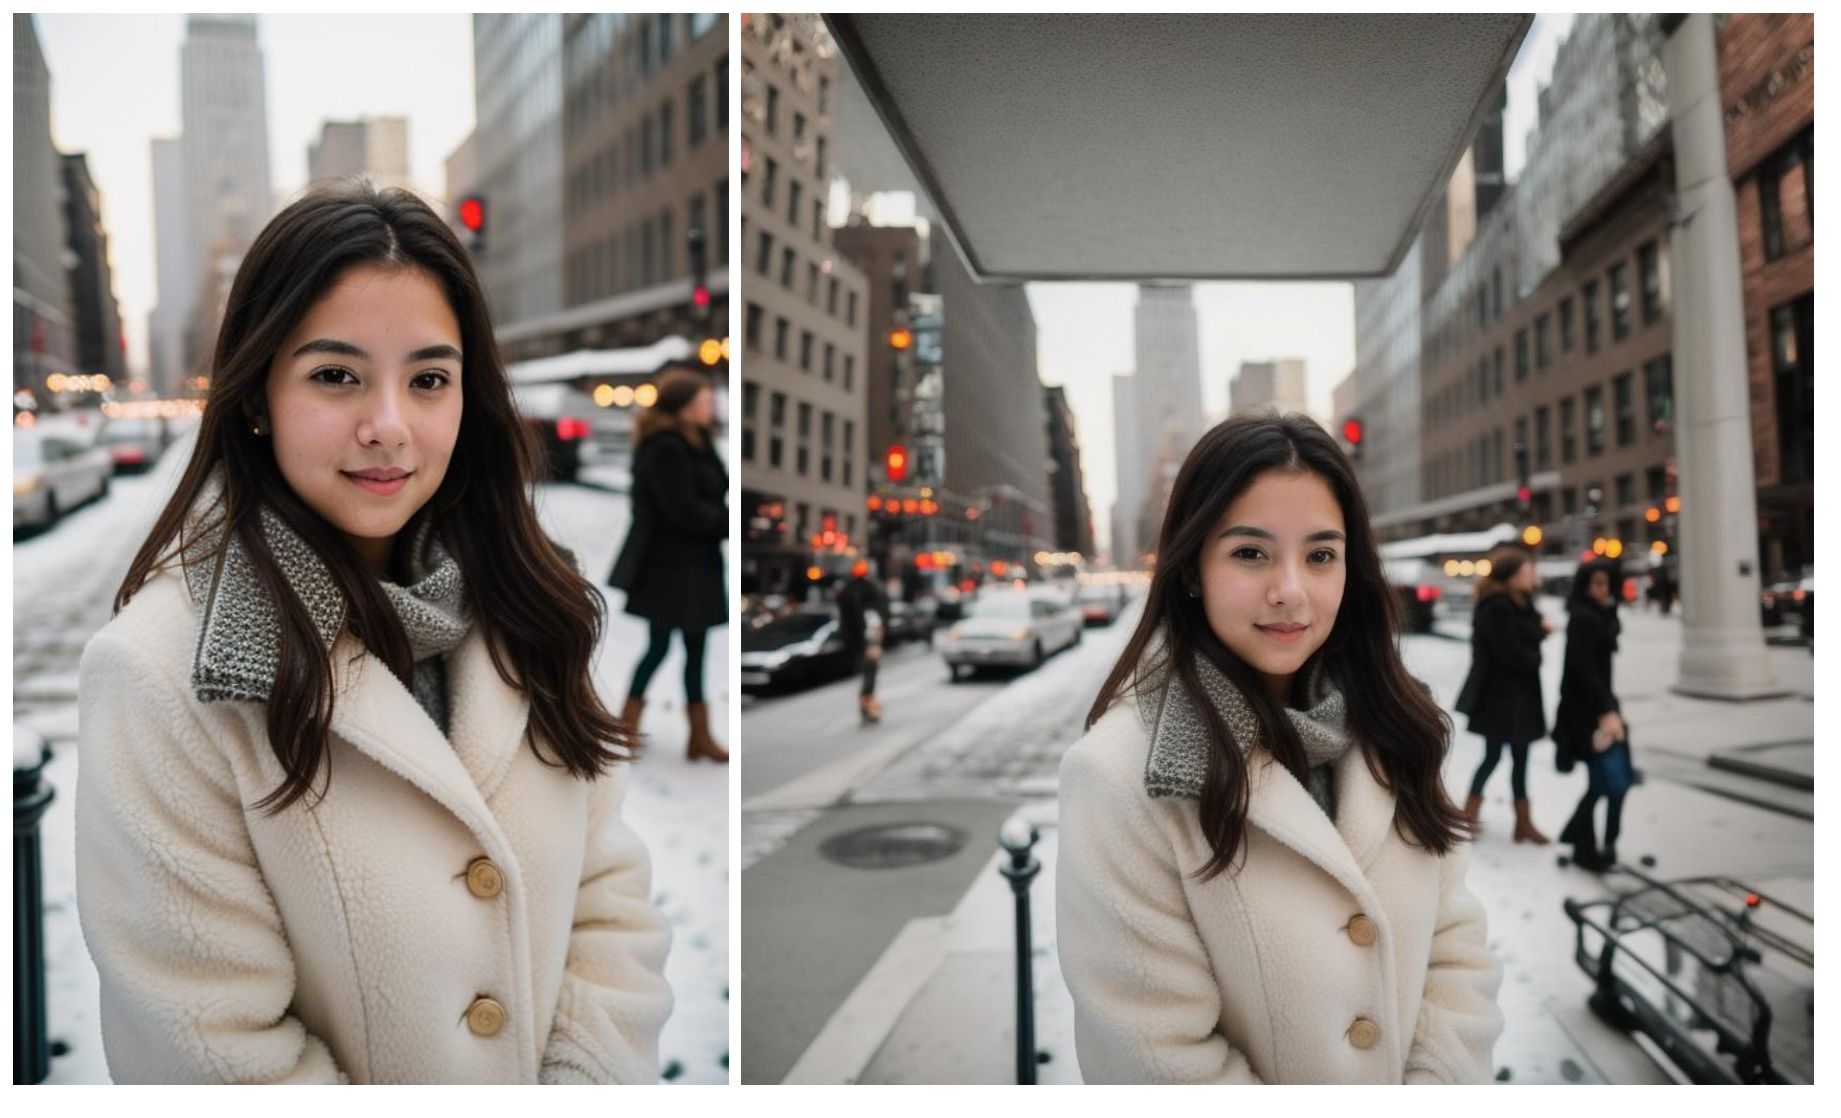
Conceptually, the trick is to treat outpainting as an inpainting problem. Instead of masking a region inside the image, we expand the canvas and mask the newly added empty space. The diffusion model is then tasked with "inpainting" this empty border.
Part 1: The Core Implementation
Let's walk through the fundamental steps to implement outpainting using the diffusers library. This process cleverly converts an outpainting task into an inpainting one.
Inpainting and Outpainting with Diffusers
The article 'Inpainting and Outpainting with Diffusers' provides a concise, code-first explanation of this core concept. It demonstrates exactly how to prepare the image and mask to use a standard inpainting pipeline for outpainting.
Please read the section titled 'Outpainting with the Diffusers Library'. Focus on the logic in the code snippets: how a larger, padded image is created, and how the corresponding mask is defined to cover only this new padded area.
As you saw in the article, the process is:
- Expand the Canvas: Create a new, larger canvas and place the original image in the center (or to one side, if extending in one direction). The new area is typically filled with a neutral color like gray or black. In Python, this is easily done with
numpy.pad. - Create the Mask: Generate a binary mask that has the same dimensions as the expanded canvas. The mask should be white (value 255) over the new, empty regions and black (value 0) over the original image area. This tells the model to only generate content in the new regions.
- Run the Inpainting Pipeline: Pass the expanded image, the new mask, and a descriptive prompt to an inpainting pipeline (e.g.,
StableDiffusionInpaintPipeline). The model will then fill in the white areas of the mask.
Here's a minimal code structure for this process:
import torch
import numpy as np
from PIL import Image
from diffusers import StableDiffusionInpaintPipeline

# 1. Load the original image
original_image = Image.open("your_image.png").convert("RGB")
original_np = np.array(original_image)
height, width, _ = original_np.shape

# 2. Expand the canvas and create the mask
padding = 256 # Pixels to add on all sides
image_extended = np.pad(original_np, ((padding, padding), (padding, padding), (0, 0)), mode='constant', constant_values=128)

mask = np.zeros((height + 2 * padding, width + 2 * padding), dtype=np.uint8)
mask[:padding, :] = 255 # Top
mask[-padding:, :] = 255 # Bottom
mask[:, :padding] = 255 # Left
mask[:, -padding:] = 255 # Right

init_image_pil = Image.fromarray(image_extended)
mask_pil = Image.fromarray(mask)

# 3. Run the pipeline
pipe = StableDiffusionInpaintPipeline.from_pretrained(
    "runwayml/stable-diffusion-inpainting", torch_dtype=torch.float16
).to("cuda")

prompt = "A beautiful landscape painting, high detail"
image = pipe(prompt=prompt, image=init_image_pil, mask_image=mask_pil).images[0]
image.save("outpainted_result.png")
Test your understanding!
You are outpainting an image of a person standing in a forest. Your prompt is "a person standing in a forest". Why might this prompt lead to suboptimal results, such as generating a second person in the extended area? What would be a better prompt?
Show answer
The prompt "a person standing in a forest" describes the entire scene, including the part that already exists. The model might interpret this as an instruction to generate another person within the new area.
A better prompt would describe only the content you want to see in the newly generated areas. For example: "a forest with tall trees, ferns on the ground, dappled sunlight, photorealistic". This guides the model to extend the background scenery coherently.
Part 2: Techniques for Seamless Integration
While the core method works, achieving a truly seamless result often requires a few more engineering tricks. These techniques address common artifacts like visible seams and color mismatches.
Technique 1: Guiding the Model with Pre-filling
Generating into a flat, gray void is difficult for the model. We can provide a better starting point by pre-filling the extended area with plausible content.
ComfyUI Outpaint workflow #comfyui #outpaint #workflow
This ComfyUI tutorial demonstrates several key refinement techniques. Watch the following segment to see how pre-filling and blurring the transition area can dramatically improve results.
Watch from 00:55 to 02:18. Pay attention to two key nodes: 'Fill Masked Area' and 'Blur Masked Area'. The 'Fill' node smears the edge pixels of the original image into the new area, providing initial texture and color. The 'Blur' node feathers the mask itself to create a smoother transition.
The concepts from the video can be implemented in code:
- Content-Aware Fill: Instead of filling the padded area with a solid color, use a classical inpainting algorithm to provide an initial guess. The Hugging Face blog post "Outpainting II - Differential Diffusion" uses
cv2.inpaintwith theINPAINT_TELEAalgorithm for this purpose. This gives the diffusion model a much better-initialized latent space to work with. - Mask Feathering/Blurring: A sharp mask edge can lead to a sharp, visible seam in the output. Applying a Gaussian blur to the mask creates a gradient at the transition boundary, encouraging the model to blend the new and old content more smoothly. You saw this in the previous lesson with
pipeline.mask_processor.blur.
Technique 2: Preserving the Original Image Integrity
A subtle but important issue is that the VAE encode/decode cycle is not perfectly lossless. This means that even the unmasked (original) part of the image can be slightly altered during the outpainting process.
The solution is a simple post-processing step: once the generation is complete, composite the original image back onto the outpainted result.
# Assuming 'outpainted_image' is the PIL Image output from the pipeline
# and 'original_image' is the initial PIL Image

# Get the dimensions
out_w, out_h = outpainted_image.size
orig_w, orig_h = original_image.size
padding = (out_w - orig_w) // 2

# Paste the original image back into the center
outpainted_image.paste(original_image, (padding, padding))
outpainted_image.save("final_outpainted_result.png")
This guarantees that the pixels from your original image remain completely untouched. The ComfyUI video (LINK) also demonstrates this principle from 03:29 to 04:10, showing how it fixes subtle degradation in the original content.
Part 3: Advanced Technique for Promptless Outpainting
What if you want to extend an image while perfectly preserving its style, color palette, and content, without having to craft a perfect text prompt? This is where IP-Adapters come in.
The Hugging Face article "Outpainting II - Differential Diffusion" introduces a brilliant method for this.
Outpainting II - Differential Diffusion
This article details an advanced outpainting workflow. We will focus on its clever use of IP-Adapters to achieve style-consistent, prompt-free outpainting.
Please read the section that begins with 'To fix both of these problems, we’re going to use IP Adapters.' Study the proposed solution: slicing the original image into smaller square patches and feeding them to the IP-Adapter as an 'image prompt'. This technique provides rich visual context to the model.
The key idea is:
- Problem: We can't use the whole image as an image prompt because it contains the empty space we want to fill.
- Solution: Slice the original, non-extended image into multiple smaller, overlapping square patches.
- Conditioning: Feed this collection of patches to the IP-Adapter.
This provides the model with a rich "bag of visual features" representing the original image's style, textures, and objects. The model can then use this strong visual prior to generate an extension that is highly consistent, often eliminating the need for a text prompt entirely. This is a powerful technique for automating high-quality outpainting.
Conclusion
Today, we've demystified outpainting, framing it as a specialized application of inpainting. You now have a full toolkit to not only implement outpainting but also to debug and refine the results for seamless image extensions.
Key Takeaways:
- Core Principle: Outpainting is implemented by expanding an image's canvas and using an inpainting model to fill the masked, empty border.
- Seamless Blending: To avoid hard seams, you should blur (or feather) the mask at the boundary between the original image and the extended area.
- Coherent Generation: Pre-filling the empty space using classical methods like smearing or
cv2.inpaintprovides the model with a better starting point, leading to more coherent extensions. - Preserving Quality: The VAE process can degrade the original image. Always perform a final composite step, pasting the original image back onto the generated canvas to ensure pixel-perfect preservation.
- Advanced Control: For prompt-free, style-consistent outpainting, you can use IP-Adapters conditioned on patches sliced from the original image.
Next Lesson Preview:
So far, we have focused on editing images by specifying regions to change with masks (inpainting and outpainting). In our next lesson, we'll explore a different form of conditioning that allows us to specify the structure of the output. We will dive into ControlNet, a powerful architecture that enables structure-guided image generation using inputs like depth maps, canny edges, and human poses.