Introduction
Welcome back. In our last lesson, you mastered the fundamentals of version control by setting up a Git repository in STM32CubeIDE and practicing the feature-branching workflow. You now know how to track changes, create isolated branches for new features, and merge them back using Pull Requests on GitHub. This is the mechanical foundation of professional collaboration.
This lesson builds directly on that foundation by addressing the learning outcome: Write clear, conventional commit messages and a professional README.md. Knowing the commands is only half the battle; the other half is communicating your work effectively. Your commit history tells the story of your project's evolution, and your README is its front door. Mastering these skills will elevate your projects from personal code backups to professional, well-documented engineering work that stands out to collaborators and potential employers.
1. The Art of the Commit Message: Conventional Commits
In the previous lesson, you wrote simple commit messages like "Initial commit." In a professional environment, messages must be more descriptive. They should explain not just what changed, but why it changed. To achieve this consistently across a team, a standard called Conventional Commits is widely used. It enforces a simple, structured format for every commit message.
This makes the project history highly readable and allows for the automatic generation of change logs.
How I version control with git (Best Practices) | Embedded System Project Series #8
To understand the philosophy behind good commits and the structure of the Conventional Commits standard, let's watch this video from Artful Bytes. The presenter uses an embedded project as an example, making it highly relevant for us.
Watch these two key segments: Rules for Good Commits (04:39 - 06:25): Pay attention to the three core rules, especially the principle of explaining the 'what' and the 'why' of a change. Conventional Commit Structure (06:25 - 08:12): This is the core of this section. Focus on the breakdown of a commit message into type, scope, description (subject), body, and footer.
The Structure of a Conventional Commit
As you saw in the video, a conventional commit message follows this template:
<type>[optional scope]: <description>

[optional body]

[optional footer]
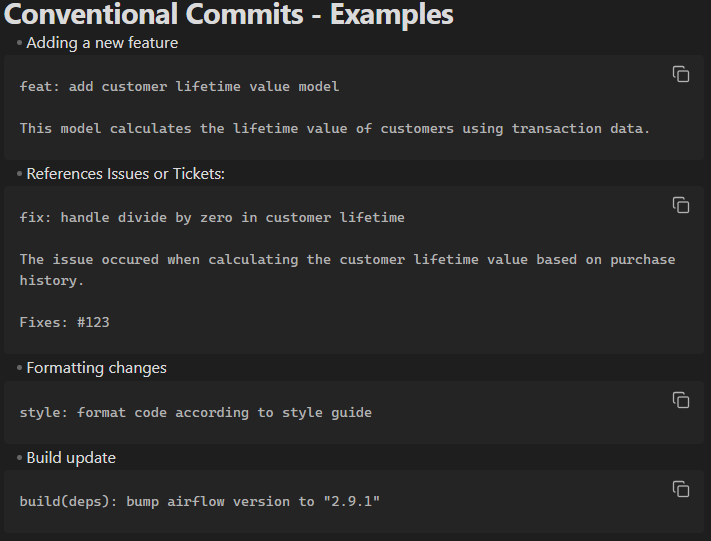
Let's break down the components:
- Type: A short noun that describes the category of change. This is mandatory.
- Scope: (Optional) A noun specifying the part of the codebase affected (e.g.,
gpio,uart_driver,build). - Description: A short, imperative-mood summary of the change (e.g., "add," not "added" or "adds").
- Body: (Optional) A longer explanation providing context. This is where you explain why you made the change. It's separated from the subject by a blank line.
- Footer: (Optional) Used for referencing issue tracker IDs (e.g.,
Fixes: #42) or noting breaking changes.
Common Commit Types
To give you a practical vocabulary, here are the most common commit types you will use.
Conventional Git Commits With Best Practices.
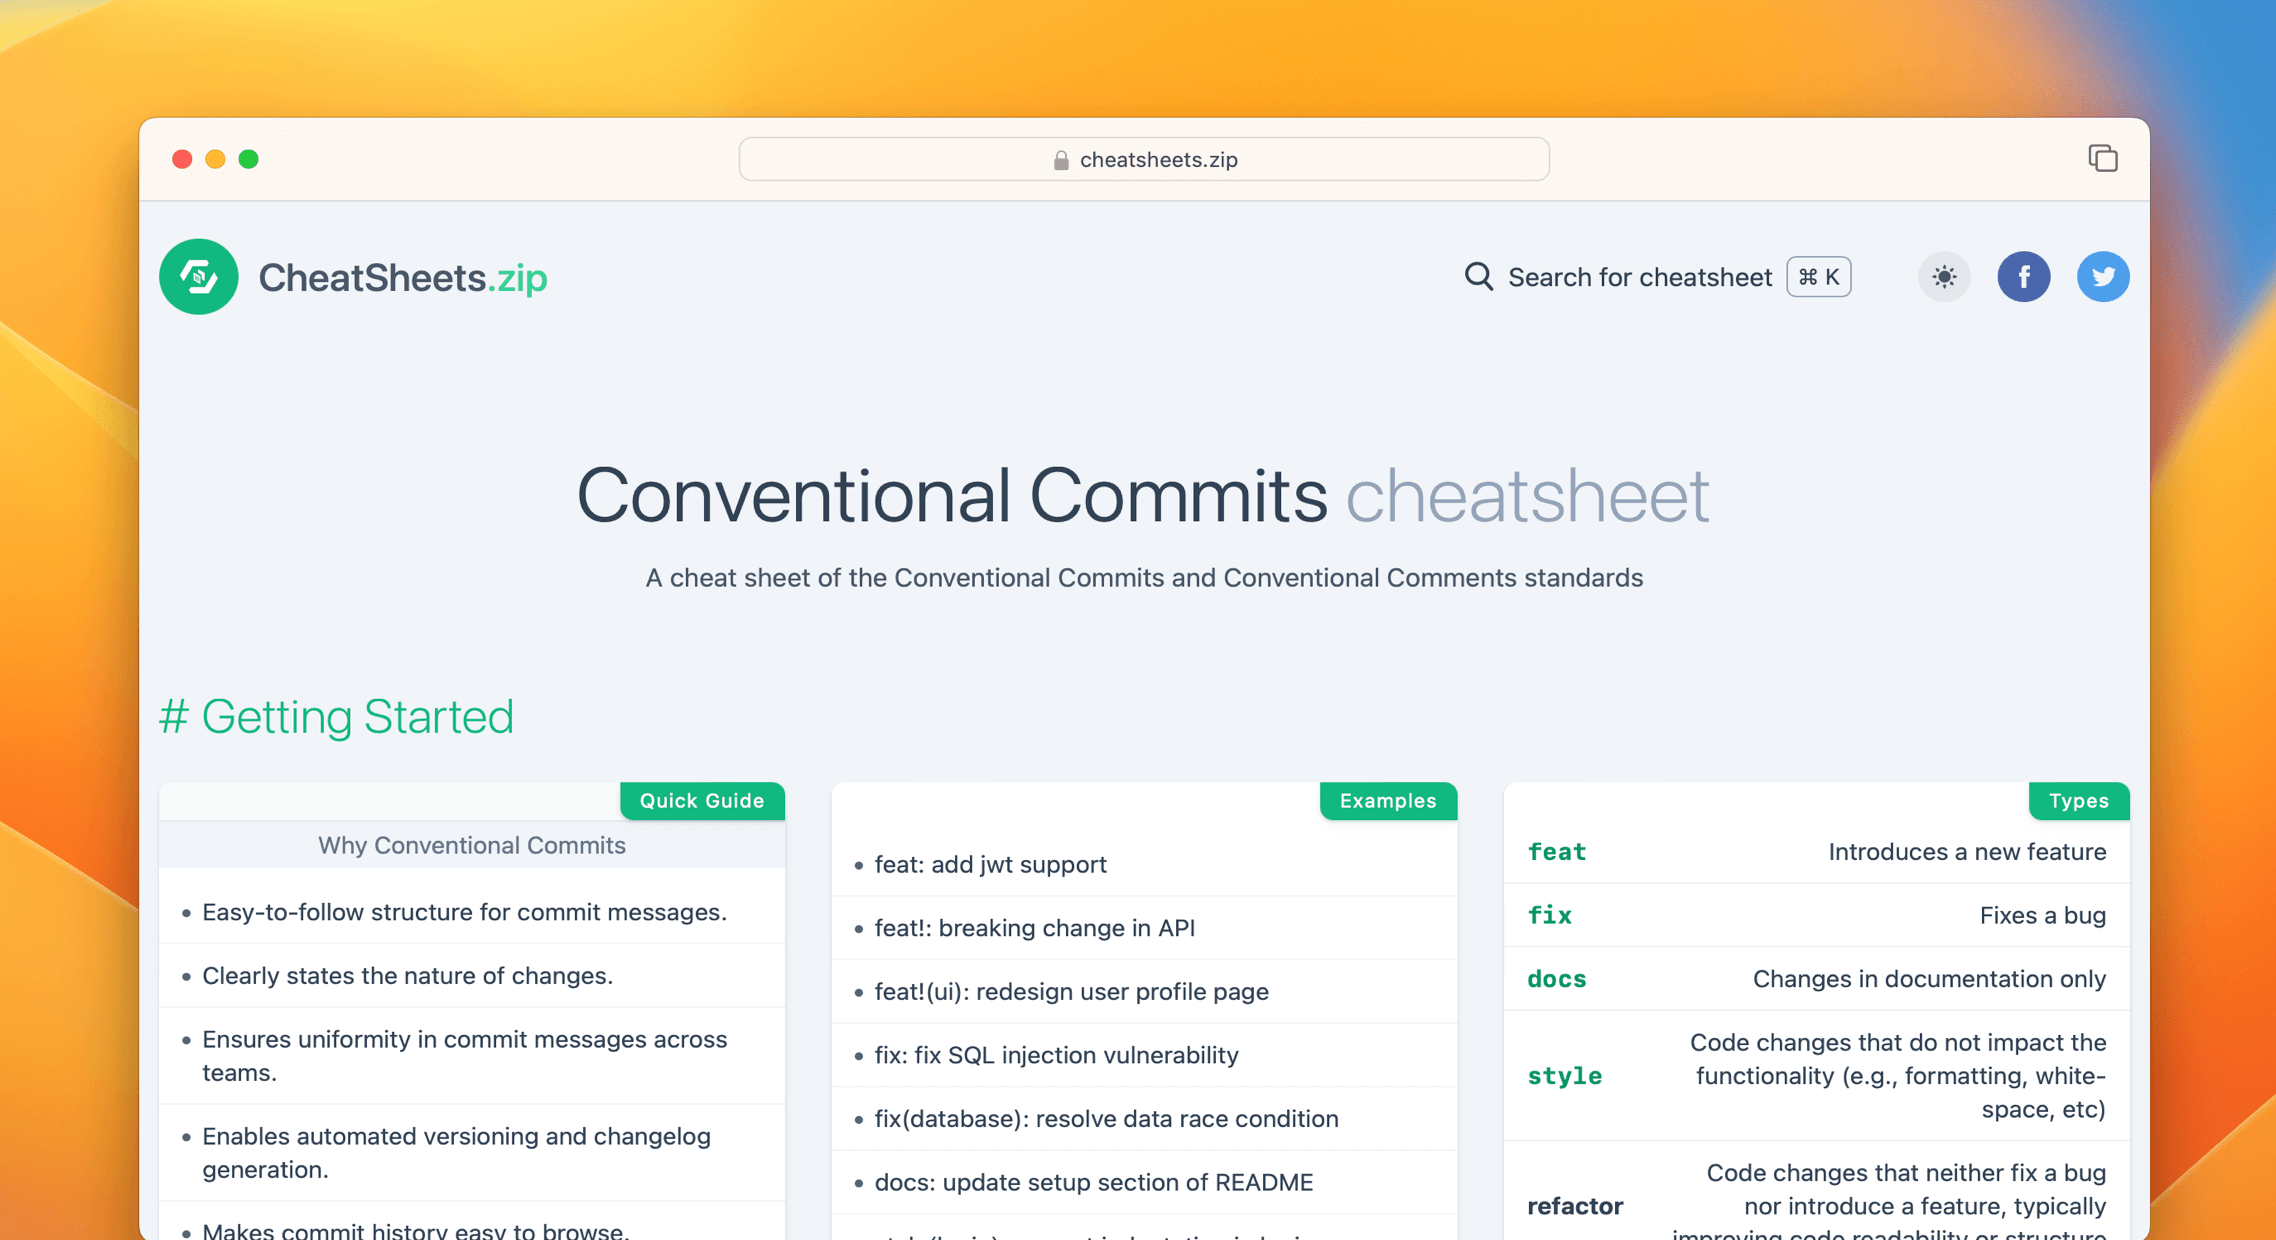
This article, 'Conventional Git Commits With Best Practices,' provides an excellent, concise list of standard commit types with examples. It's a great reference to keep handy.
Read the section titled 'Examples of commit types' to familiarize yourself with the standard types like feat, fix, docs, refactor, style, and chore. Also, review the 'Tips for writing effective commit messages' at the end.
Here is a summary of the most essential types for quick reference:
| Type | Description |
|---|---|
feat |
A new feature for the user. |
fix |
A bug fix for the user. |
refactor |
Code change that neither fixes a bug nor adds a feature. |
docs |
Changes to documentation only. |
style |
Formatting changes, white-space, etc; no code logic change. |
test |
Adding missing tests or correcting existing tests. |
chore |
Changes to the build process or auxiliary tools. |
build |
Changes that affect the build system or external dependencies. |
Practice Exercise
Let's apply this. Imagine you are working on the layered LCD driver from our previous lesson. You discover and fix a bug where calling lcd_send_string() with a NULL pointer causes the microcontroller to crash.
How would you write the conventional commit message for this fix?
Click to see a model answer
A good commit message would look like this:
fix(lcd_driver): prevent hard fault on NULL string input

Added a null check at the beginning of the lcd_send_string function.
If a NULL pointer is passed, the function now returns immediately
without attempting to dereference the pointer, which previously caused
a hard fault.
- Type:
fix, because it's a bug fix. - Scope:
lcd_driver, as the change is within that specific module. - Description: Clearly states what the fix achieves in the imperative mood.
- Body: Explains the problem (hard fault) and the solution (null check) in more detail, providing crucial context for future developers.
2. Crafting a Professional README.md
Now that you can document your changes, let's document your project. The README.md file is the first thing anyone sees when they visit your repository on GitHub. It should quickly and clearly answer:
- What is this project?
- What hardware and software do I need to use it?
- How do I build and run it?
- What does it do?
A well-written README demonstrates professionalism and makes your work accessible.
How To Write a USEFUL README On Github
This video provides an excellent, high-level guide on what makes a README file useful and provides a structured outline to follow.
Watch these two segments: Benefits of a Good README (02:07 - 03:59): Understand why investing time in a good README is worthwhile. The 8-Point Outline (03:59 - 08:17): This provides a fantastic template that we will adapt for our embedded projects.
Anatomy of a Firmware Project README
Let's adapt the structure from the video for a typical STM32 project. Your README should be a file named README.md in the root of your project directory and written using Markdown, a simple text-formatting syntax.
Here are the essential sections for your embedded project's README:
-
Project Title and Summary
- A main heading (
# My Project Title) followed by a short, one-paragraph summary of the project's purpose.
- A main heading (
-
Key Features
- A bulleted list of the main functionalities. (e.g., "- Blinks an LED at 1Hz", "- Dims LED brightness using PWM controlled by a potentiometer").
-
Hardware Requirements
- Be specific!
- MCU Board: e.g., STM32F103C8T6 "Blue Pill"
- Programmer/Debugger: e.g., ST-Link V2
- Peripherals: e.g., 16x2 I2C LCD, HC-SR04 Ultrasonic Sensor, TJA1050 CAN Transceiver.
- Tools: e.g., Digital Multimeter, Logic Analyzer.
- Be specific!
-
Software & Toolchain
- IDE: e.g., STM32CubeIDE v1.14.0
- Compiler: e.g., GCC Arm Embedded
- Libraries/Frameworks: e.g., FreeRTOS v10.4.3 (if applicable)
-
Setup and Build Instructions
- Provide clear, step-by-step instructions for a new user.
- Clone the repository:
git clone <your-repo-url> - Open STM32CubeIDE.
File->Import...->General->Existing Projects into Workspace.- Select the cloned directory.
Project->Build All.
- Clone the repository:
- Provide clear, step-by-step instructions for a new user.
-
Usage / How it Works
- Explain what the user should expect to see after flashing the firmware.
- Example: "After flashing, the green LED on PC13 will start blinking. Connect a terminal to the UART (PA9/PA10) at 115200 baud to see a 'Hello, World!' message printed every second."
-
Project Structure (Optional but Recommended)
- Briefly describe your layered architecture.
Src/main.c: Application entry point and main loop.Drivers/lcd_driver/: Low-level driver for the I2C LCD.App/: High-level application logic.
- Briefly describe your layered architecture.
Conclusion
In this lesson, you've moved beyond the mechanics of Git to the art of professional communication. By adopting Conventional Commits and crafting high-quality READMEs, you ensure your work is understandable, maintainable, and impressive to others.
Key Takeaways:
- Conventional Commits provide a standardized format (
type(scope): description) that makes your Git history clean, readable, and easy to parse. - The commit
typecategorizes your change (e.g.,feat,fix,refactor), while the body explains the why. - A professional
README.mdis the front door to your project. It must clearly explain the project's purpose, requirements, and setup instructions. - For embedded projects, a good README includes specific sections for Hardware Requirements, Toolchain, and Build Instructions.
These practices are non-negotiable in the professional world. Applying them consistently in your personal projects will build strong habits and a powerful portfolio.
Preview of the Next Lesson:
So far, we've focused on static documentation—code comments, commit messages, and READMEs. But how do we understand what our firmware is doing while it's running? In our next lesson, we will tackle "Implement a lightweight logging system for runtime diagnostics via UART." You will learn to send formatted debug messages from your STM32 to your computer, giving you a real-time window into your application's behavior.