Hello! Welcome back to our series on Fusion 360.
In our last lesson, you successfully built your first parametric model—a simple box controlled by user parameters. You learned how to define variables for length, width, height, and wall thickness, and saw the immediate benefit: changing a value in the parameters table automatically resized your model. This is the foundation of creating adaptable designs.
Today, we will build directly on that knowledge. Our learning outcome is to edit parameters in the 'Change Parameters' dialog to update a design globally. This goes beyond just changing a single number. You will learn how to create intelligent relationships between parameters using mathematical expressions. This skill is crucial for creating complex, adaptable designs, whether it's iterating on a controller stand or resizing the entire framework of your future custom desk with just a few clicks.
1. A Deeper Look at the 'Change Parameters' Dialog
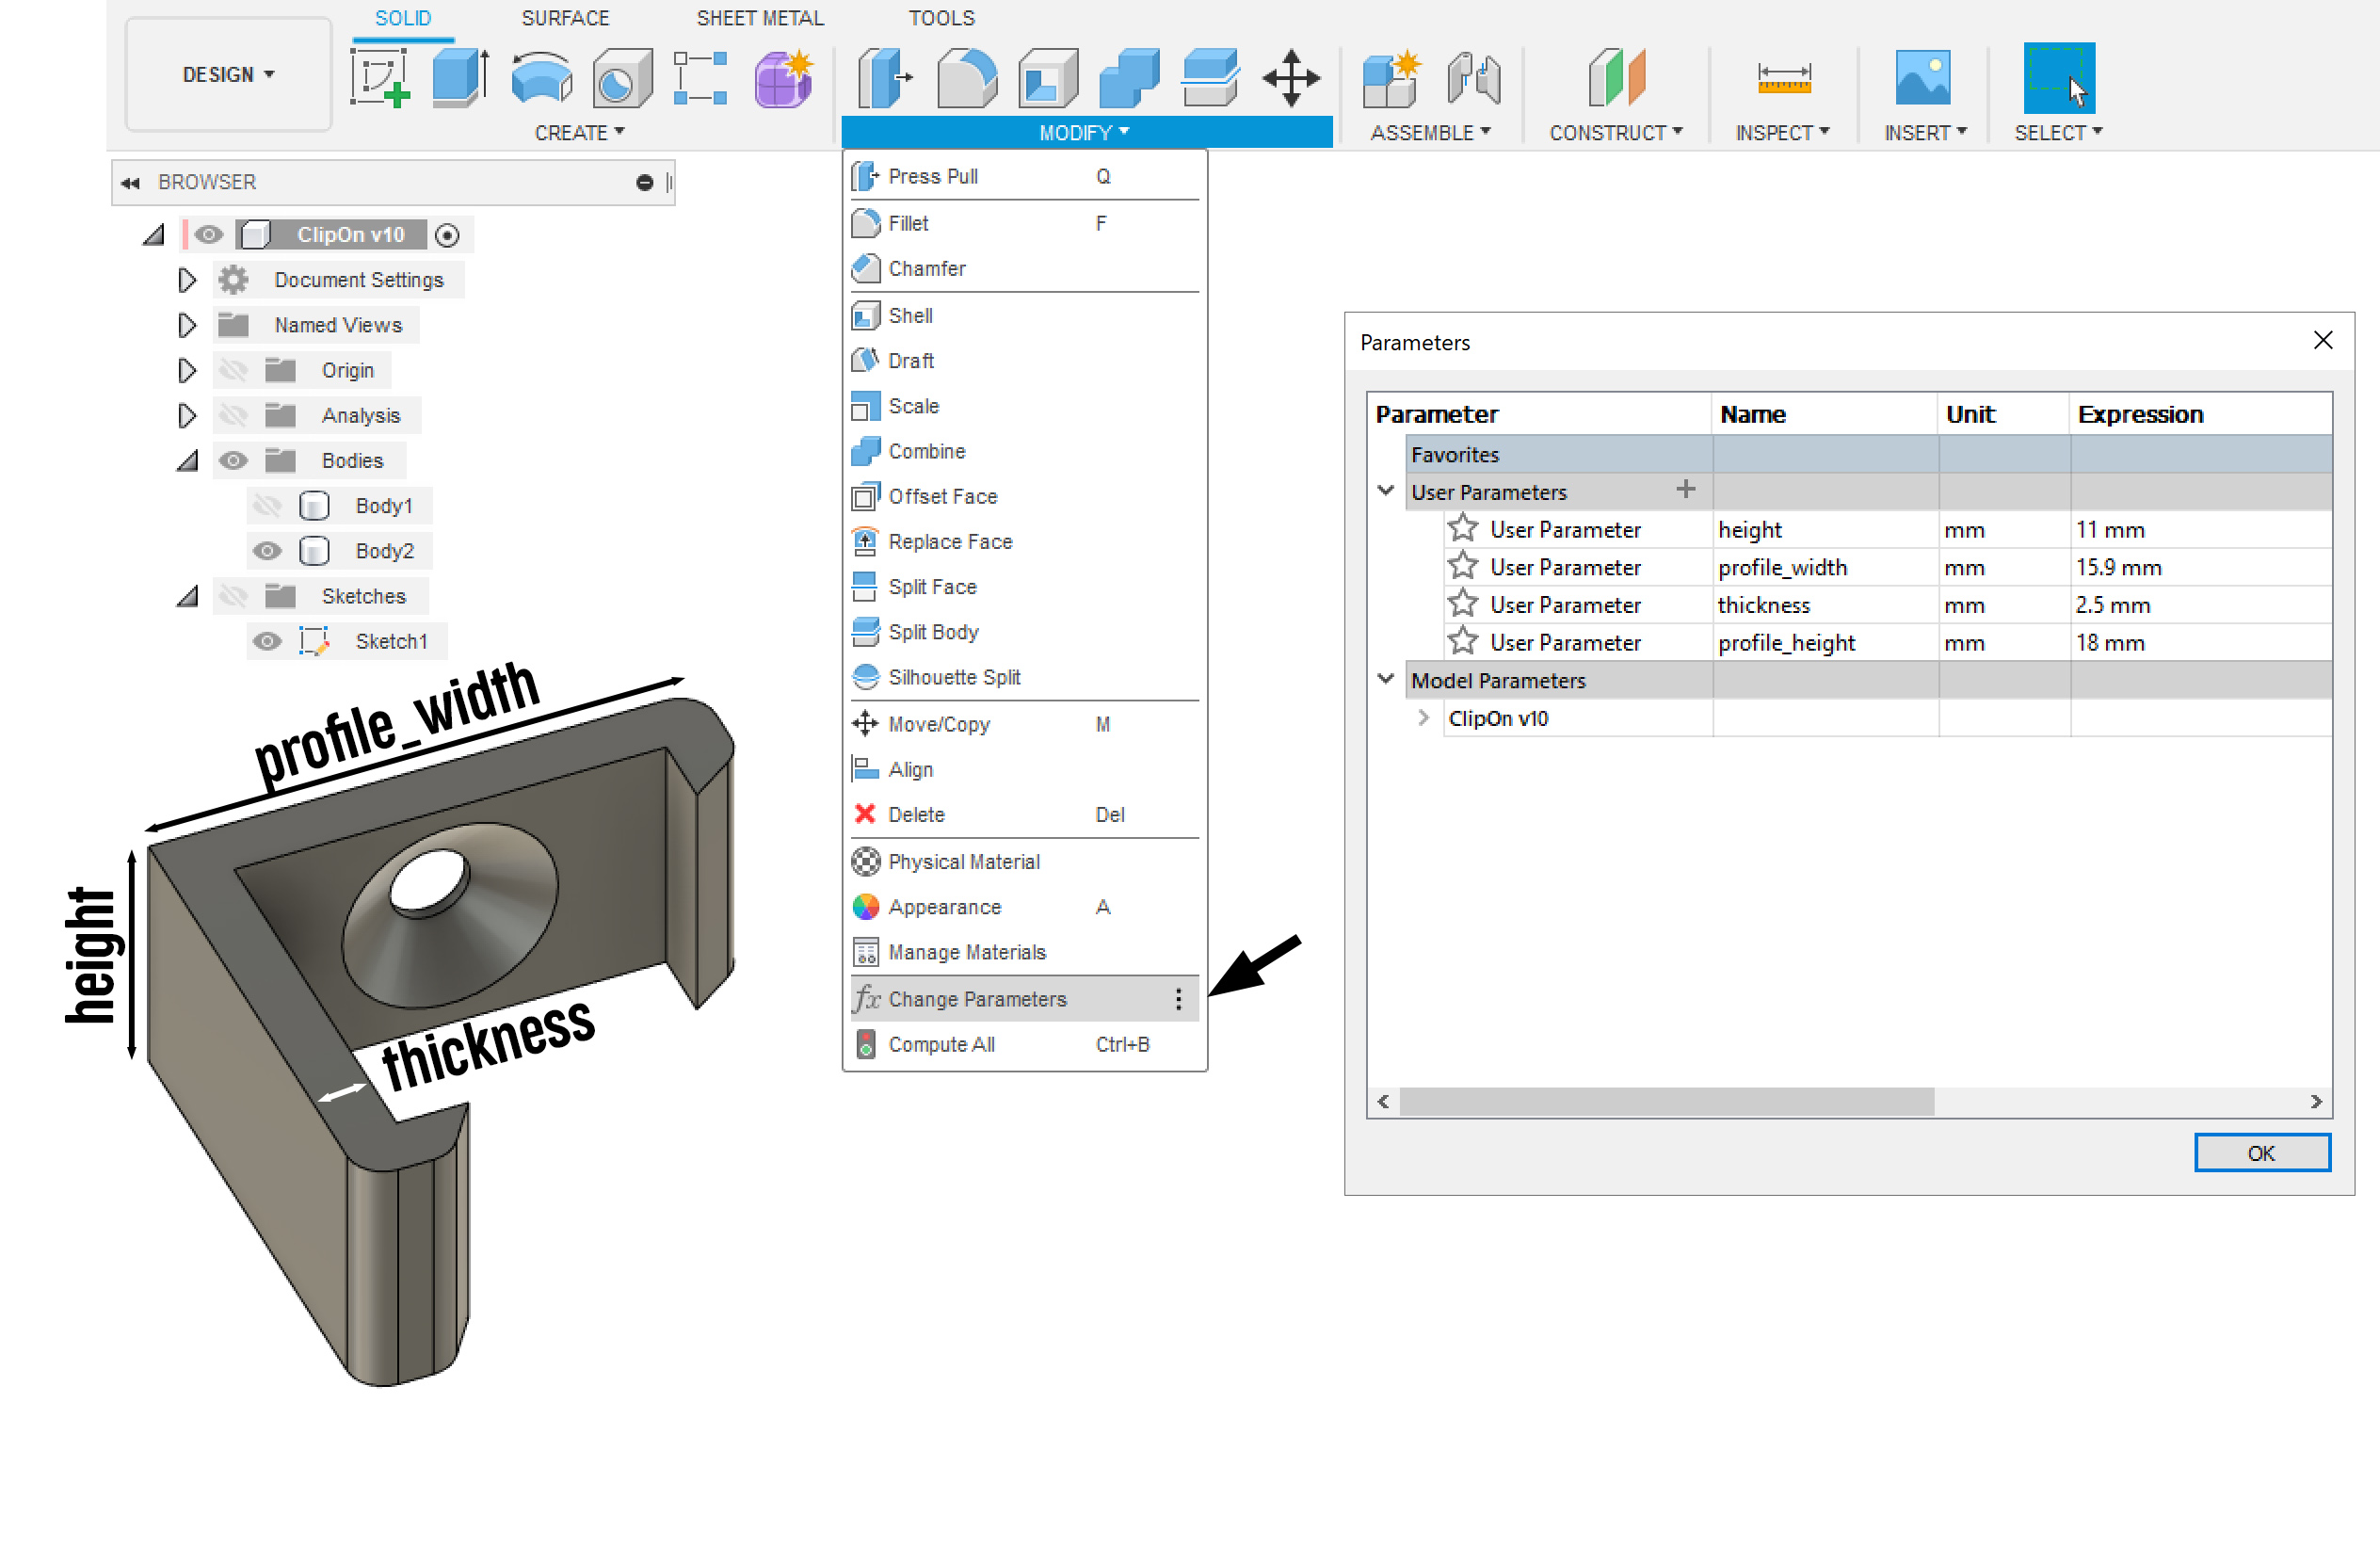
Last time, we used the Change Parameters dialog to create our user parameters. Now, let's explore its structure more formally. It's the central nervous system for your parametric designs.
Parametric designing in Fusion 360
This article from GrabCAD provides a clear breakdown of the 'Change Parameters' dialog. It explains the different types of parameters you'll encounter.
Please read 'Step 3: Setting up the parameters'. Focus on understanding the three sections presented in the dialog window: User Parameters, Model Parameters, and Favorites.
As the article explains, you'll see a few categories:
- User Parameters: These are the variables you create. They are the most important for building robust parametric models because you control their names and purpose. This is where we created
box_length,box_width, etc. - Model Parameters: Fusion 360 automatically creates these whenever you add a dimension or create a feature with a specific value. For example, if you create a 10mm extrusion without using a user parameter, Fusion will log it here with a name like
d5. While you can reference these, using your own named User Parameters makes your design intent much clearer. - Favorites: Any parameter (User or Model) can be starred and added to this list. This is incredibly useful for large projects, like your desk build, where you can keep critical dimensions like
desk_heightorwood_thicknessright at the top for quick access.
2. Creating Intelligent Designs with Equations
The true power of parametric design is unlocked when you make parameters dependent on each other. Instead of giving every parameter a fixed number, you can use formulas.
Your background in finance provides a perfect analogy. In a financial model, you don't hard-code every number. You create formulas where key metrics (like net income) are derived from driver variables (like revenue and operating margin). Changing one driver automatically recalculates everything. We will do the exact same thing in Fusion 360.
Let's see how to define a parameter using a mathematical expression that references another parameter.
Change your designs quickly with user parameters | Fusion 360 Tutorial - Parametric Modeling Basics
This video by Austin Shaner provides an excellent, clear explanation of how to use math and reference other parameters within the 'Change Parameters' dialog.
Watch from 03:28 to 04:30. Pay close attention to how he defines the 'width' parameter not as a number, but as 'length / 2'. This creates a direct relationship between the two.
This concept is so fundamental, let's see another practical example. Here, a chamfer's size is calculated based on the difference between two diameter parameters.
Parametric modeling in Fusion360 explained in 40 seconds + detailed tutorial with example
The video from Prusa 3D we saw previously has a great segment demonstrating this.
Watch from 08:12 to 09:15. Notice how the chamfer distance is defined by the formula '(upper_diameter - bottom_diameter) / 2'. This ensures the angle of the pot wall remains correct even if the diameters change.
3. Hands-On: Making Your Box "Smarter"
Now, let's apply this to the parametric box you created in the last lesson.
- Open your parametric box design in Fusion 360.
- Go to
Modify > Change Parameters. - Find your
box_widthparameter. Click on its expression (e.g.,50mm). - Replace the number with the formula:
box_length * 0.75. Press Enter. You'll see the value forbox_widthupdate in the table. - Now, find
box_height. Replace its expression with:box_length / 2. - Finally, change the expression for
box_lengthto120mm.
Notice how the values for box_width and box_height instantly update in the dialog. box_length is now the single driver parameter for the overall proportions of your box.
- Click
OKand watch your model update to its new proportions. You have just experienced a "global update" driven by parametric relationships.
4. Witnessing the Global Update
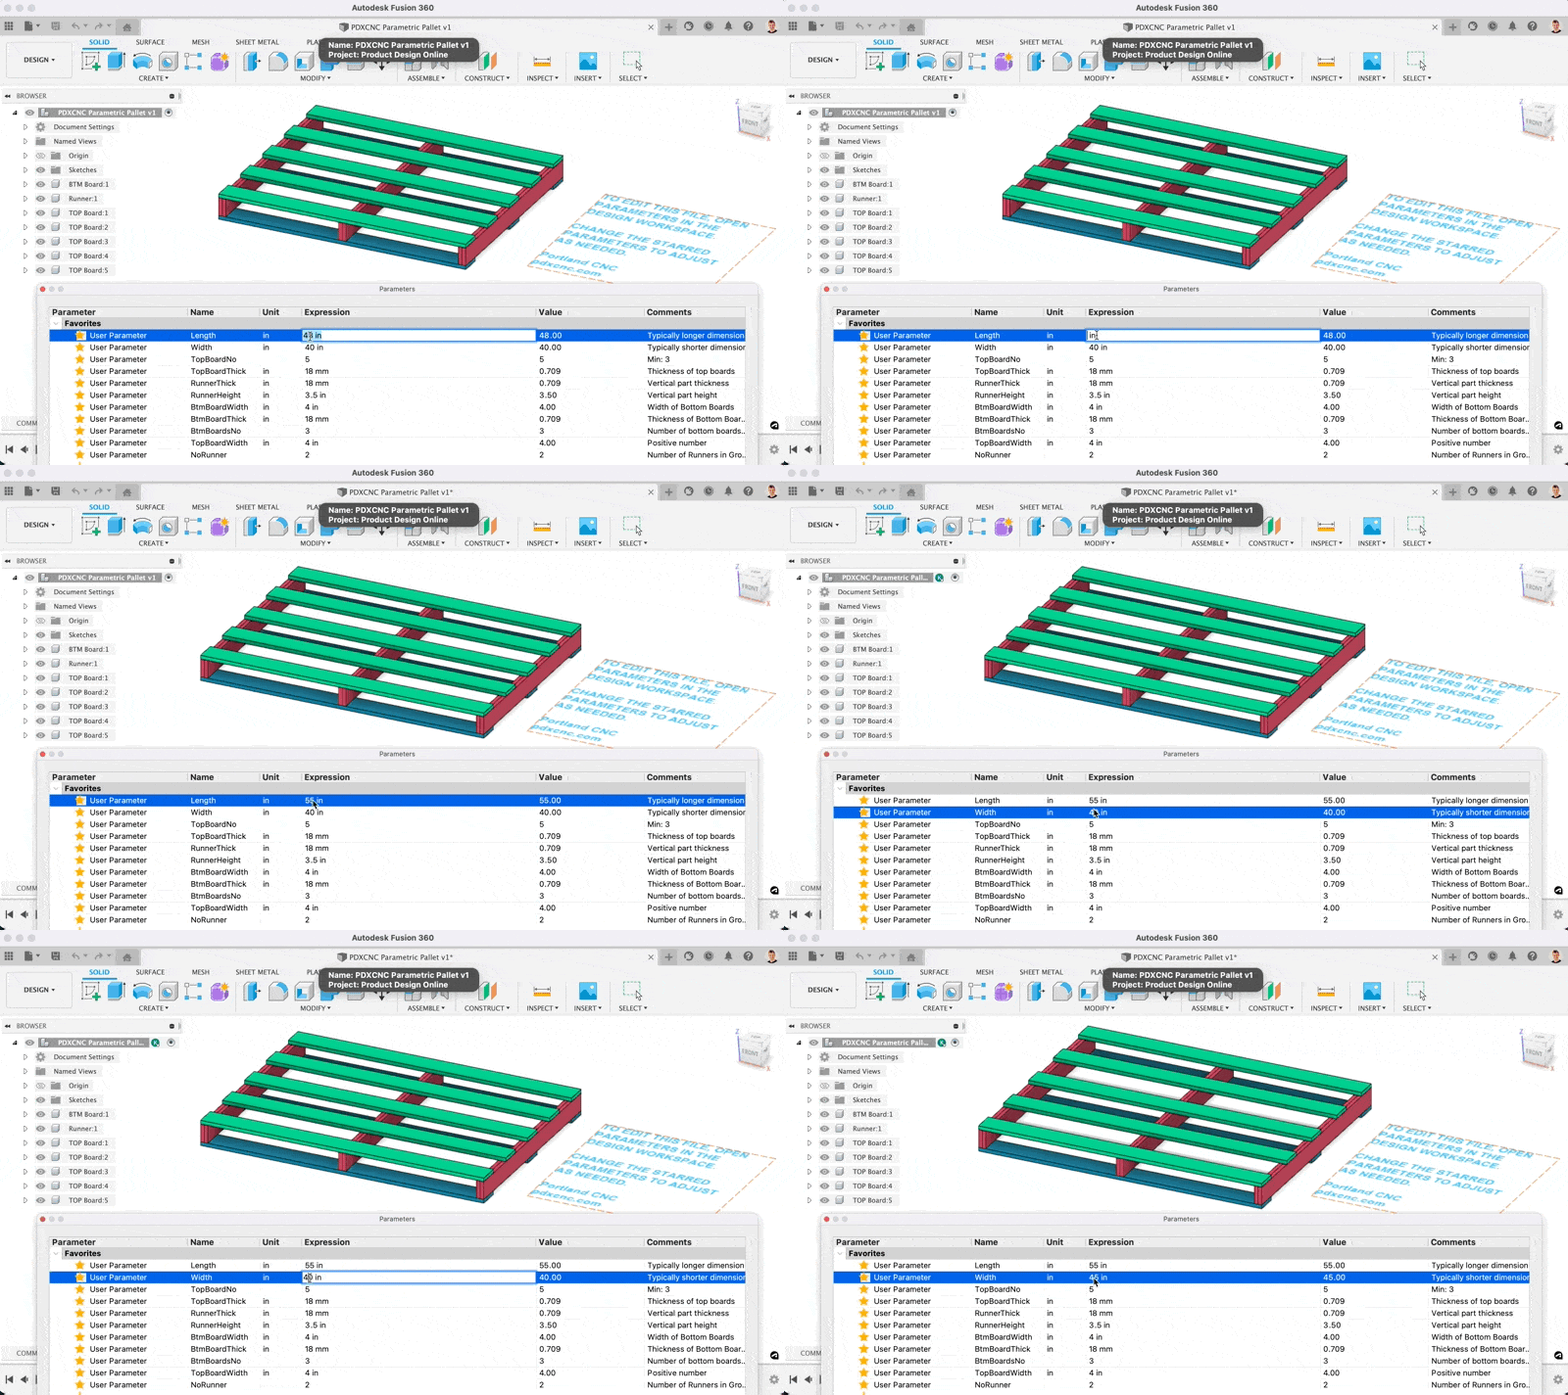
You've seen how one change can trigger others in a simple model. Now imagine this principle applied to a more complex assembly. By setting up the right parameters and equations, you can reconfigure an entire design by editing just a few key values.
This is exactly what you'll need when designing things like a universal gaming accessory holder that needs to be adapted for different controllers, or for your desk project where you might want to test different heights or leg thicknesses.
Let's watch a powerful demonstration of this.
Change your designs quickly with user parameters | Fusion 360 Tutorial - Parametric Modeling Basics
Austin Shaner's video continues with a fantastic example of a complex parametric part. He modifies multiple parameters and the entire model reconfigures itself flawlessly.
Watch from 05:57 to 07:46. Observe how he changes 'hole_diameter', spacing values, and even the number of columns and rows. The entire grid of holes and the plate itself updates instantly and correctly. This is the goal of a well-built parametric model.
The key to making this work is that the overall size of the plate was itself defined by a complex formula that used the number of holes, their diameter, and the spacing between them. You can see this advanced technique in the same video from 16:09 to 20:29 if you are curious, but the main takeaway is the result you just watched.
Conclusion
In this lesson, you've taken a significant step from simply creating parameters to using them intelligently. You now understand how the Change Parameters dialog is your central command console for an adaptable design.
Key Takeaways:
- The
Change Parametersdialog is where you manage all the variables driving your model. - You can create powerful relationships by defining a parameter's expression with mathematical formulas that reference other parameters.
- Changing a single "driver" parameter can trigger a global update, modifying multiple aspects of your design automatically and without errors.
- Using Favorites helps keep your most important parameters easily accessible in complex designs.
You now have the core skills to create flexible and reusable models. In our next lesson, we will examine the Design History Timeline. This is the feature at the bottom of the Fusion 360 window that records every step of your design process. You'll learn how it complements parametric design by allowing you to edit, reorder, and troubleshoot the "recipe" of your model.