Hello! Let's dive into the next piece of the parametric design puzzle.
In our last session, we focused on the "what" of parametric modeling—defining parameters and using expressions in the Change Parameters dialog to create intelligent, adaptable designs. You learned how to make your box design "smarter" by linking its dimensions together.
Today, we'll explore the "how." We'll focus on the Design History Timeline, the feature at the bottom of the Fusion 360 interface. The learning outcome for this lesson is to explain how the timeline records the history of a design's creation. Think of it as the chronological recipe for your model. Understanding this is fundamental to editing, troubleshooting, and managing the complexity of any design, from a simple print to your future custom desk.
1. The Timeline: Your Design's Recipe
If parametric design is a recipe, the user parameters we set are the ingredients, and the timeline shows the step-by-step instructions. Every action you take—creating a sketch, extruding a solid, adding a fillet—is recorded as a distinct "feature" in the timeline.
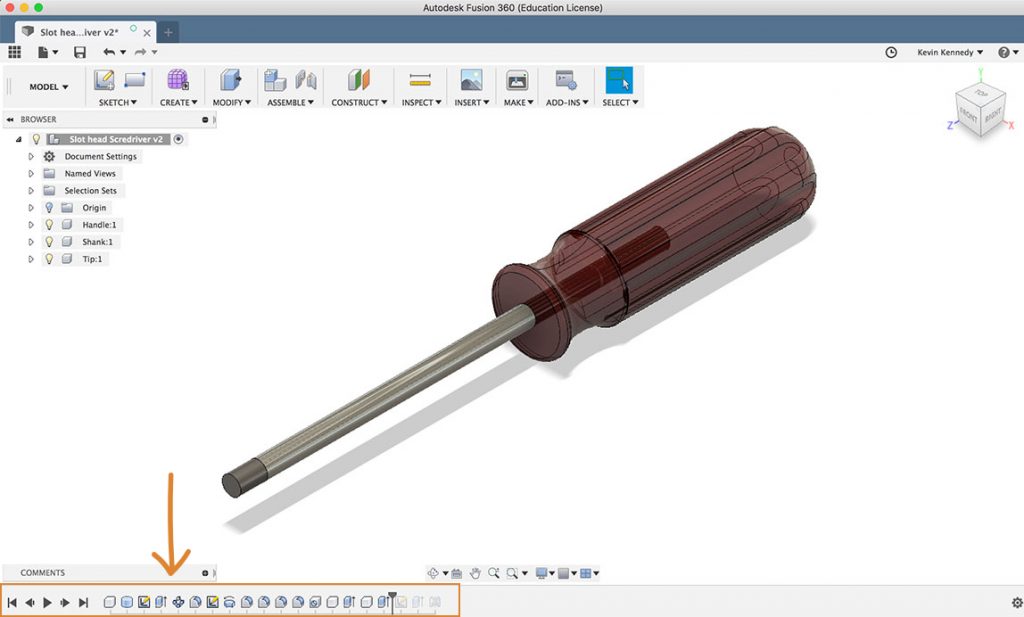
To get a formal definition, let's look at a brief article from the Fusion 360 team.
Master the Timeline, Browser, & Preferences
This article, 'Master the Timeline, Browser, & Preferences,' provides a concise explanation of the timeline's function and its core navigation.
Please read the section titled 'Traversing the Timeline.' Focus on understanding what the timeline contains and the basic navigation controls (the left and right arrows).
The key takeaway is that the timeline isn't just a passive record; it's an interactive history. This history is the core of Parametric Modeling. The alternative, Direct Modeling, doesn't save this history, which offers freedom for conceptual shaping but lacks the structured, editable nature we need for mechanical design. For our goals, we will always want to have the Design History enabled.
2. Visualizing History: The Timeline in Action
The best way to understand the timeline is to see it work. Each icon represents an operation, and by moving through the timeline, you can literally watch your model be built from scratch.
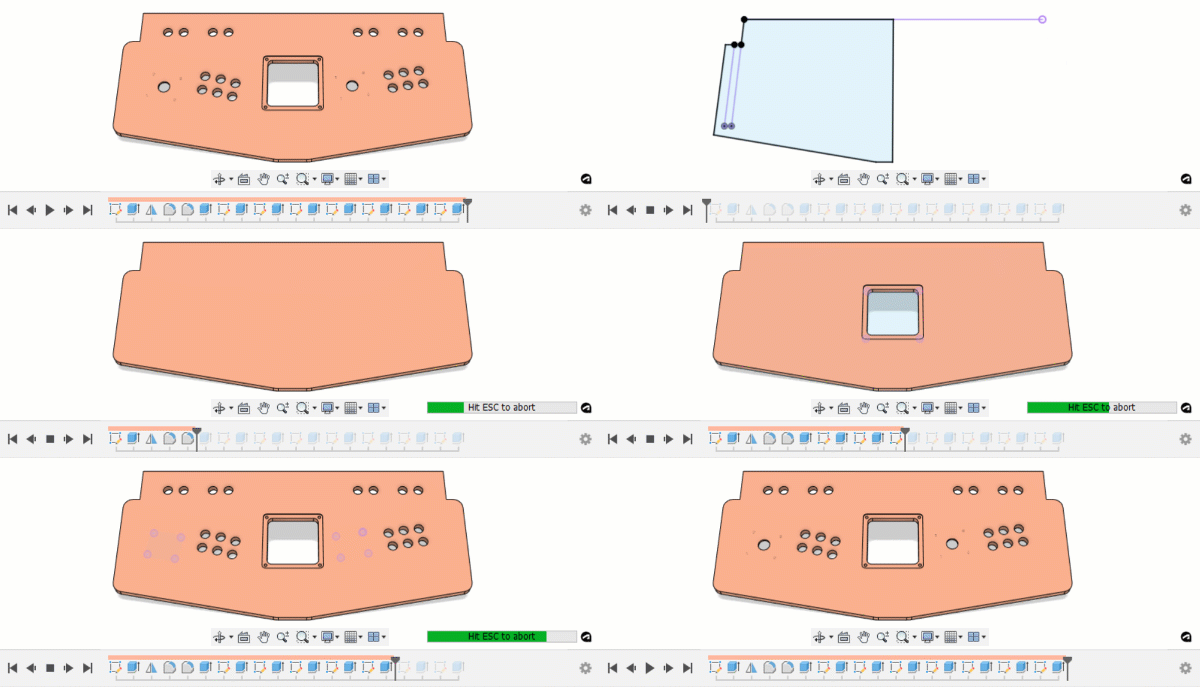
Now, let's watch a short video that demonstrates how to navigate this history.
Using DESIGN HISTORY in Fusion 360! (Everyone should do this)
This video, 'Using DESIGN HISTORY in Fusion 360!', offers a great visual of how to interact with the timeline.
Watch from 02:16 to 02:49. The presenter demonstrates using the slider to move back and forth in time and using the play button to see an animation of the model's creation.
3. Hands-On: Explore Your Box's History
It's time to apply this to your own work.
- Open the parametric box file you worked on in the previous lessons.
- Look at the timeline at the bottom of the screen. You should see a series of icons representing the steps you took:
- An initial Sketch for the base rectangle.
- An Extrude feature to create the solid body.
- A Shell feature to hollow it out.
- A second Sketch on the top face for the lid lip or cutout.
- A second Extrude feature for that lip/cutout.
- Drag the history marker (the vertical bar at the end of the timeline) all the way to the left, before your first sketch. Your model will disappear.
- Now, drag the marker to the right, one step at a time. Watch how the model is rebuilt in the viewport after each feature.
- Finally, drag the marker back to the beginning and press the "Play" button to the left of the timeline. Fusion 360 will play an animation of your design's creation.
This ability to "roll back time" is incredibly powerful for understanding how a model was made, especially when you are examining a file created by someone else.
4. The Logic of History: Parent-Child Relationships
The order of features in the timeline is not arbitrary. It's governed by a strict and logical hierarchy known as parent-child relationships.
A "child" feature depends on a "parent" feature that came before it.
- An Extrude feature (child) is dependent on a Sketch profile (parent).
- A Fillet on an edge (child) is dependent on the Extrude that created that edge (parent).
A child cannot exist without its parent. This is why the timeline is often described as a "time machine."
Fusion 360 - Modeling Tips from the Experts
This document, 'Modeling Tips from the Experts,' uses a great analogy to explain the implications of this chronological dependency.
Read 'Tip 1: The Timeline is a time-travel machine.' This section explains a critical concept: when you roll back the timeline to edit an early feature, any geometry created after that point is temporarily non-existent.
This concept of dependencies is the single most important thing to understand about the timeline. Let's hear it explained with the specific "parent-child" terminology.
Fusion 360 Timeline Tips – Why You Can’t Drag Features Out of Order
In this video, Tyler Beck gives a very clear explanation of parent-child relationships.
Watch from 00:11 to 01:10. Focus on the explanation of how the sketch is the parent of the extrude, and the extrude is the parent of the fillet. This simple example perfectly illustrates the concept.
Understanding this logic is the key. When you want to modify a design, you don't just delete parts and start over. You go back in time, find the parent feature that defines the geometry you want to change, and edit it. The timeline then automatically rebuilds all subsequent child features.
Conclusion
In this lesson, you've learned the fundamental concept of the Design History Timeline. You now know that it's more than just a record; it's the structured, editable recipe of your parametric model.
Key Takeaways:
- The Timeline records every operation (sketch, extrude, etc.) as a feature in chronological order.
- You can navigate the timeline by dragging the history marker or playing an animation to see how a part was constructed.
- The order of the timeline is determined by parent-child relationships, where child features depend on parent features that were created earlier.
- This structure allows you to go "back in time" to edit parent features, which is the foundation of modifying parametric models.
You now understand what the timeline is and why it's ordered the way it is. In our next lesson, we will put this knowledge into practice. You will learn how to use the timeline to reorder, edit, and suppress features, giving you the practical skills to modify and troubleshoot your designs effectively.