Hello! Welcome back to our module on Design for Additive Manufacturing (DfAM).
In the previous lesson, you designed a test piece to discover your printer's practical limits for minimum wall thickness and feature size. That was a crucial first step in understanding how to design parts that are physically manufacturable.
Today, we'll address another fundamental challenge in FDM printing: features that jut out into open space. The goal for this lesson is to learn how to design self-supporting features by respecting overhang angles and using chamfers. Mastering this will allow you to create cleaner, stronger prints that require less post-processing and waste less material, moving you closer to designing complex, functional parts for your gaming and DIY projects.
1. The Overhang Problem and the 45-Degree Rule
In Fused Deposition Modeling (FDM), each layer of your print is built upon the one beneath it. An overhang occurs when a layer extends past the edge of the previous layer. A small overhang is fine, but as the angle becomes more horizontal, the printer is essentially trying to extrude molten plastic onto thin air. This leads to drooping, curling, and poor surface quality, as gravity wins the battle against layer adhesion.
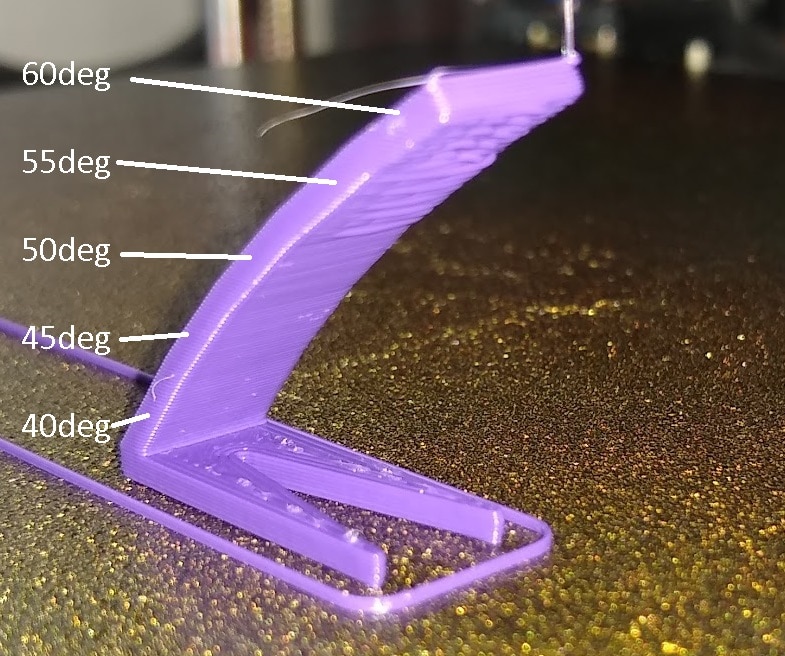
To create reliable, self-supporting designs, we follow a core principle in DfAM known as the 45-Degree Rule.
To understand the physics behind this rule, let's dive into a short reading.
The 45-Degree Rule for 3D Printing: A Core Guide to Design for ...
The article "The 45-Degree Rule for 3D Printing" provides an excellent explanation of the underlying principles.
Please read the following sections: The introduction (before "The Physics"), which defines the 45-Degree Rule. "The Physics: A Battle Between Gravity and Layer Adhesion", focusing on the Core Concept of '50% Overlap'. This is the key to why the rule works. "Consequences of Breaking the Rule", which explains why we want to avoid support structures. This will clarify the trade-off between the new layer's cantilevered weight and the adhesion force from the previous layer.
The key takeaway is that at a 45-degree angle, each new layer is supported by at least 50% of the layer beneath it. This provides enough of a foundation for the new layer to bond successfully without sagging. Any angle steeper than 45 degrees (e.g., 60, 70, or 90 degrees) reduces this overlap, making a print failure much more likely without adding support structures.
2. The Design Solution: Chamfers over Fillets
Now that we understand the problem, how do we solve it in our designs? One of the most common situations where you'll encounter overhangs is when transitioning between a horizontal and a vertical surface. In traditional design, a rounded edge, or fillet, is often used for aesthetics and stress reduction. However, for 3D printing, a fillet can be problematic.
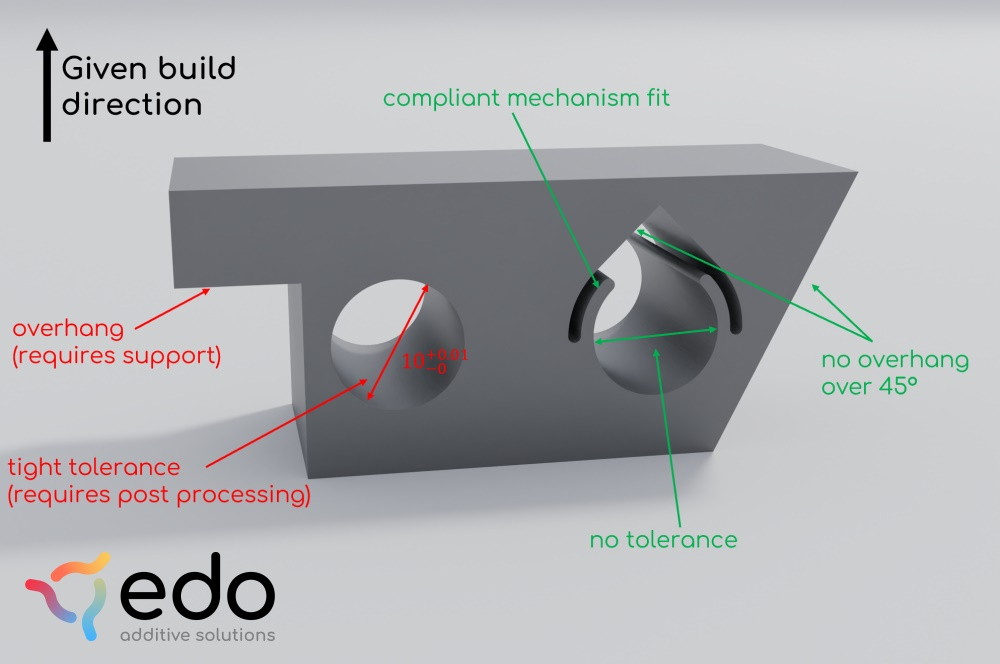
A fillet is a curve. As the curve approaches the top, its tangent becomes almost horizontal, creating a severe overhang angle that violates the 45-degree rule. The solution is to use a chamfer, which is a straight, angled edge. By setting this angle to 45 degrees, you create a feature that is entirely self-supporting.
This video provides a powerful visual demonstration of why chamfers are often a better choice for parts that will be 3D printed.
Fillets are Sexy but Chamfers are BETTER (For 3D Printing...)
The video "Fillets are Sexy but Chamfers are BETTER (For 3D Printing...)" from Maker's Muse clearly illustrates the difference in print quality between these two features.
Please watch from the beginning to 06:03. Pay close attention to: The visual difference in the printed test piece (02:28). The explanation in the slicer preview (03:21), which shows why the fillet fails on the bottom (severe initial overhang) and top (layer stepping becomes too wide).
As the video shows, the constant 45-degree angle of the chamfer results in consistent layer overlap and a much cleaner surface finish on bottom-facing (overhanging) and top-facing surfaces. Fillets are still perfectly fine for vertical edges (on the sides of a print), where the printer's XY motion can create a smooth curve without any overhang issues.
3. Practical Application: Designing Self-Supporting Holes
The 45-degree rule isn't just for external edges. It's a powerful tool for designing internal features as well. A classic example is creating a horizontal hole or a recess (like one for a hex nut) that prints cleanly without needing support material inside.
If you model a simple cylindrical hole horizontally, the top surface of the hole is a massive 90-degree overhang that will droop and fail. The same applies to the flat ceiling of a hex nut pocket.
One elegant solution is to change the geometry from a flat roof to an angled one. By applying a 45-degree chamfer or taper, you transform the problematic overhang into a self-supporting cone or pyramid shape.
This next video demonstrates several techniques for creating support-free bores, but we will focus on the one that directly applies today's lesson.
How to 3D Print bores without supports (Fusion 360 Masterclass)
In "How to 3D Print bores without supports," Maker's Muse demonstrates how to use the 45-degree rule to create clean holes.
Please watch the segment from 04:27 to 06:31. This section shows how to apply a 45-degree taper angle in Fusion 360 to a hex nut pocket, making it self-supporting. Note the discussion on the structural trade-off: this modification is excellent for printability but may not be suitable for high-load applications where the nut could act as a wedge.
This technique of designing a "teardrop" shape for horizontal holes is a hallmark of good DfAM practice. When you see a part with these angled internal features, it's a clear sign that it was designed with 3D printing in mind. The other methods shown in the video, like sacrificial and sequential bridging, are also powerful techniques we will touch on later.
Conclusion
In this lesson, you've learned a foundational principle of Design for Additive Manufacturing. By understanding and respecting your printer's physical limitations with overhangs, you can make deliberate design choices in your CAD software to create parts that print successfully without relying on wasteful and time-consuming support structures.
Key Takeaways:
- The 45-Degree Rule: Overhangs angled at 45 degrees or less from the vertical are generally self-supporting because each new layer has at least 50% overlap with the previous one.
- Chamfers > Fillets (for overhangs): For bottom-facing edges, a 45-degree chamfer creates a constant, printable angle, whereas the changing curve of a fillet creates severe overhangs that lead to poor quality.
- Design for Printability: You can make features like horizontal holes and internal pockets self-supporting by incorporating 45-degree tapers or "teardrop" shapes into your design.
In our next lesson, we will tackle the main exception to the 45-degree rule: designing printable horizontal bridges between two vertical points. This will add another essential technique to your DfAM toolkit for creating complex, support-free models.