Hello! Welcome to your final lesson in the "First Practical Projects" module.
In our last session, you completed the full design loop by printing, evaluating, and iterating on a replacement part. You've experienced how a digital model becomes a physical object and how to refine it based on real-world testing. Now, let's focus on the last step that turns a raw print into a finished product.
Today's Goal: Your learning outcome is to safely remove support structures from a print and perform basic surface finishing (sanding).
A great design can be let down by a messy finish. This lesson covers the essential post-processing skills needed to clean up your prints, making them both functional and aesthetically pleasing. Mastering these techniques is just as important for creating durable replacement parts as it is for making professional-looking gaming accessories.
1. Safety and Toolkit for Post-Processing
Removing support structures can generate sharp, brittle plastic shards that can easily cause cuts or eye injuries. Before you begin, it's crucial to have the right safety gear and tools.
Your mechanical engineering background has likely given you a healthy respect for workshop safety; the same principles apply here, even on a smaller scale.
Easily Remove 3D Printed Supports | 5 Methods for Clean Results
To start, let's go over the essential safety precautions and the basic toolkit for support removal. The first part of this video from ItsMeaDMaDe provides an excellent overview.
Watch from 1:34 to 5:54. The presenter covers the 'three pillars' of safety for post-processing: Cut-resistant gloves: To protect your hands from sharp plastic edges. Safety glasses: To protect your eyes from flying debris. Respirator: To be used when applying heat or chemicals that create fumes (we'll touch on this later).
In addition to safety gear, you will need a few basic tools. You likely received a set of flush cutters with your printer, and the other tools are common in any DIY toolkit.

Your Basic Toolkit:
- Flush cutters: For snipping supports close to the model surface.
- Needle-nose pliers: For gripping and twisting larger sections of support material.
- Craft knife (e.g., X-Acto) or a deburring tool: For trimming away small, stubborn remnants and cleaning up edges.
2. Techniques for Removing Supports
The goal of support removal is to break away the temporary scaffolding without damaging the actual part. The image below shows the "before and after," which is what we're aiming for.
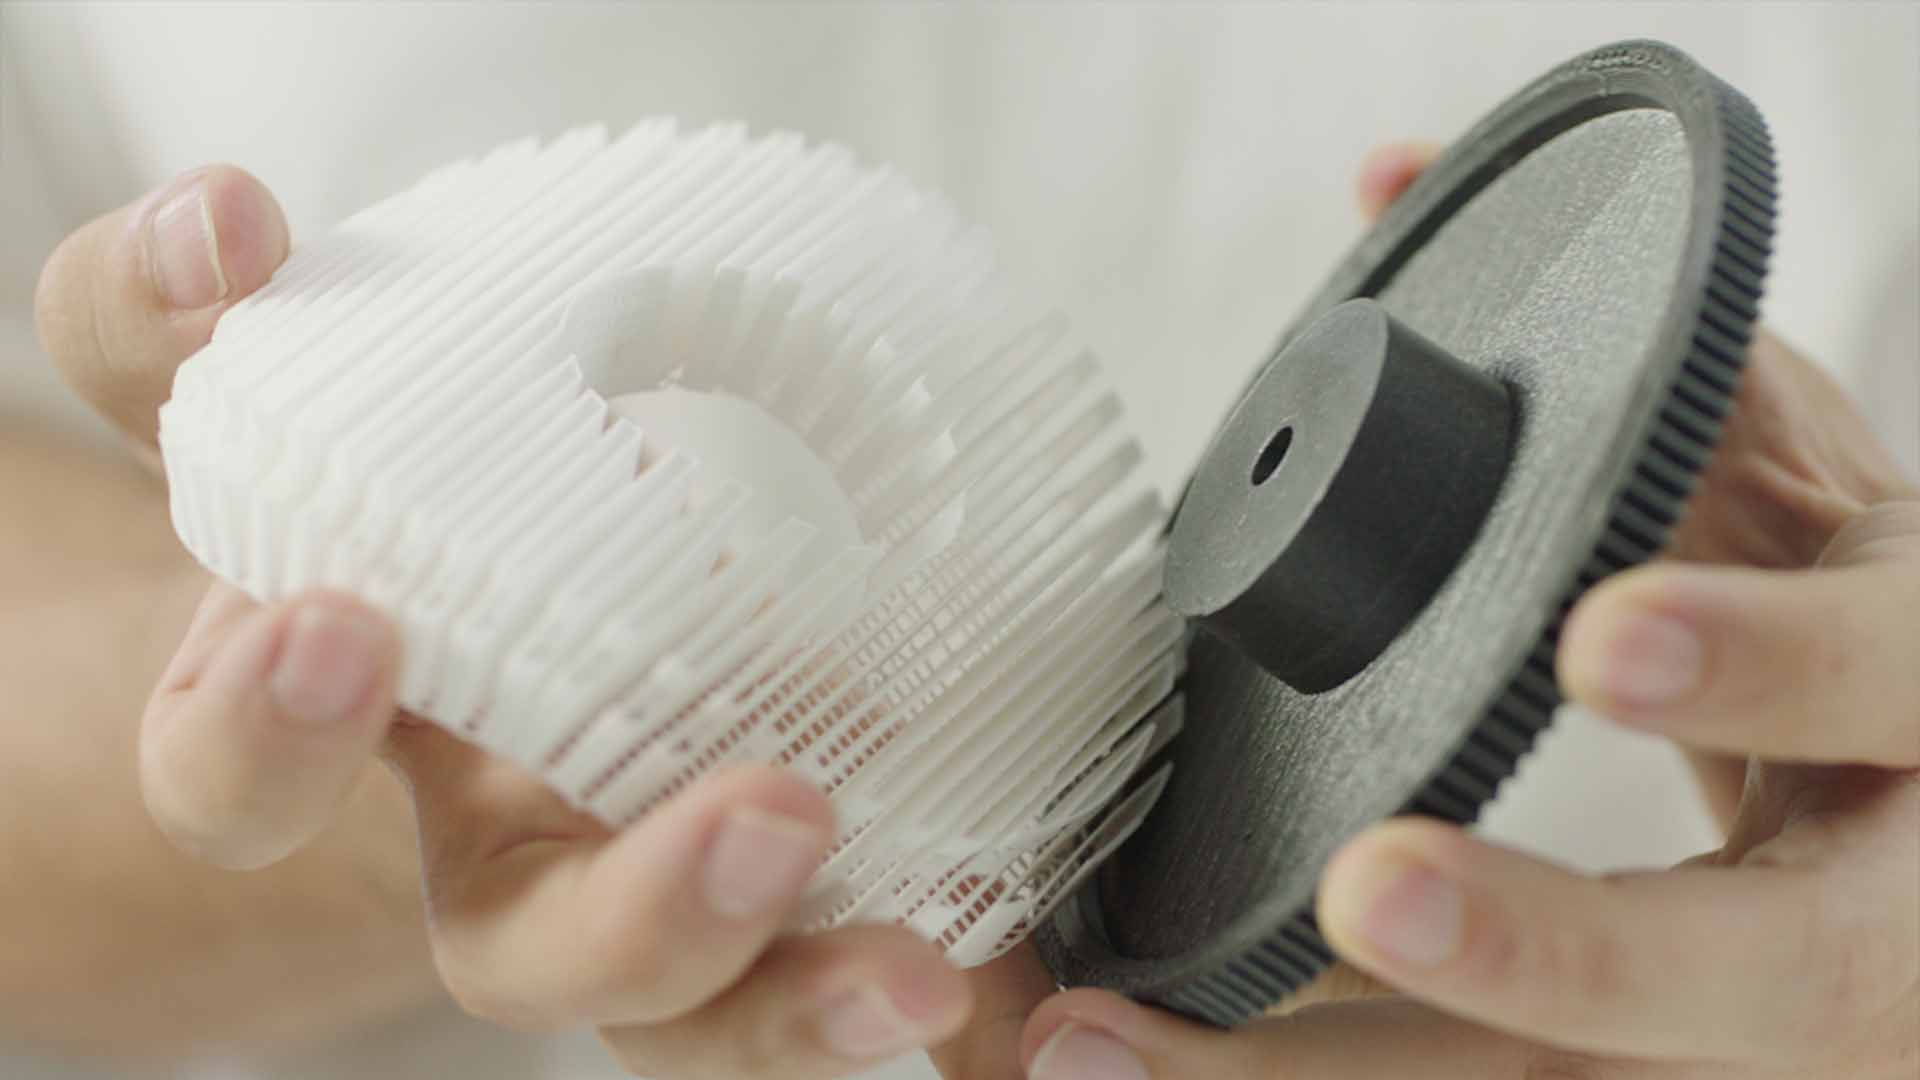
There are several methods for removing supports, ranging from simple mechanical force to more specialized thermal techniques.
A. Mechanical Removal: The Standard Approach
For most prints made from materials like PLA or PETG, you'll use mechanical methods. This involves a combination of prying, pulling, and snipping.
Easily Remove 3D Printed Supports | 5 Methods for Clean Results
The following sections of the same video demonstrate the most common techniques for mechanically removing standard and tree supports.
Please watch from 5:54 to 13:48. Focus on the overall strategy: Prying Method (5:54): Notice how a screwdriver or pick is used to get leverage under a support interface and pry it away. Be cautious with this method, as too much force can gouge or break your part. Twist and Pull Method (13:48): See how pliers are used to grip and twist large sections of support structures, breaking them away from the base. Cleanup: In both segments, observe how flush cutters and pliers are used to clean up the remaining small pieces after the main structures are removed.
Key Principles for Mechanical Removal:
- Let it Cool: As the Xometry article "10 Steps on How To Remove Supports" advises, always let your print cool down completely. A warm print is softer and more likely to deform or break.
- Start from the Outside: Begin by removing the most accessible supports on the exterior of the model. This often clears the way to reach internal or more difficult supports.
- Use Leverage Wisely: When prying, apply gentle, steady force. Try to work along the support interface layer rather than pushing directly into your model.
- Wiggle and Twist: For larger support sections, gently wiggling or twisting them with pliers can help them snap cleanly at the contact point.
B. Thermal Methods: For Delicate or Stubborn Supports
Sometimes, supports are in delicate areas where mechanical force would break the model. In these cases, applying a bit of heat can soften the support material, making it easier to remove.
The safest and easiest thermal method for PLA is using hot water.
Easily Remove 3D Printed Supports | 5 Methods for Clean Results
This next clip shows the hot water method. It's surprisingly effective for intricate models with fine details, like the gaming miniatures you might be interested in.
Watch from 31:06 to 39:37. The key takeaway is that submerging a PLA print in hot (not boiling) water for 30-60 seconds makes the thin support structures pliable and easy to peel away by hand or with pliers, often without leaving any marks.
Other Advanced Methods (For Your Information):
- Heat Gun/Soldering Iron: As shown in the same video (LINK from 19:00 to 22:05), a heat gun or soldering iron can be used to target and soften specific support areas. These are powerful tools that require a respirator and a great deal of care to avoid melting your actual model.
- Solvent Smoothing: Some materials, like ABS, can be "melted" or smoothed with a solvent like acetone. This is an advanced technique used to both remove supports and completely eliminate layer lines, as shown in the M.M's Prop Shop video (LINK) from 16:17 onwards. We won't focus on this now, but it's a good example of how material choice can dramatically change the post-processing workflow.
3. Basic Surface Finishing: Sanding
After removing supports, you'll be left with small marks or a rough texture where they were attached. The goal of basic finishing is to smooth these areas and blend them with the rest of the print. The primary tool for this is sandpaper.
The process is analogous to finishing wood or metal: you start with a coarser grit to remove larger imperfections and then move to finer grits for a smoother finish.
The Ultimate Guide to Smoothing & Finishing Your 3D Prints
This video from M.M's Prop Shop gives an excellent demonstration of the sanding process. We'll focus on the initial steps for basic finishing.
Watch these two segments: Initial Sanding (2:31 - 5:45): Pay attention to the use of files for very rough areas and then hand sanding with 100-120 grit sandpaper to remove support marks and layer lines. This is the core of basic finishing. Final Sanding (9:05 - 10:03): This shows the last step before painting, using a finer 400-grit sandpaper. This illustrates the progression from coarse to fine grits to achieve a very smooth surface.
A Simple Sanding Workflow:
- File Down High Spots: If there are any significant nubs left from supports, use a small file to knock them down first.
- Coarse Sanding (120-180 grit): Use a coarse grit to remove the remaining support marks and to begin smoothing the most visible layer lines. Sand in a circular or varied motion to avoid creating deep scratches in one direction.
- Fine Sanding (220-400 grit): Once the major imperfections are gone, switch to a finer grit to smooth out the scratches left by the coarse paper. This step will give you a surface that is smooth to the touch.
A quick tip: When sanding PLA, be careful not to generate too much heat from friction, as it can cause the plastic to get gummy and clog the sandpaper. Sand in short bursts or use wet sanding (using water as a lubricant) to keep things cool.
4. Your Turn: Finish Your Replacement Part
Now, let's apply these skills. Take the final version of the replacement part you printed in the last lesson.
- Gear Up: Put on your safety glasses and cut-resistant gloves.
- Remove Supports: Using your flush cutters and pliers, carefully remove any support material or brim/raft from the print. Work slowly and methodically.
- Initial Cleanup: Use your craft knife or deburring tool to carefully trim any small, remaining bits of plastic.
- Sand the Surface: Take a piece of ~150 grit sandpaper and smooth the areas where the supports were attached. Try to blend the surface texture with the rest of the part. If you want an even smoother finish, follow up with 220 or 400 grit paper.
Conclusion
Congratulations on completing your first full project workflow! You've now covered every step from measuring a real-world object to designing, printing, iterating, and finally, finishing a functional part.
Key Takeaways:
- Safety First: Always wear gloves and safety glasses when removing supports.
- Use the Right Tool: Mechanical removal with pliers and cutters is the default method for most prints.
- Thermal Assists: Hot water is a safe and effective way to remove supports from delicate PLA prints.
- Sanding Progression: Finishing involves sanding from a coarse grit (to remove material) to a fine grit (to smooth the surface).
Next Lesson Preview:
You've built a strong foundation in the entire 3D printing process. In the next module, "Advanced Modeling & Design Refinement," we will circle back to Fusion 360 to expand your design capabilities. The first lesson will focus on how to create and use construction planes and axes. This skill is fundamental for creating geometry that isn't aligned with the origin, which is essential for the complex, multi-part designs you'll need for projects like your custom desk.