Introduction
Hello! In our previous lesson, we explored the "what" and "why" of Azure Container Apps (ACA), establishing it as a powerful, serverless platform for running containerized microservices. You learned about its core architectural components—Environments, Apps, Revisions, and Replicas—and how it leverages open-source projects like KEDA and Dapr to provide advanced capabilities.
Today, we transition from theory to practice. You have a .NET application, containerized with Docker and pushed to your Azure Container Registry (ACR) from earlier in this module. Now, we will deploy that container as a live, running microservice on Azure Container Apps.
This lesson directly addresses the learning outcome: Deploy a microservice to Azure Container Apps using an image from ACR. This is a fundamental, hands-on skill you'll be tested on for the AZ-204 certification. We will walk through the deployment process using the Azure Portal for a visual, step-by-step experience, and then review the equivalent Azure CLI commands that are essential for automation and scripting.
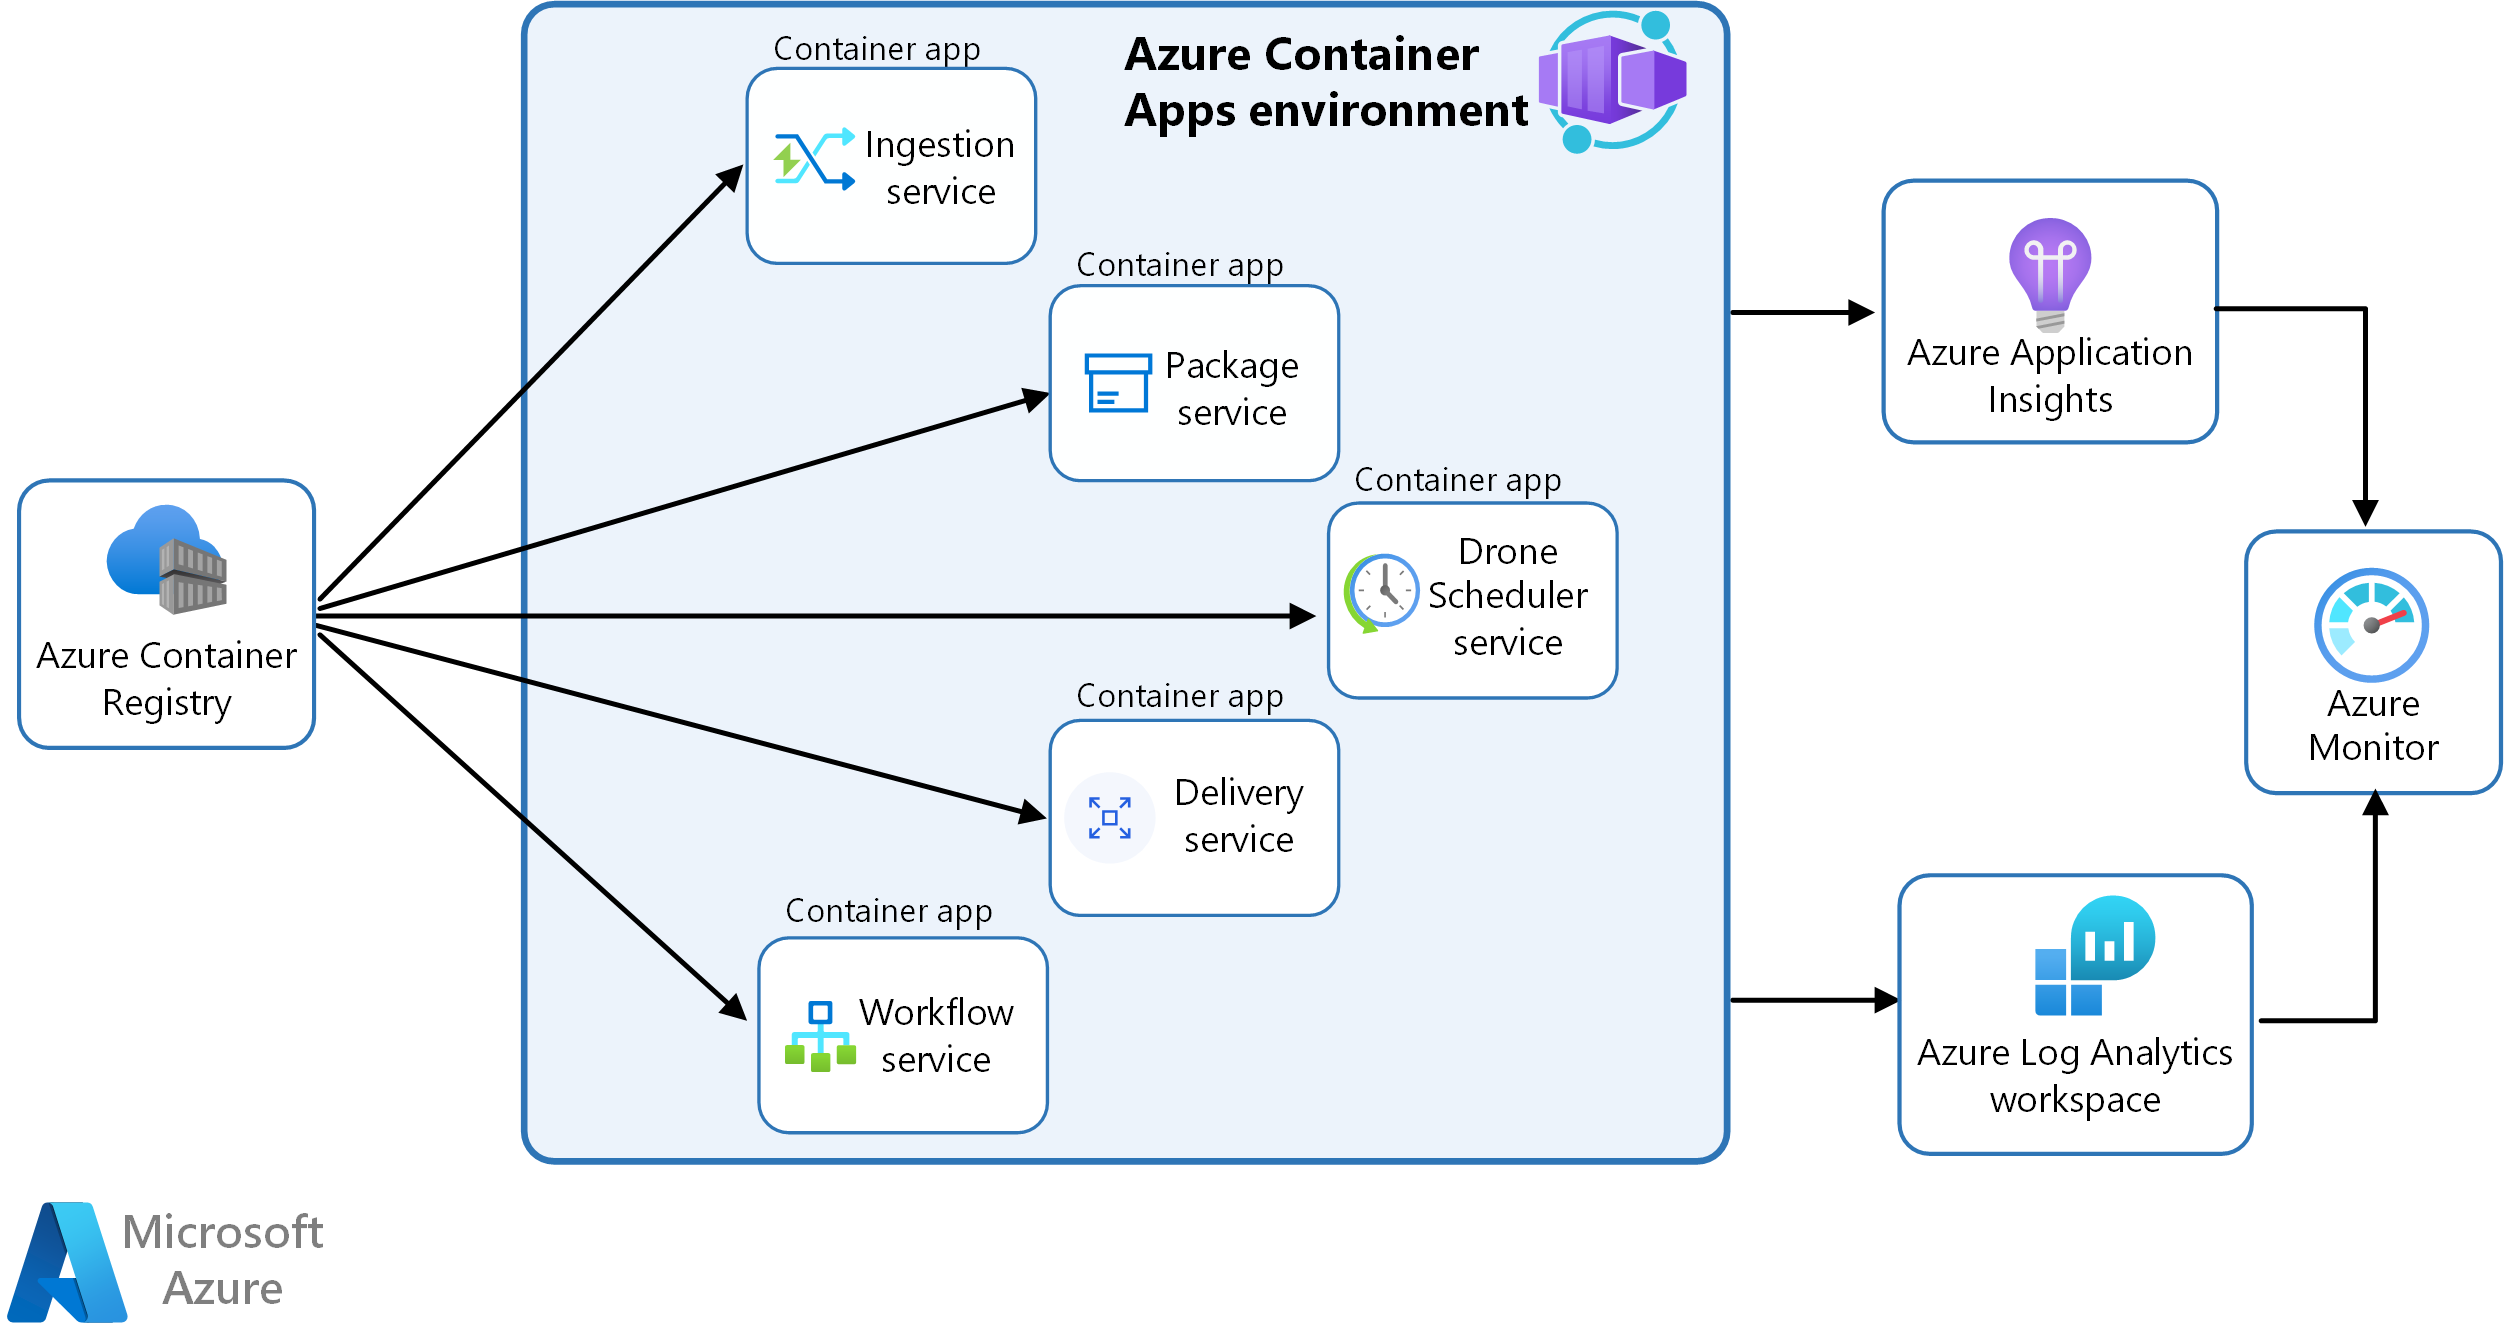
Visualizing the Goal
A single microservice is often one component in a larger distributed system. The goal of using a platform like Azure Container Apps is to easily deploy, manage, and connect multiple services.
1. Deploying a Container App via the Azure Portal
Our first approach will be using the Azure Portal. This provides a clear, form-based interface that maps directly to the architectural concepts we discussed in the last lesson. We will create a Container App Environment and then deploy our container app into it.
The following video provides an excellent walkthrough of this entire process. We will use it as our guide for this hands-on lab.
How To Deploy Your Application To Azure Container Apps Using GitHub Actions | CI/CD Pipeline
This video by Milan Jovanović demonstrates how to create a Container App and deploy an image from a container registry. We will follow a similar process to deploy the .NET application image you have in your ACR.
Please watch the segments from 06:52 to 11:15. As you watch, follow along in your own Azure Portal to perform the steps. The video will guide you through: Creating a Container App (from 06:52): This includes creating a new Container App Environment first. Configuring the App (from 07:36): Pay close attention to selecting Azure Container Registry as the image source and choosing the image and tag you pushed in a previous lesson. Enabling Ingress (from 08:59): This is the crucial step to expose your application to the internet. Verifying the Deployment (from 09:30): See how to find the application URL and test it.
Step-by-Step Instructions
Based on the video, here is a summary of the steps you need to take in the Azure Portal:
-
Navigate to Container Apps: Search for and select "Container Apps" in the Azure portal, then click "Create".
-
Create a Container App Environment:
- On the "Basics" tab, select your subscription and the same resource group you've been using for this module.
- Give your container app a name (e.g.,
my-api-app). - Under "Container App environment", click "Create new". Give the environment a name (e.g.,
my-container-env). The environment provides a secure, isolated boundary for your apps. All apps within an environment share the same virtual network and logging workspace. - Click "Create" to provision the environment.
-
Configure the Container App Details:
- On the "App settings" tab, uncheck "Use quickstart image".
- Image Source: Select Azure Container Registry.
- Registry: Choose the ACR instance you created earlier.
- Image: Select the repository for your .NET application.
- Image tag: Select
latestor the specific tag you used. - CPU and Memory: For now, you can leave the default resource allocation (e.g., 0.5 vCPU, 1.0 Gi memory).
-
Enable Ingress:
- Navigate to the Ingress tab.
- Select Enabled.
- Ingress traffic: Choose Accepting traffic from anywhere. This makes your app publicly accessible.
- Target port: Set this to the port your container listens on. For a standard .NET web API, this is often
80or8080(or443for HTTPS). Check your Dockerfile if you're unsure. The video uses80as an example.
-
Review and Create:
- Click "Review + create", then "Create". The deployment will take a few minutes.
-
Verify Deployment:
- Once the deployment is complete, go to the resource.
- On the "Overview" page, find the Application Url.
- Since you've deployed a .NET web API that likely includes Swagger, append
/swaggerto the URL (e.g.,https://my-api-app.some-region.azurecontainerapps.io/swagger) and open it in your browser. You should see the Swagger UI, confirming your API is live.
2. The Command-Line Approach with Azure CLI
While the portal is great for learning, the Azure CLI is essential for automation, CI/CD pipelines, and is a frequent topic on the AZ-204 exam. The steps you just performed visually can be accomplished with a few commands.
We will now review a Microsoft Learn tutorial that uses the Azure CLI to achieve the same outcome. You don't need to re-deploy your application, but you should study these commands to understand how they map to the actions you took in the portal.
Tutorial: Build and deploy your app to Azure Container Apps
This Microsoft Learn tutorial provides a complete guide to deploying a container app using only the Azure CLI. We will focus on the commands for creating the environment and the app itself.
Read the sections titled 'Create a Container Apps environment' and 'Deploy your image to a container app'. You can use the 'Bash' tab for the commands. Pay close attention to the az containerapp create command and its parameters.
Deconstructing the az containerapp create Command
The core of the CLI deployment is the az containerapp create command. Let's break down the key parameters from the tutorial:
az containerapp create \
  --name $API_NAME \
  --resource-group $RESOURCE_GROUP \
  --environment $ENVIRONMENT \
  --image $ACR_NAME.azurecr.io/$API_NAME \
  --registry-server $ACR_NAME.azurecr.io \
  --target-port 8080 \
  --ingress external \
  --user-assigned "$IDENTITY_ID" \
  --registry-identity "$IDENTITY_ID"
--name,--resource-group,--environment: These parameters specify the basic identity and location of your container app. This corresponds to the "Basics" tab in the portal.--image: The full path to your container image in ACR. This is what you selected from the dropdowns in the portal.--registry-server: Specifies the login server for your container registry.--target-port: The port your container expects traffic on. This matches the "Target port" field in the Ingress settings.--ingress external: This single parameter is equivalent to enabling ingress and accepting traffic from anywhere.--registry-identity: This is an important parameter for security. It tells the Container App to use a managed identity to authenticate with ACR and pull the image. This avoids using admin credentials. We will cover managed identities in detail in Module 8, but it's good to see this best practice now.
By using these commands, you can script the entire deployment process, making it repeatable and suitable for automated pipelines—a critical skill for a DevOps-focused developer.
Conclusion
Congratulations! You have successfully deployed a containerized microservice from Azure Container Registry to Azure Container Apps. You've experienced the process through the intuitive interface of the Azure Portal and have also dissected the powerful Azure CLI commands that accomplish the same task.
Key Takeaways:
- Deploying to ACA requires a Container App Environment to provide a secure boundary for your app.
- You can deploy an app by pointing to an image in ACR.
- Ingress must be enabled to expose your application to external traffic, and the target port must match what your container listens on.
- The deployment process can be done visually via the Azure Portal or automated using the Azure CLI
az containerapp createcommand.
Next Steps
Your application is now running, but what happens when it receives a surge of traffic? In our next lesson, we will explore one of the most powerful features of Azure Container Apps: autoscaling. You will learn how to configure scaling rules for an Azure Container App based on HTTP traffic, ensuring your application remains responsive and cost-effective under varying loads.