Hello! Welcome to the next step of your crypto journey.
In our previous lessons, you've done the essential groundwork: you created your Binance account, learned to identify security threats, completed identity verification, and most importantly, secured your account with Two-Factor Authentication (2FA). Your account is now set up and safe.
Today, we're going to get you comfortable moving around the Binance platform. Think of it like getting the keys to a new car; before you drive, you need to know where the dashboard, steering wheel, and pedals are. By the end of this lesson, you will be able to confidently navigate the key areas of the Binance web and mobile interfaces, including the main dashboard, markets, trading sections, and your wallets.
This tour will set the stage for our next lesson, where you'll make your first deposit.
Part 1: The Two Faces of the Binance App (Lite vs. Pro)
The Binance mobile app has two different modes designed for different experience levels: Lite and Pro. It's important to know the difference and how to switch between them.
- Binance Lite: A simplified, beginner-friendly interface. It focuses on the absolute basics: buying, selling, and converting crypto. It's clean and uncluttered.
- Binance Pro: The full-featured, powerful interface. This mode gives you access to everything, including advanced trading charts, multiple order types, staking, futures, and all other Binance products.
While Lite is a gentle introduction, our goal is to master the full platform, so we will be focusing on the Pro interface.
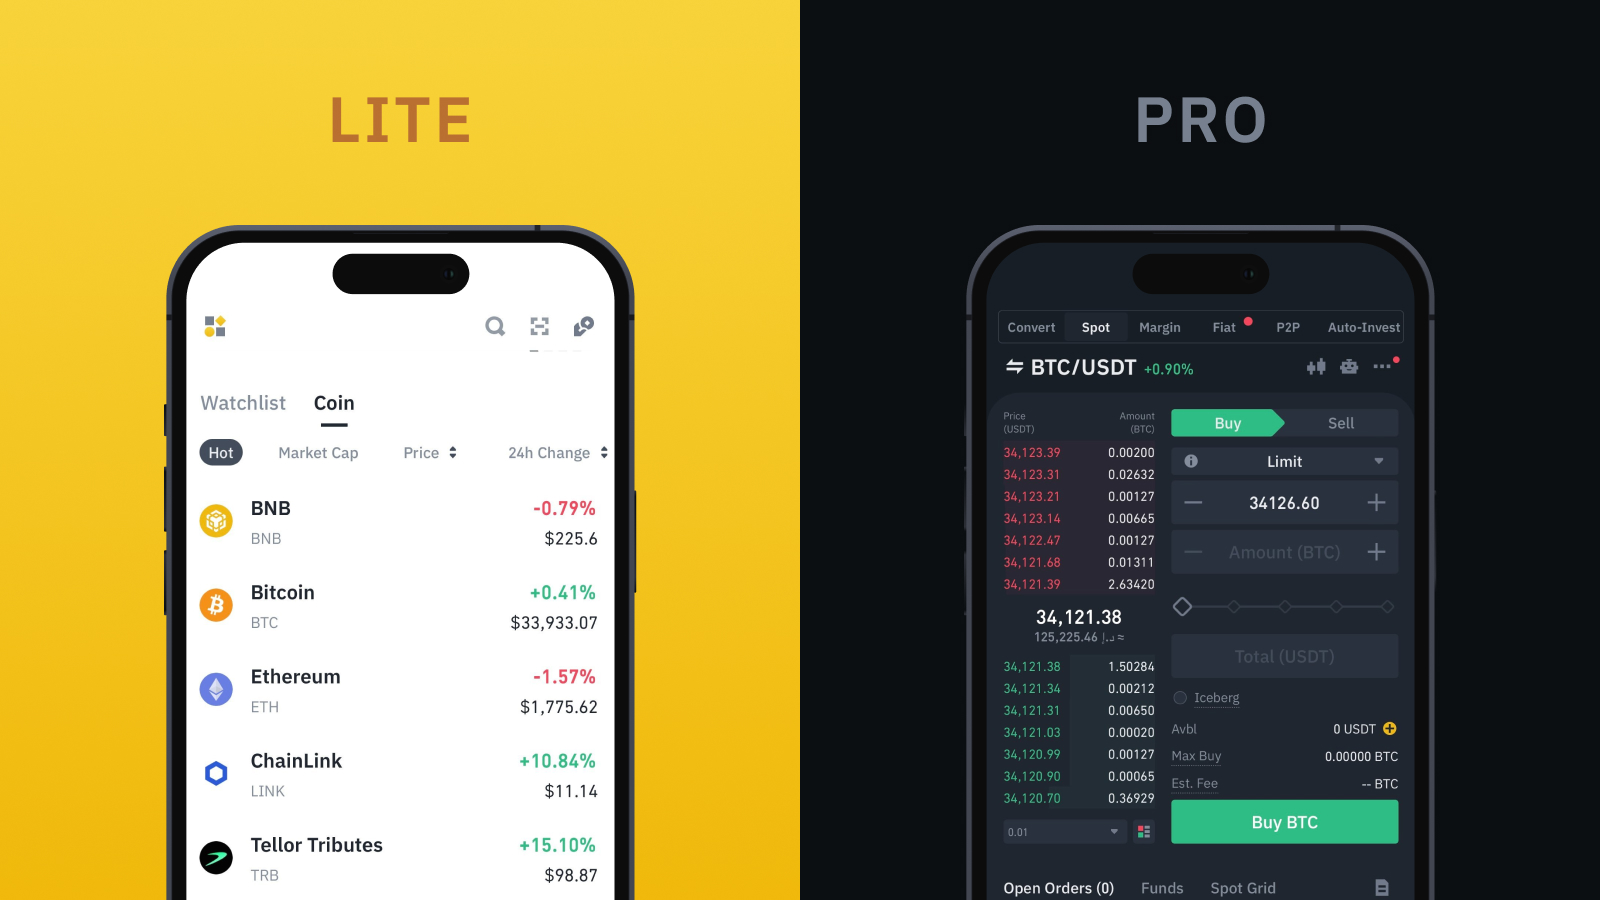
The following video will quickly show you the difference and, most importantly, how to switch from Lite to Pro mode.
Binance App Tutorial for Beginners: How to use Binance Mobile App
Let's watch a segment from the 'Binance App Tutorial for Beginners' by Collection Crypto. This will give you a quick visual overview of the Lite and Pro versions and how to toggle between them.
Watch from 02:32 to 03:20. The key thing to focus on is how the presenter navigates to their profile and switches from 'Binance Lite' to 'Binance Pro'. Please make sure your app is in Pro mode to follow along with the rest of this lesson.
Part 2: A Guided Tour of the Binance Mobile App (Pro Mode)
With your app in Pro mode, let's explore the five core sections found in the bottom navigation bar. These are your primary controls for almost everything you'll do on Binance.

-
Home: This is your main dashboard. You'll find announcements, shortcuts to popular features (like
Earn), and lists of hot or trending coins. It's your starting point. -
Markets: This is your window into the crypto world. Here, you can browse or search for thousands of available cryptocurrencies, see their prices, and check their performance over the last 24 hours. You'll see them listed as "trading pairs" (e.g., BTC/USDT), which we'll cover in detail later.
-
Trades: This is the action hub. From here, you can access the main "Spot" trading interface to buy and sell cryptocurrencies. You can also find the "Convert" feature for simple, instant swaps.
-
Futures: This tab is for advanced leveraged trading. It's a high-risk, high-reward area that we will cover in a dedicated module much later in the course. For now, it's good to know where it is, but we will not be using it.
-
Wallets: This is one of the most important sections for you right now. It's where you manage your money. You can check your account balance, see all the different assets you hold, and—crucially for our next lesson—initiate deposits and withdrawals.
Part 3: Navigating the Binance Website
While the mobile app is great for on-the-go access, the website offers a more expansive view, which is especially useful for trading and analysis. The layout mirrors the app's logic but is presented differently.
The primary navigation happens via the top navigation bar.
Binance Tutorial for Beginners 2025: Complete Step-by-Step Guide
The article 'Binance Tutorial for Beginners 2025' by Mind Math Money gives a fantastic text-based overview of the website's layout. We'll use it as our guide.
Please read the section 'Understanding the Binance Platform Interface,' focusing on the descriptions under 'The Main Dashboard' and 'Top Navigation Bar.' This will introduce you to the key menus we're about to discuss.
Here's a breakdown of the key menus on the website's top bar:
-
Buy Crypto: This is your primary on-ramp. Just like on the app, this is where you can buy crypto with a credit/debit card or initiate a bank deposit to fund your account with fiat currency (like USD or EUR).
-
Markets: This page is the web equivalent of the 'Markets' tab on the mobile app. It provides a comprehensive list of all cryptocurrencies and trading pairs on Binance.
-
Trade: Hovering over this menu reveals several options. The two most important for you are:
- Spot: This takes you to the standard trading interface with charts and order books. This is the main trading arena.
- Convert: A simple tool for instantly swapping one currency for another without a complex interface. It’s perfect for quick, straightforward exchanges.
-
Earn: This is where you can find products to earn passive income on your crypto, such as through savings or staking. We will explore this in a later module.
-
Wallet Icon: On the top right, you'll see an icon of a wallet. Hovering over this and clicking "Fiat and Spot" will take you to your main account balance page. This is the web equivalent of the 'Wallets' tab on the app and shows you all the fiat and crypto assets you hold.
Part 4: A Closer Look at the Trading Interface
You don't need to place a trade today, but it's important to get a feel for the environment where trades happen. This is the "Spot" trading screen. It might look intimidating at first, but it's made up of a few logical components.
The official 'Binance Beginner's Guide' has a great section that breaks down the Spot trading interface into its core parts.
Read the section titled 'Using the Binance Spot Trading Interface.' Don't worry about the instructions on how to buy or sell yet. Just focus on identifying the main components: the order book (red sell orders, green buy orders), the central trading chart, the trading pair list, and the area at the bottom where you create orders.
The main takeaway is to understand that on both web and mobile, the trading screen provides you with all the necessary information in one place: the current price action (chart), the supply and demand (order book), and the tools to place your buy or sell order. We will dive deep into how to use this in Module 3.
Conclusion
Great work today! You've taken a comprehensive tour of the Binance platform. While it may seem like a lot at first, you'll quickly become familiar with these areas as we start using them.
Key Takeaways:
- The Binance mobile app has Lite (simple) and Pro (full-featured) modes. We will be using Pro.
- The five key areas on mobile are Home, Markets, Trades, Futures, and Wallets.
- The website's top navigation bar provides access to the same core functions: Buy Crypto, Markets, Trade (Spot/Convert), and your Wallet.
- Your main account balance is held in your "Fiat and Spot" Wallet, accessible from both web and mobile.
What's Next?
Now that you know how to find your way around and, most importantly, where your wallet is, you're ready for the next logical step. In our next lesson, we will walk through the process of depositing fiat currency (e.g., USD, EUR) into your Binance account. This will give you the funds you need to make your first cryptocurrency purchase.