Hello!
In our last lesson, we explored how to use lists and dictionaries to manage game data like inventories and character stats. We saw that you can create a character's stat sheet using a dictionary:
player_stats = {
    "Name": "Galador",
    "HP": 100,
    "MP": 50,
}
And you can define their actions using functions:
def attack(attacker_stats, defender_stats):
    # logic for attacking
    pass
This works, but the data (the dictionary) and the actions (the functions) are separate. Wouldn't it be more organized if we could bundle a character's data and actions together into a single, neat package?
That's exactly what this lesson is about. Your goal is to learn how to use Python classes to create objects with properties and methods. This is the foundation of a powerful programming style called Object-Oriented Programming (OOP), which is the standard for building complex, maintainable games. We'll create "blueprints" for things like characters or items, and then stamp out unique versions of them, each with its own data and built-in behaviors.
What are Classes and Objects? The Blueprint Analogy
At its core, the idea is simple.
- A class is a blueprint or a template.
- An object (also called an instance) is a specific item created from that blueprint.
Since you have a background in cooking, here's a helpful analogy:
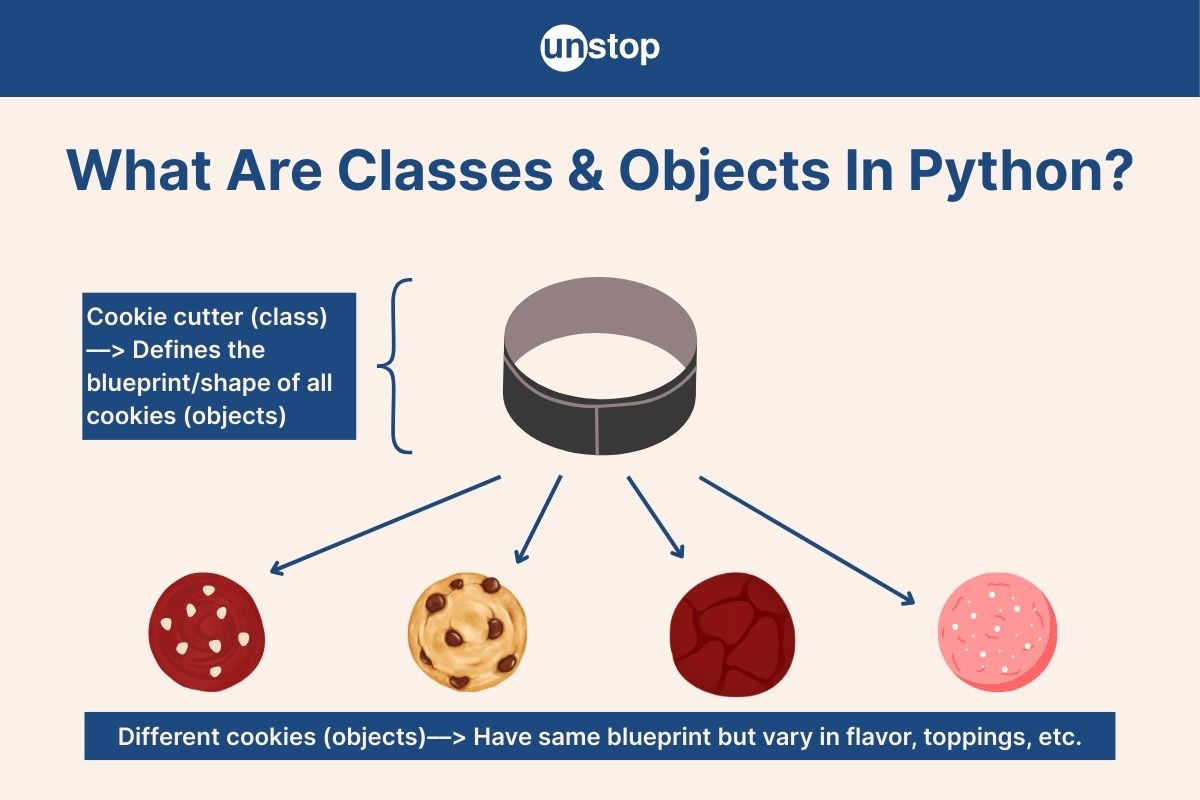
In programming terms:
- Properties (or attributes) are the data that an object holds (e.g., a character's
name,health, andattack_power). - Methods are the functions that belong to an object, defining its behavior (e.g., an
attack()method or aheal()method).
Let's watch a quick video that introduces these concepts formally.
Python Classes and Objects - OOP for Beginners
The video 'Python Classes and Objects - OOP for Beginners' by Python Simplified gives a clear and concise explanation of these core ideas.
Watch the following three segments: From the beginning until 00:34 to understand the definition of classes, objects, attributes, and methods. From 04:39 to 06:14 to learn about the special __init__ method and the self keyword. From 06:14 to 07:17 for a summary of how OOP helps organize code.
Creating Your First Class: A Character Blueprint
Now, let's apply this to our RPG. We'll create a Character class that will serve as a blueprint for every character in our game, whether it's the player hero or a goblin enemy.
The video "Learn Python Classes With a Text-Based Battle" is perfect for this, as it's built around the exact goal you have: making a game.
Learn Python Classes With a Text-Based Battle - OOP Tutorial
Let's watch a section of 'Learn Python Classes With a Text-Based Battle' from Ork Slayer Gamedev to see how to build a Character class from scratch.
Watch from 01:44 to 04:03. Pay close attention to: The class Character: syntax. The __init__ method, which sets up the character's initial properties. The self keyword, which refers to the specific character object being created. How properties like self.name and self.health are defined. How the attack method is defined and how it uses self to access the character's own damage.
Let's break down the code structure based on what you just saw.
# A blueprint for any character in our game
class Character:
    # The __init__ method is a special method called a "constructor".
    # It runs automatically whenever we create a new character object.
    # 'self' refers to the new object being created.
    def __init__(self, name, health, attack_power):
        print(f"A new character named {name} has appeared!")

        # We take the arguments passed in and assign them as properties
        # to the object itself.
        self.name = name
        self.health = health
        self.attack_power = attack_power

    # A method defines a behavior for the object.
    # It must have 'self' as its first parameter to access its own properties.
    def attack(self, target):
        print(f"{self.name} attacks {target.name} for {self.attack_power} damage!")

        # We can modify the properties of another object.
        target.health -= self.attack_power

    # Here's another method we can add.
    def check_status(self):
        print(f"{self.name}'s Status - HP: {self.health}")
This Character class now neatly bundles the data (name, health, attack_power) and the behaviors (attack, check_status) for any character.
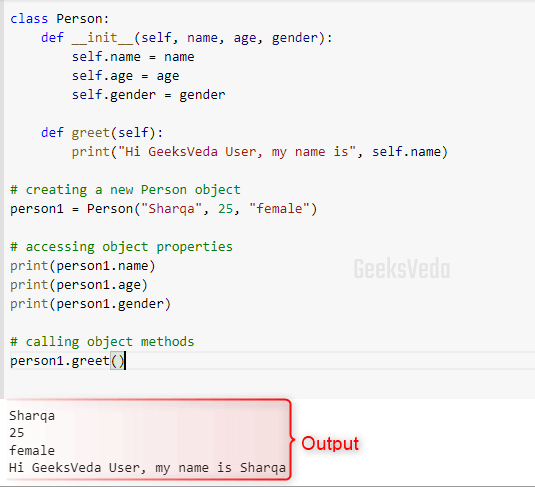
Here's a simple, non-game visual example of the same structure to help solidify the syntax:
Bringing Your Blueprint to Life: Creating Objects
A blueprint isn't very useful on its own. We need to use it to create actual characters. This process is called instantiation.
Let's return to the "Text-Based Battle" video to see how to create objects from our Character class and make them interact.
Learn Python Classes With a Text-Based Battle - OOP Tutorial
This next segment shows how to instantiate (create) objects and call their methods.
Watch from 04:03 to 05:20. Notice how hero = Character(...) creates a new character object and how hero.attack(enemy) makes the hero object perform its attack action on the enemy object.
As the video showed, creating and using objects is straightforward. Let's write the code for a simple battle scene.
# --- Blueprint Definition ---
class Character:
    def __init__(self, name, health, attack_power):
        self.name = name
        self.health = health
        self.attack_power = attack_power

    def attack(self, target):
        print(f"{self.name} attacks {target.name} for {self.attack_power} damage!")
        target.health -= self.attack_power

    def check_status(self):
        print(f"{self.name}'s Status - HP: {self.health}")

# --- Game Logic ---

# 1. Create objects (instances) from our class blueprint
hero = Character("Sir Gideon", 100, 15)
goblin = Character("Grunk", 30, 5)

print("\n--- The battle begins! ---")
hero.check_status()
goblin.check_status()

# 2. Call methods on the objects to make them interact
print("\n--- Hero's turn ---")
hero.attack(goblin)

# 3. Check the results by accessing object properties
print("\n--- After the attack ---")
hero.check_status()
goblin.check_status() # The goblin's health should be lower!
When you run this code, you'll see how the hero and goblin objects are distinct entities, each with its own health that is modified independently. This level of organization is difficult to achieve cleanly with just separate dictionaries and functions.
For another great, practical example, you can read through the article "Concept to Code Part 1 - Beginner's Python RPG Game" (LINK). It walks through building a very similar Character class and Knight and Dragon subclasses to create a turn-based duel.
Test your understanding!
- Add a new method to the
Characterclass calledheal. This method should take one argument,heal_amount. Inside the method, increase the character'shealthbyheal_amountand print a message like "[Character Name]heals for[heal_amount]HP!". - In the game logic section, after the hero attacks the goblin, make the
herouse their newhealmethod to recover 10 HP. - Print the hero's status again after they heal to confirm their health has increased.
Show answer
Here's how you can modify the Character class and the game logic:
# --- Blueprint Definition ---
class Character:
    def __init__(self, name, health, attack_power):
        self.name = name
        self.health = health
        self.attack_power = attack_power

    def attack(self, target):
        print(f"{self.name} attacks {target.name} for {self.attack_power} damage!")
        target.health -= self.attack_power

    def check_status(self):
        print(f"{self.name}'s Status - HP: {self.health}")

    # 1. Add the new 'heal' method here
    def heal(self, heal_amount):
        self.health += heal_amount
        print(f"{self.name} heals for {heal_amount} HP!")


# --- Game Logic ---
hero = Character("Sir Gideon", 100, 15)
goblin = Character("Grunk", 30, 5)

print("\n--- The battle begins! ---")
hero.check_status()
goblin.check_status()

print("\n--- Hero's turn ---")
hero.attack(goblin)

print("\n--- After the attack ---")
hero.check_status()
goblin.check_status()

# 2. Make the hero heal
print("\n--- Hero heals ---")
hero.heal(10)

# 3. Check the hero's status again
print("\n--- Final Status ---")
hero.check_status()
goblin.check_status()
Conclusion
Congratulations on taking your first step into object-oriented programming! It might feel a bit abstract at first, but it's an incredibly powerful way to structure your code, especially for games where you have many similar entities (characters, items, enemies) that need to interact.
Here are the key takeaways from today's lesson:
- A class is a blueprint that defines the structure and behavior of something.
- An object is a specific instance created from a class, with its own unique data.
- Properties (or attributes) are the variables that belong to an object (e.g.,
self.name). - Methods are the functions that belong to an object and define its actions (e.g.,
def attack(self, ...)). - The
__init__method is the special constructor that sets up an object's initial state when it's created. - The
selfkeyword is your way of referring to "this specific object" from within the class definition.
You have now completed the first module on Python fundamentals! You've gone from basic variables to organizing complex game entities into classes.
In our next lesson, we will begin Module 2: Introduction to Game Development with Pygame. We'll leave the text-based console behind and take the exciting leap into visual programming. Your first task will be to set up a Pygame development environment and create a basic game window. This is where your game will start to take visual form