Hello! Welcome to the next lesson in our module on Secure Remote Access.
In our last session, you learned how to use scp to copy files and directories. While scp is great for simple, one-off transfers, it's not very efficient. If you change one line in a single file of your Django project, scp would need to copy the entire file again. For a whole project directory, this inefficiency adds up.
This is where rsync comes in. This lesson addresses that exact problem, focusing on our learning outcome: to synchronize directories between local and remote systems using rsync. You will learn why rsync is the industry-standard tool for tasks like deploying web applications and how its "delta-transfer algorithm" saves you time and bandwidth by only transferring the parts of files that have actually changed.
1. What is rsync and Why is it Better?
rsync, short for "remote sync," is a powerful command-line utility designed for efficient file and directory synchronization. While it can act like a more feature-rich cp or scp, its main strength is its intelligence.
Instead of blindly copying everything, rsync compares the source and destination directories. It quickly identifies which files are new, which have been updated, and—most impressively—it can even find the specific parts of a file that have changed and send only those differences. For a developer, this means deploying updates to your Django project becomes much faster.
To get a feel for what rsync does, the first few minutes of this video provide an excellent overview.
Linux/Mac Terminal Tutorial: How To Use The rsync Command - Sync Files Locally and Remotely
This video from Corey Schafer introduces rsync and clearly explains why it's more efficient than a simple copy command, which is the perfect transition from our last lesson on scp.
Watch from the beginning to 02:40. Focus on the explanation of how rsync only copies what's different, making it ideal for backups and deployments.
2. The rsync Command and Essential Options
The basic syntax is simple and should look familiar:rsync [options] <source> <destination>
However, the power of rsync lies in its options. While there are many, a few key flags will handle 95% of your needs as a web developer.

Let's break down the essentials:
-a,--archive: This is the most important and recommended option. It's a "combo" flag that does several things at once:- Recurses into directories (like
scp's-rflag). - Preserves permissions, ownership, and timestamps. This is critical for web deployments, ensuring your file permissions on the server are correct.
- Recurses into directories (like
-v,--verbose: Shows you which files are being transferred.-h,--human-readable: Displays file sizes in a friendly format (e.g.,KB,MB) instead of bytes.-z,--compress: Compresses file data during the transfer, which can significantly speed things up over a network.-P: This is another powerful combo flag. It's equivalent to--progress --partial.--progress: Shows a progress bar for each file, which is great for large transfers.--partial: If the connection drops, it keeps the partially transferred file, allowingrsyncto resume from where it left off.
A typical command for syncing over the network often looks like this: rsync -avzhP source/ destination/.
3. Do-It-Yourself: Local and Remote Synchronization
Time for some hands-on practice. We'll start with a local sync to see the mechanics, then move to a remote sync. For the remote part, we'll use localhost as our "server," just as we did in the last lesson.
Step 1: Set Up Your Project Directories
In your terminal, navigate to your home directory (cd ~) and create a mock project and a backup location.
# Create a source directory for our Django project
mkdir -p my_django_app/static
echo "print('Hello from manage.py')" > my_django_app/manage.py
echo "from django.http import HttpResponse" > my_django_app/views.py
echo "body { color: blue; }" > my_django_app/static/style.css


# Create an empty destination directory
mkdir my_app_backup
Step 2: Perform an Initial Sync
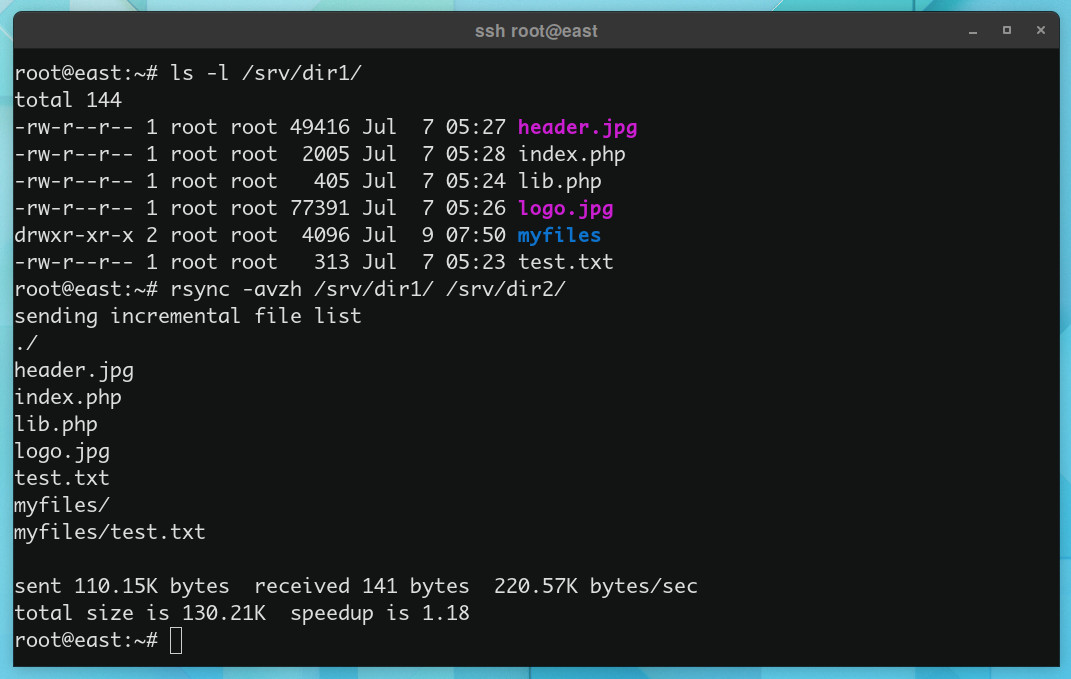
Let's sync the project to the backup directory. We'll use the -avh options.
rsync -avh my_django_app/ my_app_backup/
Now, check the contents of the backup directory:
ls -R my_app_backup/
You should see an exact copy of my_django_app.
Step 3: See the "Magic" of Incremental Sync
Now, let's make a small change to the source and re-run the sync.
# Update the modification time of one file and add a new one
echo "# New line" >> my_django_app/views.py
touch my_django_app/new_file.txt


# Run the sync again, but this time with the -v (verbose) flag
rsync -avh my_django_app/ my_app_backup/
Look at the output! rsync was smart enough to transfer only views.py and new_file.txt. It didn't waste time re-copying manage.py or style.css. This is the core efficiency of rsync.
A CRITICAL Detail: The Trailing Slash
In our command rsync -avh my_django_app/ ..., the trailing slash (/) on my_django_app/ is extremely important. It tells rsync to copy the contents of the directory.
What if you forget it? Let's see. First, clear the backup directory.
rm -rf my_app_backup/*
rsync -avh my_django_app my_app_backup/
Now check the contents of my_app_backup/ with ls -R my_app_backup/. You'll see that it created a my_django_app directory inside my_app_backup.
source/-> copies contents.source-> copies the directory itself.
This is a very common mistake, so always double-check your source path!
4. Remote Sync: Pushing and Pulling
Now let's apply this to a remote server. The syntax is identical to scp: user@host:/path/. For network transfers, we'll add the -z (compress) and -P (progress/partial) flags.
Let's practice by pushing our local project to a "deployment" directory on our localhost server.
# Replace your_username with your actual username
# The -zP flags are perfect for network transfers.
rsync -avzP my_django_app/ your_username@localhost:~/my_app_backup/
The command is the same, just with a remote destination. It will use your SSH key for authentication automatically.
You can also "pull" files from a remote server to your local machine by simply swapping the source and destination. This is great for downloading server logs or backups.
# Example of pulling a log directory from a server
# mkdir server_logs
# rsync -avzP your_username@remote_server:/var/log/nginx/ ~/server_logs/
This video provides a fantastic walkthrough of the concepts we've just covered, from basic flags to remote transfers.
How to Use rsync to Reliably Copy Files Fast (many examples)
This video from Tony Teaches Tech demonstrates the core rsync workflow, including recursion, preserving attributes, showing progress, and transferring files over SSH. It's a great practical summary of what you've learned so far.
Watch the following segments to reinforce these concepts: Basic recursive copy (00:00 - 02:53): Covers recursive copying and the importance of the trailing slash. Archive mode and progress (02:53 - 05:59): Explains the -a (archive) flag and how to show progress with -v, --progress, and -h. Resuming transfers (05:59 - 08:24): Shows the benefit of the --partial flag (which is part of -P). Remote copy via SSH (11:40 - 14:35): Demonstrates a 'push' from local to remote. Compression and remote-to-local (15:21 - 18:18): Covers the -z flag and how to 'pull' from remote to local.
5. Advanced Sync: Mirroring and Safe Testing
Two final, crucial options will complete your rsync toolkit.
--delete: Creating a True Mirror
By default, if you delete a file from your source directory, rsync will not delete it from the destination. To make the destination an exact mirror of the source, you need the --delete flag.
⚠️ Warning: This is a destructive option! If you run it with an empty source directory by mistake, it will wipe out your destination. Use it with extreme care.
--dry-run: Your Safety Net
Because --delete can be dangerous, you should always test your command first with the --dry-run flag (short version: -n). This tells rsync to simulate the transfer and show you exactly what it would do, without actually copying or deleting anything.
Let's try it.
# First, add a dummy file to our backup destination
touch my_app_backup/old_file.txt


# Now, do a dry run of a sync with the --delete flag. Note the 'n' in -avnh
rsync -avnh --delete my_django_app/ my_app_backup/
The output will show deleting old_file.txt. Since you're happy with that, you can run the command for real by removing the -n.
rsync -avh --delete my_django_app/ my_app_backup/
For more details on these concepts, the following article is an excellent reference.
How To Use Rsync to Sync Local and Remote Directories
This DigitalOcean article provides clear, text-based explanations of rsync's core features. It's a great resource to bookmark and review.
Focus on these sections: Emphasize Testing with --dry-run: Reinforces the importance of this safety feature. Pushing and Pulling Files: A great summary of remote operations. Mirroring Directories with --delete: Explains how and why to use the --delete flag. FAQ item #7: Another concise explanation of --dry-run.
Conclusion
Congratulations! You've now mastered rsync, a tool that is fundamental to modern web development and system administration. You can now efficiently synchronize your project files between your development machine and a server, which is a massive step towards automating your deployment process.
Key Takeaways:
rsyncis for synchronizing directories and is far more efficient thanscpfor repeated transfers.- The
-a(archive) flag is essential for preserving file permissions and attributes. - A trailing slash on the source (
source/) copies the contents, while omitting it (source) copies the directory itself. - For network transfers,
-avzPis a powerful and common combination. - Use
--deleteto create a true mirror, but always test with--dry-run(-n) first to avoid data loss.
In the next lesson, we will continue securing our server. Now that you know how to transfer files securely with scp and rsync (which both use SSH), we'll focus on hardening the SSH server itself by editing its configuration file. This will make your remote access even more robust.