Hello! Welcome back to our module on Secure Remote Access with SSH.
In our last lesson, you took the first essential step into remote server management by connecting to a server using ssh with a password. You learned how to install the SSH server, open the firewall, handle the initial host verification, and execute commands.
While password authentication works, it has security risks (like brute-force attacks) and can be inconvenient, especially for automated tasks. Today, we'll upgrade to the professional standard: key-based authentication. Our goal is to generate an SSH key pair and configure passwordless, key-based authentication. This method is not only more secure but also a prerequisite for many development and deployment workflows you'll encounter as a web developer.
1. The Concept of SSH Key Pairs
At its core, SSH key-based authentication uses a pair of cryptographically linked keys to prove your identity to a server, instead of a password.
- Private Key: This is your secret. It stays on your local machine (your Fedora desktop) and should never be shared with anyone. It's used to prove you are who you say you are.
- Public Key: This is like a lock that only your private key can open. You can freely share this key and install it on any server you want to access.
When you try to connect, the server uses your public key to issue a challenge that only your private key can solve. Your SSH client automatically solves this challenge, proving your identity without ever sending your private key over the network.
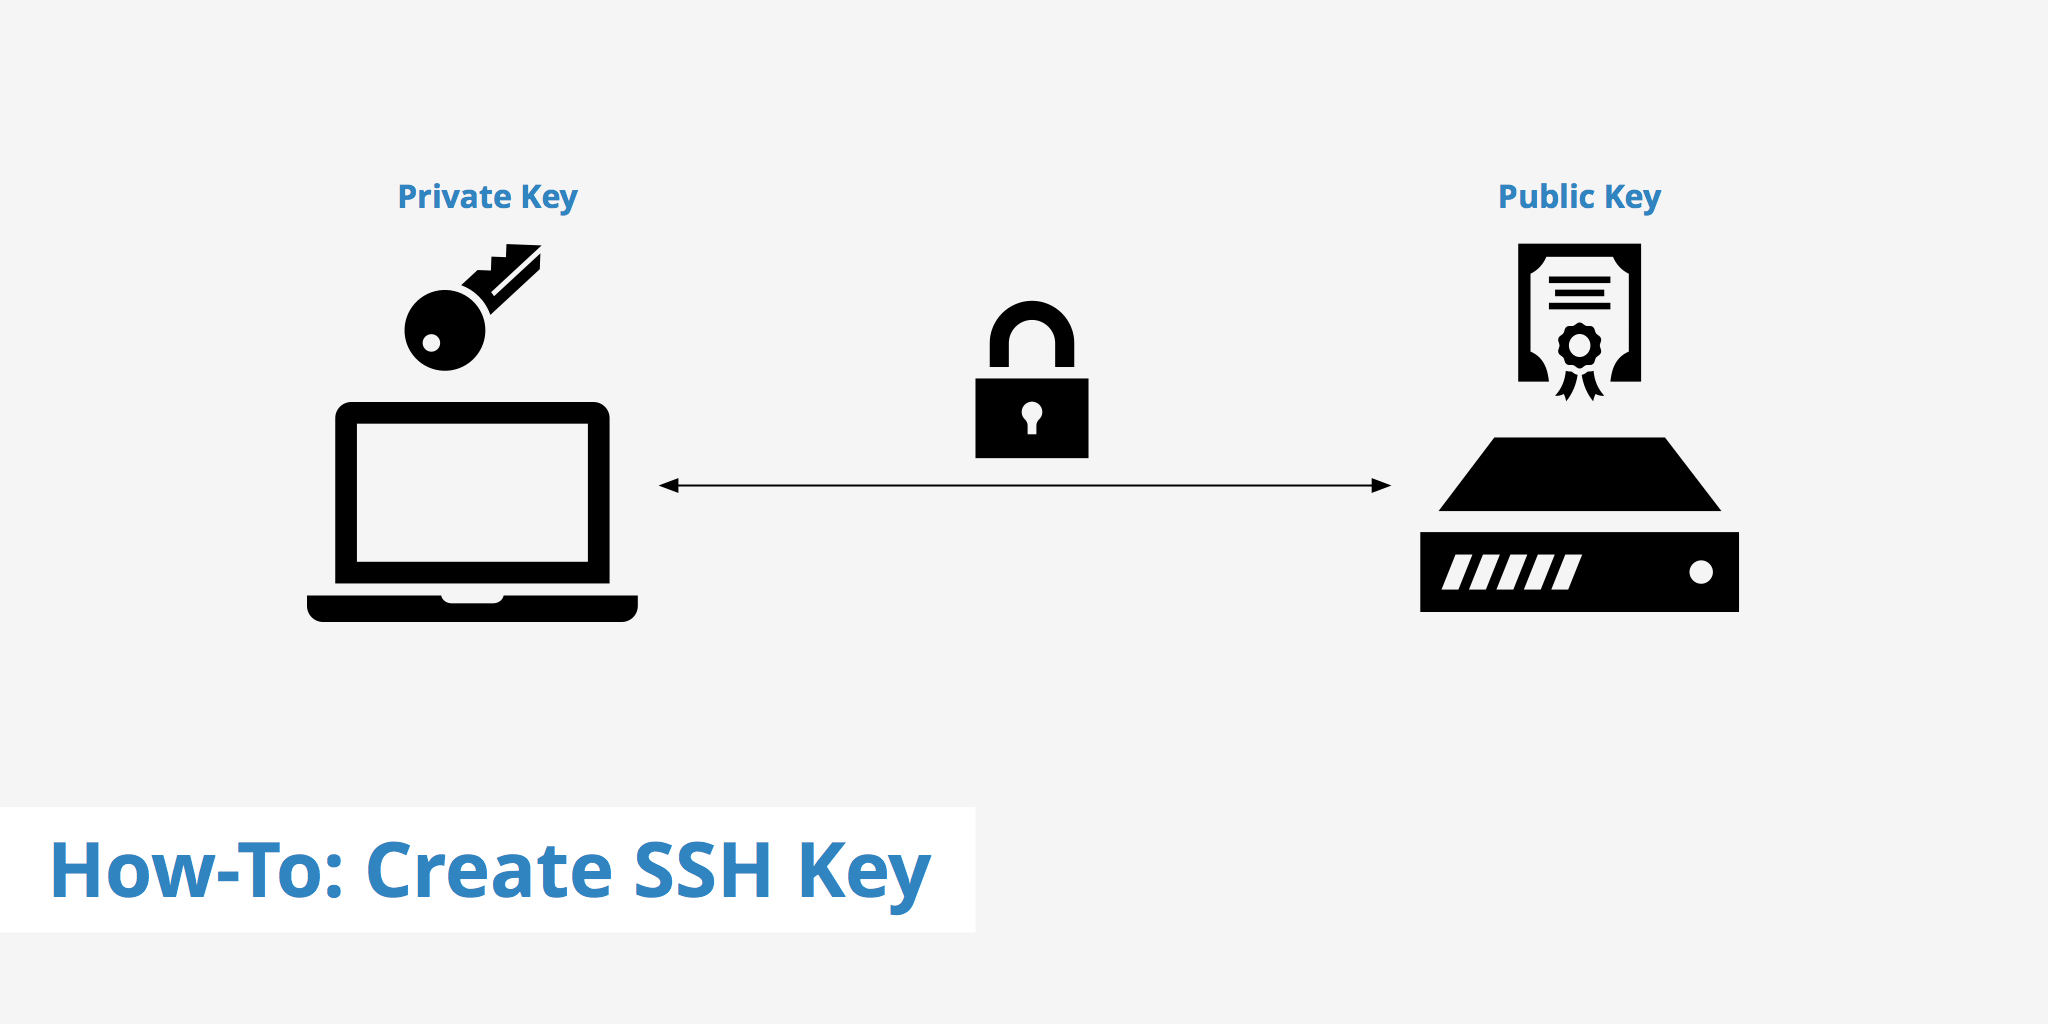
This approach is far more secure than a password, which can be guessed or stolen. A strong SSH key is virtually impossible to crack through brute force.
For a great written explanation of how this works, you can refer to the introductory section of the following article.
How to Configure SSH Key-Based Authentication on a Linux Server
Read the introduction of this DigitalOcean tutorial to solidify your understanding of how public and private keys work together for authentication and why they are more secure than passwords.
Read the section titled "How Do SSH Keys Work?". Focus on the distinct roles of the private and public keys.
2. Do-It-Yourself: Generating Your SSH Key Pair
Now let's create your own key pair. We'll use the ssh-keygen command, a standard tool for this purpose. We will create an Ed25519 key, which is the modern recommended standard for its strong security and excellent performance.
Step 1: Check for Existing Keys
First, it's good practice to check if you already have SSH keys on your system. This prevents you from accidentally overwriting a key you might be using for something else. Open your terminal and run:
ls -l ~/.ssh/id_*.pub
If you see a "No such file or directory" error, that's perfect—it means you don't have any keys yet. If you do see files listed, you have existing keys. For this course, it's best to create a new one to ensure we're all starting from the same place.
Step 2: Generate the New Key
Now, run the following command. Replace "your_email@example.com" with your actual email address. This email is just a comment inside the key file to help you identify it later.
ssh-keygen -t ed25519 -C "your_email@example.com"
You will be prompted with a few questions:
Enter file in which to save the key...: The default location is~/.ssh/id_ed25519. This is the standard place, and your SSH client will look for it here automatically. Press Enter to accept the default.Enter passphrase (empty for no passphrase):: This is an optional password to encrypt your private key on your computer.- With a passphrase: If someone gains access to your computer, they still can't use your SSH key without knowing the passphrase. This is more secure.
- Without a passphrase: This allows for true one-click, passwordless login, which is very convenient for scripts and automation.
- For this exercise, you can press Enter twice to leave it empty. We are focusing on the passwordless login mechanism first.
After you finish, you'll see a confirmation that your keys have been generated, along with a "randomart image" of your key.
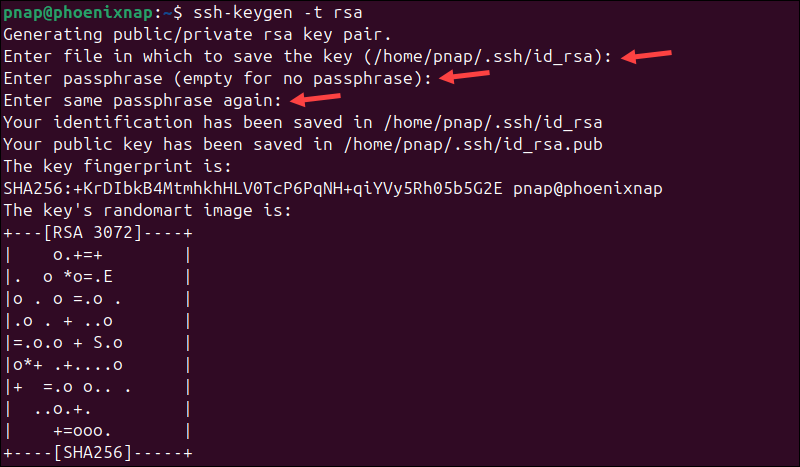
Step 3: Verify Your Keys
Let's verify the files were created. List the contents of your .ssh directory:
ls -l ~/.ssh
You should now see two new files:
id_ed25519: This is your private key. Keep it secret!id_ed25519.pub: This is your public key. This is the one you will copy to servers.
3. Installing Your Public Key on the "Server"
The next step is to install your public key on the target server. In our case, the "server" is your own machine (localhost), which you configured in the previous lesson.
The public key needs to be added to a file called ~/.ssh/authorized_keys in the user's home directory on the server. While you could do this manually, there is a much simpler and safer command for this: ssh-copy-id. This tool handles everything: it creates the .ssh directory and authorized_keys file if they don't exist, and it sets the correct file permissions, which are critical for security.
Run the following command, replacing your_username with your Fedora username:
ssh-copy-id your_username@localhost
You will be prompted for your user password one last time. This is because ssh-copy-id uses the existing password-based login method to securely copy the key.
After it succeeds, it will print a message telling you to try logging in.
4. Testing Your Passwordless Connection
This is the final step. Let's try to connect via SSH again:
ssh your_username@localhost
If everything worked correctly, you should be logged in instantly, without any password prompt! You have successfully configured key-based authentication.
To see the whole process from generation to connection, the following video provides a clear demonstration.
How To Generate Ed25519 SSH Keys, Install Them, and Configure Secure Passwordless Authentication
This video from Lawrence Systems walks through the entire process we just completed: explaining the keys, generating a modern Ed25519 key, and using ssh-copy-id to enable passwordless login.
Watch the segment from 06:57 to 11:35. It provides a great visual recap of using ssh-keygen and ssh-copy-id.
To exit the SSH session, simply type exit and press Enter.
Conclusion
Excellent work! You have now replaced insecure password logins with the robust and convenient method of SSH key authentication. This is a fundamental skill for any developer or system administrator working with remote servers.
Key Takeaways:
- SSH key authentication uses a private key (kept secret on your machine) and a public key (placed on servers).
- The
ssh-keygencommand is used to create a key pair. Ed25519 is the recommended modern algorithm. - A passphrase can be added to your private key for an extra layer of local security.
- The
ssh-copy-idcommand is the easiest and most reliable way to install your public key on a remote server.
In our next lesson, we will leverage this secure connection to transfer files. You will learn how to use scp to easily copy files and directories between your local machine and a remote server, a task you'll perform frequently when deploying your web applications.