Introduction
Welcome back! In the last lesson, you learned the essential commands for navigating the Linux filesystem: pwd, ls, and cd. You now know how to determine your location, see what's around you, and move between directories using both absolute and relative paths.
Now that you can find your way around, it's time to start interacting with the environment. This lesson focuses on manipulating files and directories—the digital equivalent of organizing an office. As a developer, you'll do this constantly: creating project folders, copying source code files, renaming configurations, and cleaning up old build artifacts.
Today, we will cover four fundamental commands:
mkdir: Make a directory.cp: Copy files and directories.mv: Move or rename files and directories.rm: Remove files and directories.
By the end of this lesson, you'll be able to confidently manage the basic structure of your projects and system files directly from the command line.
Creating Directories with mkdir
Every project, from a simple script to a complex Django application, starts with a well-organized directory structure. The mkdir command is your tool for building this structure.
The basic usage is simple: mkdir <directory_name>.
However, its real power comes from its options. A particularly useful one for developers is -p (or --parents). This option allows you to create a whole nested hierarchy of directories in a single command, even if the parent directories don't exist yet. For example, mkdir -p my_project/app/templates will create my_project, then app inside it, and finally templates inside app.
This image clearly demonstrates creating both a single directory and a nested structure.

To get a more detailed look at mkdir, please read the following section from the Linux Professional Institute.
Lesson 1 - Creating, Moving and Deleting Files
This guide from the Linux Professional Institute provides a structured walkthrough of creating directories, including the important -p option.
Read the section titled 'Creating Directories'. It starts right after the 'Case Sensitivity' section. Pay close attention to the example where mkdir fails without -p and succeeds with it.
Copying, Moving, and Deleting
Once you have your directory structure, you'll need to manage the files within it. The next set of commands—cp, mv, and rm—handle these core operations. While their basic functions are straightforward, they have powerful options that give you fine-grained control.
Let's watch a video that covers the most important features of these three commands.
07. Linux Commands: cp, mv, rm (ADVANCED)
This video from Average Linux User provides a practical overview of cp, mv, and rm, focusing on the most useful options you'll encounter in day-to-day work.
Please watch the video from 02:30 to 16:36. I've broken down what to focus on for each command below. Copy (cp) [02:30 - 09:58]: Pay attention to the -r (recursive, for directories), -i (interactive, to prevent overwrites), and -v (verbose, to see what's happening). Move/Rename (mv) [09:58 - 12:24]: Notice how this command serves two purposes and shares similar options with cp, like -i and -v. Remove (rm) [12:24 - 16:36]: This is the most critical section. Understand the difference between deleting a file and deleting a directory with -r. Pay very close attention to the warnings about this command.
Let's summarize the key points and add some important context.
Copying with cp
The basic syntax is cp <source> <destination>.
- To copy
file.txtintobackup_folder/:cp file.txt backup_folder/ - To copy
file.txtand createfile.bak:cp file.txt file.bak - To copy a directory, you must use the
-r(recursive) option:cp -r my_project/ static_backup/
Moving and Renaming with mv
The mv command is elegant because it handles both moving and renaming. The shell determines the action based on the destination.
- To rename
old_name.txttonew_name.txt:mv old_name.txt new_name.txt - To move
file.txtintodocuments/:mv file.txt documents/
If the last argument is an existing directory, mv moves the source files/directories into it. Otherwise, it performs a rename.
Deleting with rm (and rmdir)
This is the command that requires the most caution. Files deleted with rm on the command line are gone forever; there is no Recycle Bin.
rmdir <directory_name>: Deletes an empty directory. It's safe because it will fail if the directory contains any files.rm <file_name>: Deletes a file.rm -r <directory_name>: Recursively deletes a directory and all of its contents.
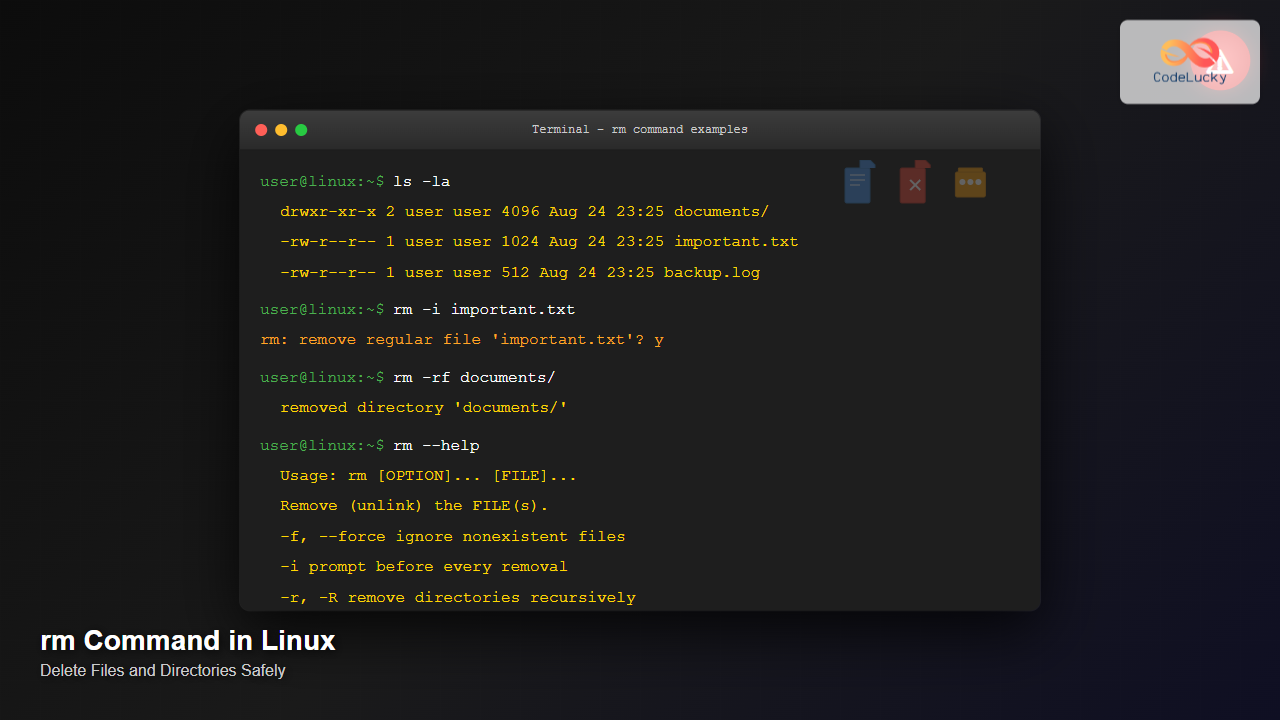
Always think twice before running rm -r. A great safety habit is to use the -i (interactive) flag, which will prompt you for confirmation before deleting each item.
rm -ri my_project
This image provides a good visual summary of the rm command and its powerful options.
Do It Yourself: Set Up a Project Skeleton
Time to put this all into practice. Let's perform a task you'll do many times as a web developer: creating the initial directory structure for a new project. We'll simulate setting up a simple Django project.
Open your terminal and follow these steps.
-
Navigate Home and Create the Project Root
First, make sure you're in your home directory, then create the main folder for our project.cd ~ mkdir my_django_site cd my_django_site -
Create the Nested Structure
Now, usemkdir -pto create the standard directories for a Django app, its templates, and its static files all at once.mkdir -p project_core/settings static/css templates -
Create Some Placeholder Files
To make our structure more realistic, let's create a few empty files. Thetouchcommand is perfect for this; it creates an empty file if it doesn't exist.touch manage.py project_core/urls.py static/css/styles.css templates/base.html README.mdYou can read a quick summary of
touchand the other commands in this lesson on the CodingNomads page. -
Verify Your Structure
Use thelscommand with the-R(Recursive) option to see the entire directory tree you've just created.ls -RYour output should show the
project_core,static, andtemplatesdirectories with their respective files inside. -
Copy and Move Files
Let's do some organizing.- Create a backup of your readme file.
cp README.md README.bak - Now, let's say you decide to move the original
README.mdinto a newdocsfolder.mkdir docs mv README.md docs/
- Create a backup of your readme file.
-
Clean Up
You've decided you don't need the backup file anymore.- Remove the backup file.
rm README.bak - Let's also remove the
templatesdirectory. It's not empty, sormdirwill fail. You must userm -r. Use the interactive flag for safety!rm -ri templates
When prompted, type
yand press Enter to confirm the deletion of the directory and the file within it. - Remove the backup file.
-
Final Cleanup (Optional & CAUTION!)
If you want to delete the entire project, navigate out of it and userm -r. Be absolutely sure you are in the correct directory (~) before running this!cd ~ pwd # Make sure you are in /home/yourusername rm -r my_django_site
Conclusion
In this lesson, you've moved from being a passive observer of the filesystem to an active participant. You now have the essential tools to create, organize, and remove files and directories.
Here are the key takeaways:
mkdir: Creates directories. Usemkdir -pto build nested structures in one go.cp: Copies files and directories. Remember to use-rfor directories.mv: Moves or renames files and directories. Its function depends on the destination.rm: Deletes files. Userm -rto delete directories and their contents.- Safety First: The
rmcommand is powerful and permanent. Using the-i(interactive) flag is a strongly recommended safety measure until you are very confident.
In the next lesson, we will solidify your understanding of paths. Now that you can create and manipulate files anywhere, we'll focus on advanced techniques and scenarios for referencing them accurately, ensuring you can apply these commands with precision across your entire system.