Introduction
Welcome back! In the previous lesson, you mastered the user account lifecycle by learning how to create, modify, and delete users with useradd, usermod, and userdel. This is a foundational skill for managing any Linux system.
However, managing permissions for users one by one is inefficient and doesn't scale. Imagine having to grant five developers access to a dozen project files individually. This is where groups come in. Groups act as a collection of users, allowing you to manage permissions for the entire collection at once. This concept is central to your goal of deploying web applications, where you'll need to grant specific permissions to service accounts (like Nginx) and developer accounts.
In this lesson, you will build on your user management skills to create and manage groups, and assign users to them using the groupadd and gpasswd commands. We will also revisit the usermod command for this purpose.
1. Why We Need Groups
Before we dive into the commands, let's solidify our understanding of why groups are so important in a multi-user environment, especially for a development team.
Managing Users and Groups in Linux | Linux Tutorial | KodeKloud
The video "Managing Users and Groups in Linux" by KodeKloud provides a great real-world analogy. It explains how creating a 'developers' group simplifies managing access to project files.
Watch the segment from 10:50 to 12:49. Pay attention to how a group acts as a role or label, making administration much easier and more intuitive.
As the video explained, instead of adjusting permissions for each user, you can simply add or remove them from a group that already has the necessary access. This is the core principle of role-based access control.
2. The Anatomy of a Group
Just like users are defined in /etc/passwd, group information is stored in a dedicated file. Understanding this file and the different types of groups is key.
Linux Crash Course - Managing Groups
Let's turn to the "Linux Crash Course - Managing Groups" video from Learn Linux TV. This segment breaks down the /etc/group file and clarifies the crucial difference between a user's primary and secondary groups.
Please watch the following two clips from the video: The /etc/group file (05:13 - 09:17): Focus on the four fields for each group: Group Name, Password Placeholder (x), Group ID (GID), and the list of members. Primary vs. Supplementary Groups (10:56 - 13:30): Understand that every user has exactly one primary group (which owns their newly created files by default) and can belong to multiple secondary (or supplementary) groups to gain additional permissions.
To summarize:
/etc/group: The database of all local groups on your system.- Primary Group: Assigned when a user is created (usually a group with the same name as the user). File ownership defaults to this group.
- Secondary Groups: Additional groups a user can be a member of to access shared resources. This is what we will mostly be managing.
3. Creating and Deleting Groups
Creating and deleting groups is straightforward. The commands are simple and semantic.
groupadd: Creates a new group.groupdel: Deletes an existing group.
You must use sudo for these commands as they modify system configuration.
How to create, delete, and modify groups in Linux
For a concise, written reference from an authoritative source for Fedora, let's look at a Red Hat blog post.
Read the short sections "Create and modify groups" and "Delete a group". Note the simple syntax for groupadd and groupdel.
4. Managing Group Membership
This is where the real power lies: adding users to and removing them from groups. There are two common commands for this, and you should be familiar with both.
Method 1: usermod (The Modifier)
In the last lesson, you used usermod to modify user properties. You can also use it to manage group memberships. The key is the -aG flag.
-a: append, tellsusermodto add the user to the group(s) without removing them from existing ones. This is critical!-G: specifies the secondary group(s).
The syntax is sudo usermod -aG <groupname> <username>.
Method 2: gpasswd (The Group Manager)
The gpasswd command is specifically designed for group administration, making its syntax very intuitive for this task.
gpasswd -a <username> <groupname>: Adds a user to a group.gpasswd -d <username> <groupname>: Deletes (removes) a user from a group.
Let's see both methods in action.
Linux Crash Course - Managing Groups
Let's return to the Learn Linux TV video. The first clip shows how to use usermod, while the second introduces gpasswd and explains how to remove users.
Watch the following clips: Adding a User with usermod (13:30 - 15:23): Note the use of usermod -aG to add a user to a supplementary group. Introducing gpasswd (17:35 - 18:36): The presenter discusses gpasswd as a valid alternative to usermod for managing group membership. Removing a User (21:32 - 22:36): See how to use gpasswd -d to remove a user from a group.
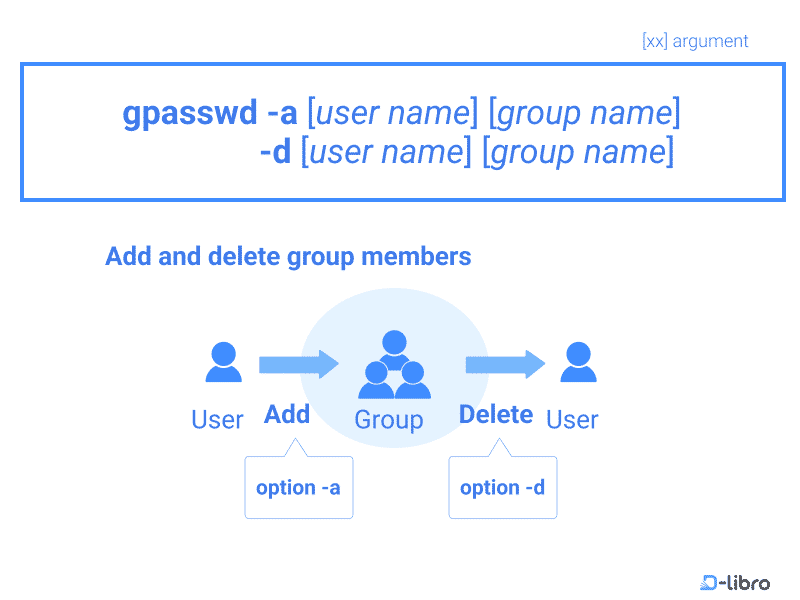
Both usermod -aG and gpasswd -a are valid ways to add a user to a group. You will see both used in online tutorials and scripts, so it's good to recognize them. For removing users, gpasswd -d is the standard approach.
5. Do-It-Yourself: Setting Up a Developer Team
Time to apply these concepts. In this exercise, you'll create a shared directory for a web development team, create a dedicated group for them, and manage user access. This exercise directly simulates a common task in setting up a server for a Django project.
Open your terminal and execute the following steps.
-
Create User Accounts:
First, ensure you have a couple of test users. If you don't have them from the previous lesson, create them now.sudo useradd -m alice sudo useradd -m bob -
Create a
developersGroup:
Usegroupaddto create a new group for your development team.sudo groupadd developersVerify its creation by checking the last line of the
/etc/groupfile:tail -n 1 /etc/group -
Add Users to the Group:
Addaliceto thedevelopersgroup usingusermod. Addbobusinggpasswd.sudo usermod -aG developers alice sudo gpasswd -a bob developers -
Verify Membership:
Use theidcommand to confirm that both users are now members of thedevelopersgroup.id alice id bobYou should see
developerslisted in thegroups=section for both users. -
Create and Configure a Shared Directory:
Now, let's create a directory for your shared projects and give thedevelopersgroup ownership.# Create the directory sudo mkdir -p /srv/django_projects # Change the group ownership to 'developers' sudo chgrp developers /srv/django_projects # Set permissions so the owner (root) and group members can read, write, and execute. # The '2' at the beginning is the 'setgid' bit. It ensures that any new files # or directories created inside /srv/django_projects will automatically # inherit the 'developers' group, instead of the user's primary group. sudo chmod 2775 /srv/django_projects -
Test the Permissions:
Log in asaliceand try to create a file in the shared directory.# Switch to the alice user su - alice # Create a test file (you will be prompted for alice's password if you set one) touch /srv/django_projects/alice_test.txt # Check the ownership of the new file ls -l /srv/django_projects/alice_test.txtNotice that the file's group is
developers, thanks to thesetgidbit you set in the previous step. This is incredibly useful for shared folders. Typeexitto return to your main user account. -
Remove a User from the Group:
Imaginebobis moving to a different team. Remove him from thedevelopersgroup.# As your main user with sudo privileges sudo gpasswd -d bob developersVerify with
id bob. Thedevelopersgroup should now be gone from his list.
Conclusion
In this lesson, you have moved from managing individual users to organizing them into functional groups. This is a massive step up in administrative efficiency and a cornerstone of secure, collaborative environments.
Key Takeaways:
- Groups are collections of users that simplify permission management.
- Group information is stored in
/etc/group. Every user has one primary group and can have many secondary groups. groupaddandgroupdelare used to create and delete groups.- To add a user to a group, you can use either
sudo usermod -aG <group> <user>orsudo gpasswd -a <user> <group>. - To remove a user from a group, use
sudo gpasswd -d <user> <group>. - Always verify membership changes with the
idorgroupscommand.
In the next lesson, we will focus on another critical aspect of user management: account security. You will learn how to configure password policies, such as forcing password changes and setting account expiration dates, using the passwd and chage commands.