Introduction
Welcome to the first lesson in our module on User and Group Administration. In the previous module, you built a powerful Bash script to automate backups, a core task for any developer or system administrator. A key principle of secure system administration, which is directly relevant to your goal of deploying Django applications, is running processes and services under dedicated, non-privileged user accounts. This prevents a potential vulnerability in one application from compromising the entire system.
This is where user management comes in. Before you can assign ownership of a service, you need to know how to create the user for it. In this lesson, you will learn how to create, modify, and delete user accounts using the fundamental commands useradd, usermod, and userdel. Mastering this user lifecycle is the first step toward building a secure, multi-user Linux environment for your web projects.
1. Understanding User Accounts in Linux
Before we start creating users, it's important to understand how Linux sees them. Every user on the system is assigned a unique User ID (UID) and has an entry in a specific system file. The distinction between human users and service users is also important.
Let's start with a video that explains these foundational concepts.
Linux Crash Course - Managing Users
This clip from the "Linux Crash Course - Managing Users" video by Learn Linux TV provides an excellent overview of where user information is stored and the concept of UIDs.
Watch the segment from 03:52 to 07:51. Focus on these key points: The structure of the /etc/passwd file and how it lists all users on the system. The concept of a User ID (UID). The distinction between UIDs for normal users (typically 1000 and above) and system users (below 1000).
As you saw, a "user" is more than just a name. It's an entry in /etc/passwd with a UID. The system uses this UID to track file ownership and permissions.
- Normal Users: These are accounts for humans who log in and interact with the system, like the account you created when you installed Fedora.
- System Users: These are special, non-login accounts created to run specific services or applications (like a web server or a database). This is a security best practice known as the principle of least privilege. You'll be creating system users later in this course when you deploy your Django application.
2. Creating User Accounts with useradd
The primary command for creating a new user is useradd. While you can run it with just a username, it's best practice to be explicit with your options to ensure the user is created correctly. One of the most common mistakes beginners make is creating a user without a home directory.
The following video segment demonstrates the correct way to add a user and set their password.
Linux Crash Course - Managing Users
Let's continue with the Learn Linux TV video. This part covers the practical application of useradd and highlights a crucial option, -m, for creating a home directory. It also shows how to set the initial password with passwd.
Please watch two segments from the video: Creating a user (07:41 - 13:08): Pay close attention to the discussion about the -m flag to create a home directory and why being explicit is better, as defaults can vary between Linux distributions. Setting a password (17:08 - 20:53): Understand how to use the passwd command to set a password for a new user, which is a necessary step to enable them to log in.
Here is a summary of the most important commands and flags for creating a user:
| Command / Flag | Purpose | Example |
|---|---|---|
sudo useradd <user> |
Creates a new user. | sudo useradd jdoe |
-m |
Create the user's home directory (e.g., /home/jdoe). |
sudo useradd -m jdoe |
-s <shell> |
Sets the user's default login shell. | sudo useradd -m -s /bin/bash jdoe |
-c "<comment>" |
Adds a descriptive comment (e.g., full name or role). | sudo useradd -m -c "John Doe" jdoe |
sudo passwd <user> |
Sets or changes the password for the specified user. | sudo passwd jdoe |
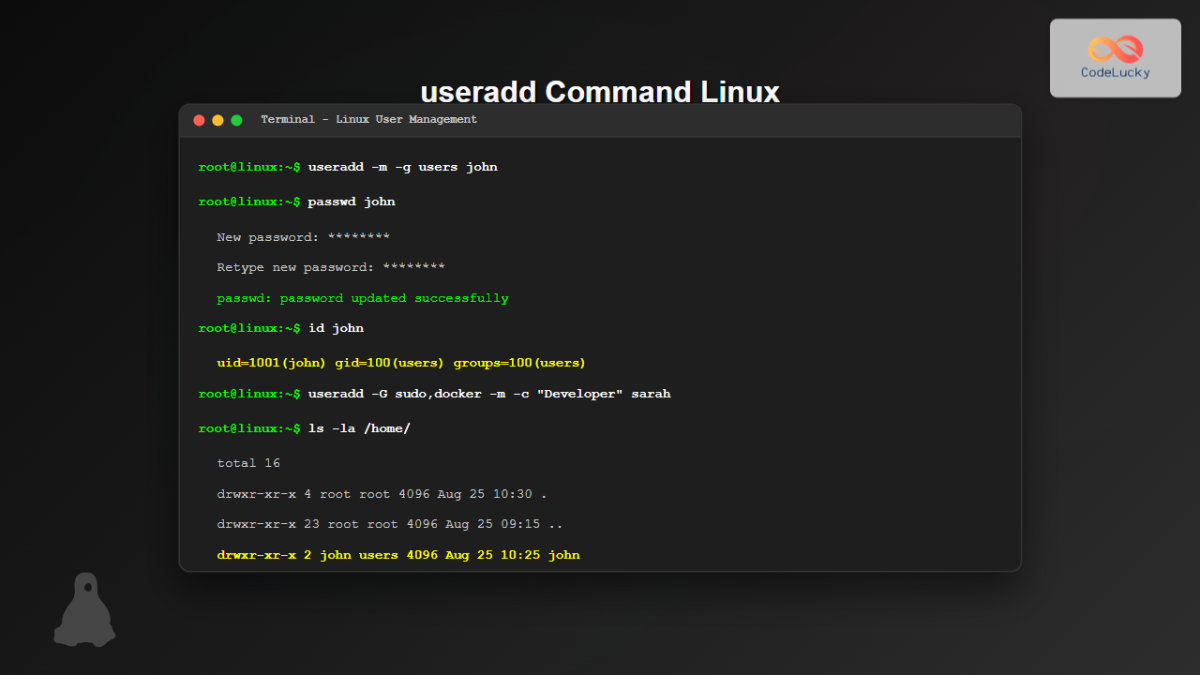
For a more detailed written guide and a handy quick-reference table, the article "Linux User Management: From Zero to Admin" is an excellent resource to review.
Linux User Management: From Zero to Admin
This article from IT Support Group provides a clear, structured breakdown of user management commands. We'll use it as a reference throughout this lesson.
Read the sections "Solution 1: Creating Users That Actually Work" and "Common Mistakes and How to Avoid Them." Focus on the table breaking down the useradd flags and the explanation of Mistake #2 (Creating Users Without Home Directories).
3. Modifying and Deleting User Accounts
Once a user is created, their attributes aren't set in stone. You might need to change a username, lock an account for security reasons, or ultimately delete it.
usermod: Theusermod(user modify) command is used to change existing user account details.userdel: Theuserdel(user delete) command is for removing user accounts.
Let's see how these are used in practice.
Linux Crash Course - Managing Users
The final segments of the Learn Linux TV video demonstrate how to delete a user, making the important distinction between removing just the user account and removing the account and its data.
Watch the segment from 12:58 to 17:17. Pay special attention to: The default behavior of userdel (it does not remove the home directory). The -r flag (userdel -r <username>), which removes the home directory and its contents. The important professional consideration of data retention before deleting user files.
Here's a summary of key modification and deletion commands:
| Command | Purpose |
|---|---|
sudo usermod -l <new> <old> |
Changes a user's login name from <old> to <new>. |
sudo usermod -L <user> |
Locks a user's account, preventing them from logging in. |
sudo usermod -U <user> |
Unlocks a user's account. |
sudo userdel <user> |
Deletes the user account but leaves their home directory. |
sudo userdel -r <user> |
Deletes the user account and removes their home directory and mail spool. Be careful! |
For more usermod options, you can refer back to the "Linux User Management" article, specifically the section titled "Solution 2: Modifying Existing Users Without Breaking Things."
4. Do-It-Yourself: The User Lifecycle
Now it's time to put theory into practice. You will perform the complete lifecycle of a test user: create, modify, and delete. This hands-on exercise is designed to build muscle memory for these essential commands.
Open your terminal and follow these steps.
-
Create a Test User:
Create a new user namedtestuser. Make sure to create their home directory and add a descriptive comment.sudo useradd -m -c "Temporary Test User" testuser -
Set a Password:
A user can't log in without a password. Set one fortestuser. You will be prompted to enter and confirm a new password.sudo passwd testuser -
Verify User Creation:
You can check that the user was created by looking for them in the/etc/passwdfile or by using theidcommand.id testuser # You should see output showing the user's uid, gid, and groups. ls -l /home # You should see the 'testuser' directory listed. -
Modify the User:
Let's say the user needs a new username. Changetestusertotestuser_alpha.sudo usermod -l testuser_alpha testuserVerify the change. The old username should no longer work.
id testuser


# This should return an error: "no such user"

id testuser_alpha


# This should succeed.
Note: Notice that
/home/testuserwas not automatically renamed. You'll learn how to manage that in a later lesson, but for now, just be aware of it. -
Lock the Account:
Temporarily disable the account using the-Lflag.sudo usermod -L testuser_alphaIf you were to try logging in as
testuser_alphanow (for example, by switching users in your terminal), it would fail. -
Unlock the Account:
Re-enable the account.sudo usermod -U testuser_alpha -
Delete the User (Cleanly):
Finally, the test user is no longer needed. Remove the user account and its home directory.sudo userdel -r testuser_alpha -
Verify Deletion:
Confirm that the user and their home directory are gone.id testuser_alpha # Should return "no such user" ls -l /home # The 'testuser' directory should be gone.
You have now successfully managed a user from creation to deletion.
Conclusion
In this lesson, you have learned the fundamental commands for managing the user account lifecycle on a Linux system. This is a non-negotiable skill for any system administrator and a crucial piece of knowledge for a developer aiming to securely deploy applications.
Key Takeaways:
- User accounts are defined in
/etc/passwdand identified by a unique User ID (UID). - The
useraddcommand creates users. Always use the-mflag to ensure a home directory is created unless you are creating a system account. - A newly created user needs a password set with
passwdbefore they can log in. - The
usermodcommand modifies existing user attributes, such as their login name or account status (locked/unlocked). - The
userdelcommand removes users. Use the-rflag with caution to also remove their home directory and all associated files.
In our next lesson, we will build on this foundation by exploring group management. You will learn how to create groups, add users to them, and understand the difference between primary and secondary groups. This is the next logical step in controlling file permissions and access for teams and services on your server.