Introduction
Hello! In our last lesson, you learned how to control what can be done with a file by modifying its permissions using the chmod command. Today, we'll focus on the other crucial half of the equation: controlling who has ownership of files and directories.
As a full-stack developer, you'll constantly work in environments where different user accounts are responsible for different tasks. For example, the web server (running as a user like nginx or www-data) needs to read your project files, but it shouldn't own them. Your user account needs to be able to write to the project directory, and perhaps your teammates in a specific group also need access. Managing this separation of concerns is a core system administration skill.
Your goal for this lesson is to learn how to:
- Change file ownership and group assignment using the
chownandchgrpcommands.
We'll cover how to change the user owner, the group owner, and both at the same time, giving you precise control over your file system.
Understanding File Ownership
As a quick recap, when you run ls -l, you see two names between the number of links and the file size.
-rw-rw-r--. 1 myuser myuser 12 Jan 1 10:30 my_file.txt
             |      |
            USER   GROUP
            OWNER  OWNER
Every file and directory in Linux has a user owner (usually the user who created it) and a group owner. This system allows for fine-grained access control.
The following short video clip will refresh your memory on how to identify the user and group from the ls -l output.
Linux Crash Course - Understanding File & Directory Permissions
This clip from Learn Linux TV's 'Linux Crash Course' quickly explains where to find the user and group owner in the terminal output.
Watch from 03:51 to 04:36. The key takeaway is simply identifying the user and group columns in the ls -l output.
Changing the User Owner with chown
The chown (change owner) command is used to change the user that owns a file or directory.
The basic syntax is:chown [new_owner] [file_or_directory]
One critical point: You almost always need to use sudo with chown. This is a security feature. As a regular user, you can't just assign your files to another user (like root), nor can you take ownership of files that don't belong to you. These actions require administrative privileges.
Let's watch a demonstration of chown, paying attention to the use of sudo and the recursive -R option for directories.
Linux Terminal Basics: chown, chgrp - File Ownership
This video from the channel quidsup demonstrates the chown command, explaining the need for sudo and how to apply changes to a whole directory.
Watch from 00:29 to 02:32. Notice how the initial attempt to change ownership fails without sudo. The video also clearly shows the effect of changing ownership: you might lose the permission to write to a file even if you could before.
Do It Yourself: Practice with chown
Time to put this into practice. Open your terminal.
-
Create a practice file and verify its ownership.
touch owner_test.txt
ls -l owner_test.txt
You'll see your own username as the owner.
-
Try to change the owner to
rootwithoutsudo.chown root owner_test.txtThis will result in an "Operation not permitted" error. This is Linux protecting the system from unauthorized changes.
-
Now, do it correctly with
sudo.sudo chown root owner_test.txt ls -l owner_test.txtSuccess! The owner is now
root. -
Test the consequence. Try to append text to this file.
echo "This will fail" >> owner_test.txtYou will get a "Permission denied" error. Even though you are you, the file is now owned by
root, and your user account (as part of "others") likely doesn't have write permission. -
Change the ownership back to yourself. A good practice is to use the
$(whoami)command substitution, which automatically inserts your username.sudo chown $(whoami) owner_test.txt ls -l owner_test.txtNow you own the file again.
-
Clean up.
rm owner_test.txt
Changing the Group Owner with chgrp
What if you only want to change the group, not the user owner? This is common in collaborative projects where files are owned by individuals but shared with a team (group). For this, you use chgrp (change group).
The syntax is straightforward:chgrp [new_group] [file_or_directory]
Like chown, chgrp also supports the -R flag for recursive changes and may require sudo if you are not a member of the target group.
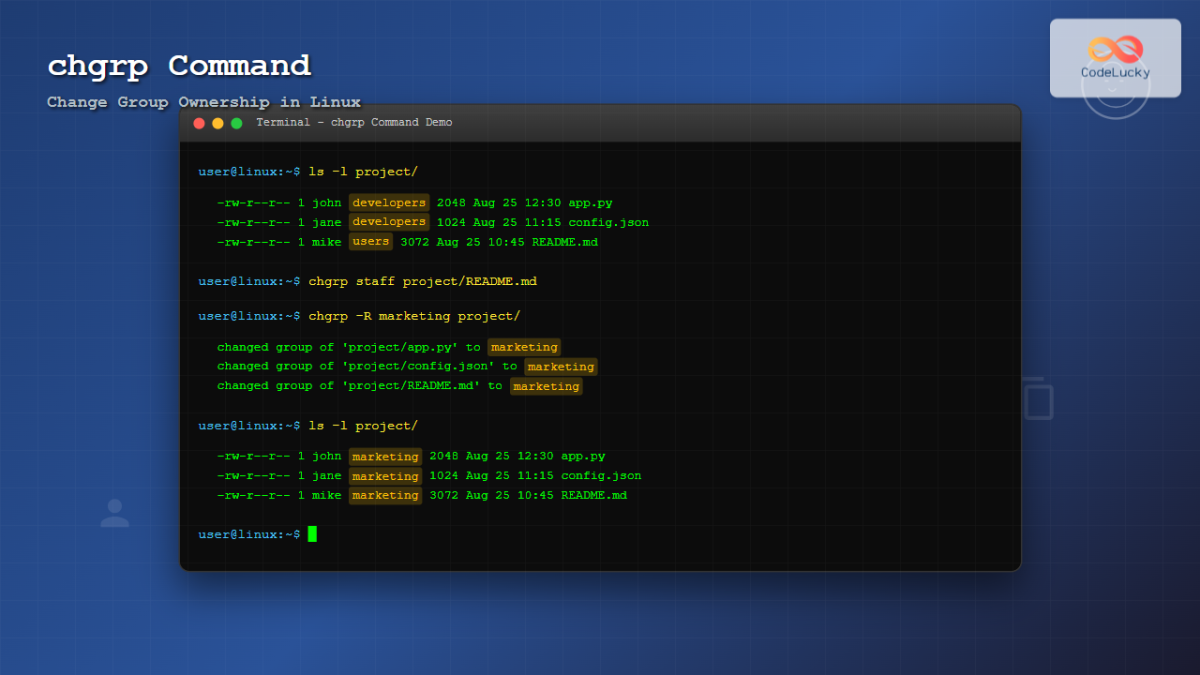
This next video clip demonstrates the chgrp command.
Linux Terminal Basics: chown, chgrp - File Ownership
Continuing with the 'quidsup' video, this segment focuses specifically on using chgrp to modify only the group ownership.
Watch from 02:32 to 03:20. The video shows how to change the group for a single file and then recursively for a directory.
The Most Efficient Method: Using chown for Both
While chgrp is useful, the chown command has a powerful syntax that lets you change the user and group simultaneously. This is the method you will likely use most often.
The syntax is: chown [user]:[group] [file]
For a complete reference on chown and chgrp, this article is an excellent resource.
How File Ownership and Permissions Work in RHEL
This article from freeCodeCamp provides a clear, RHEL-based guide (which is very similar to Fedora) on file ownership. It covers both chown and chgrp with simple examples.
Read the sections titled 'chown – Change File Ownership' and 'chgrp – Change File Group Ownership'. Pay special attention to the chown newowner:newgroup syntax in the examples.
The video below demonstrates this combined user:group syntax, which effectively makes chown a superset of chgrp.
Linux Crash Course - Understanding File & Directory Permissions
Let's return to the Learn Linux TV video. This final clip shows how to use the user:group syntax with chown to handle everything in one command.
Watch from 32:31 to 34:50. The key technique here is using a colon (:) to separate the user and group names. Also, note the useful shortcut: if you omit the group name after the colon (e.g., chown myuser:), it defaults to the user's primary group.
Do It Yourself: A Practical Scenario
Let's simulate a common web development scenario. You're setting up a Django project, and you want to ensure your user owns the files, but they belong to a group that a web server might also be a part of.
-
Create a dummy project structure.
mkdir -p my_django_project/static
touch my_django_project/manage.py
touch my_django_project/static/style.css
ls -lR my_django_project/
Everything is owned by your user and your primary group.
-
Let's say for deployment, the web server needs the files to be owned by a user named
nginxand be in thenginxgroup. (We won't create these users now, we'll just userootandwheelfor practice). Thewheelgroup is used on Fedora to grant administrative privileges.sudo chown -R root:wheel my_django_project ls -lR my_django_project/Notice how one command changed the owner and group for the directory and all its contents recursively.
-
Now, change it back to you. We'll use command substitution again to make it generic.
$(id -gn)gets your primary group name.sudo chown -R $(whoami):$(id -gn) my_django_project ls -lR my_django_project/Everything is back to normal.
-
Clean up your practice project.
rm -r my_django_project
Conclusion
Great job! You now have a complete understanding of the fundamental layer of Linux permissions: not just what can be done (chmod), but also who is in control (chown, chgrp). This is a skill that directly applies to deploying and securing your web applications.
Key Takeaways:
- Every file has a user owner and a group owner.
chownchanges the owner. Usingsudois almost always required.chgrpchanges the group.- The most common and efficient syntax is
chown user:group file, which sets both at once. - The
-Roption is essential for applying ownership changes to directories and all their contents.
In our next lesson, we will explore umask. Now that you know how to modify permissions and ownership after creation, umask will allow you to define the default permissions that files and directories get at the moment they are created.