Hello! Welcome to your second lesson.
In the last lesson, you successfully set up your development environment by installing Python and Visual Studio Code. Your digital workshop is now ready. Today, you'll build your first creation: a simple Python program.
This lesson is all about taking your first step from setting up tools to actually using them to give instructions to your computer. By the end of our 60 minutes, you will be able to write a basic Python script and run it from the integrated terminal in VS Code. This is the fundamental workflow we'll use for all the automation projects we build in this course.
Step 1: Create Your First Python File
First, we need a file to write our code in. In programming, these files are often called "scripts." It's a good practice to give your files meaningful names and organize them in the project folder you created in the last lesson.
- Make sure you have your
AI-Automation-Projectsfolder open in VS Code. You should see it in the "Explorer" panel on the left. - Click the "New File" icon next to your folder's name in the Explorer panel.
- Name the file
hello.py.
The .py extension is very important. It tells VS Code, and your computer, that this is a Python file. This allows VS Code to activate the Python extension and provide helpful features like syntax highlighting and code suggestions.
Step 2: Write Your First Line of Code
Now that you have your file, it's time to write an instruction. We'll start with the most traditional first program: making the computer say "Hello, World!".
In your hello.py file, type the following line:
print("Hello, World!")
Let's break this down:
print()is a function. A function is a named block of code that performs a specific task. Theprint()function's task is to display information on the screen. Since you have experience with C, you can think of it as being similar to C'sprintf()function, but simpler to use."Hello, World!"is a string. A string is a sequence of text characters. In Python, you must enclose strings in either single quotes ('...') or double quotes ("..."). The text inside the quotes is what theprint()function will display.
Your VS Code editor should now look something like this:

Step 3: Run Your Python Script
You've written the instruction. Now, it's time to execute it. We will do this using the integrated terminal in VS Code, which is a command-line interface built right into the editor.
The following video provides a concise demonstration of creating a Python file and running it. We'll focus on the part where the script is executed.
VSCode Tutorial: How to use Python (Hello World)
This video provides a quick walkthrough of creating a 'Hello World' program in VS Code. Pay close attention to how the file is created and, most importantly, how it's run using the editor's features.
Watch the following segments to see the process in action: 04:20 - 05:16: Creating a project folder and the hello_world.py file. 05:02 - 05:42: Writing the print() command. 06:08 - 06:35: Running the Python file in the terminal.
As you saw in the video, there are several ways to run your script. The easiest is using the "Run" button.
- Save your file (Ctrl+S or Cmd+S).
- Click the "Run Python File" (▶) button in the top-right corner of the editor.
When you click this button, two things happen:
- VS Code opens the terminal panel at the bottom of the window.
- It automatically types and runs the command to execute your script (e.g.,
python hello.py).
You should see the output Hello, World! printed in the terminal.
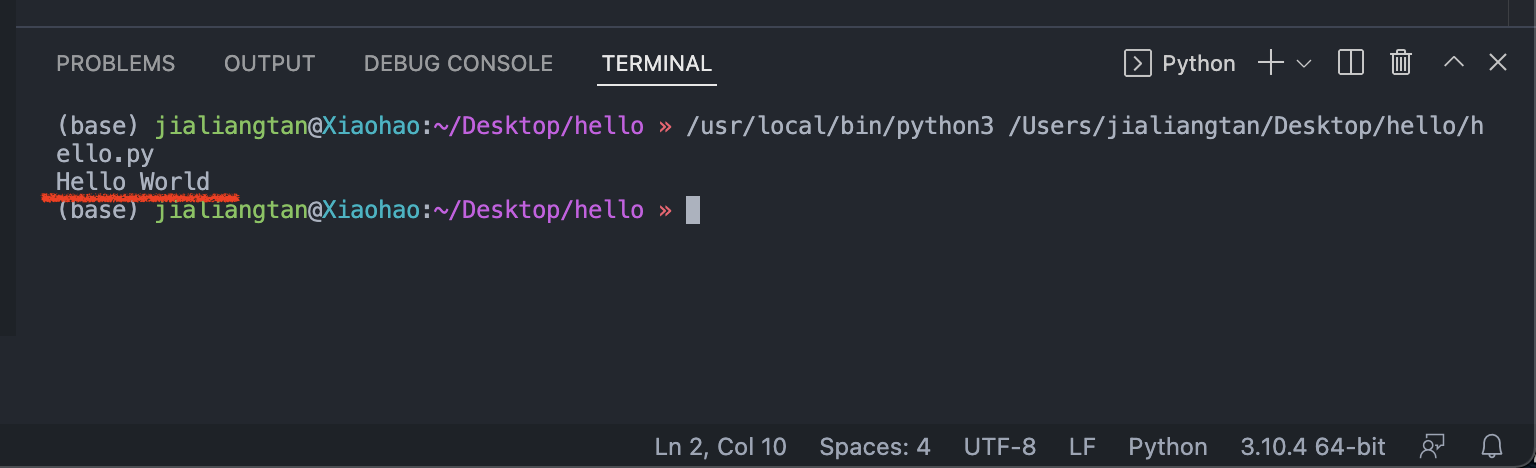
For a more detailed explanation of the different ways to run a script, you can refer to the official VS Code documentation.
Getting Started with Python in VS Code
The official VS Code documentation offers a clear, written guide on the various methods for running Python code. It's a great reference to keep handy.
Read the section titled 'Run Python code'. It explains how to use the 'Run' button, the right-click menu, and other methods to execute your script.
Test your understanding!
Imagine you have a file named task.py. Based on what you've learned, what command would you type directly into the VS Code terminal to run this file?
Show answer
You would type python task.py (or py task.py on some Windows setups) and press Enter. The "Run" button is just a convenient shortcut for this command.
Understanding the Workflow
Let's quickly review the roles of the tools you just used. Think of it like this:
- You (The Developer): You decide what needs to happen and write the instructions in a
.pyfile using the VS Code editor. - The Python Interpreter: This is the program you installed in the last lesson. When you run the script, the interpreter reads your code line by line and translates your instructions into actions the computer can perform. Since you're familiar with C, it's useful to know that Python is an interpreted language, which means it's run directly without a separate compilation step.
- The Terminal: This is the window where you see the results (output) of your executed script. It's also where the program would show error messages if something went wrong.
Mastering this "write -> run -> check output" cycle is the key to programming and building automations.
Conclusion
Congratulations! You have successfully written and executed your first piece of code. This is a huge milestone. You've now experienced the fundamental workflow of a developer: writing instructions and seeing the computer carry them out.
Key Takeaways:
- Python files must have a
.pyextension. - The
print()function is used to display output in the terminal. - You can run a Python script in VS Code by clicking the "Run Python File" button, which executes the file using the integrated terminal.
- The process involves writing code in the editor, having the Python interpreter execute it, and seeing the results in the terminal.
Next Lesson:
Now that you can make the computer display static text, the next step is to work with dynamic information. In the next lesson, you will learn how to use variables to store and manage different data types, such as text (strings), numbers, and true/false values (booleans). This will be the foundation for building scripts that can actually process information.