Welcome back! In our previous lesson, you learned how to handle exceptions using try-catch-finally blocks. This is a crucial skill for building resilient applications, as it allows you to gracefully manage errors where they occur. However, sometimes the method where an error happens isn't the best place to handle it. The calling method might have more context to make a better decision.
This lesson explores the other side of exception strategy: propagation. You will learn how to use the throws keyword to declare that a method might pass an exception up to its caller, and how to use the throw keyword to manually create and trigger your own exceptions. Mastering these tools gives you precise control over your application's error-handling logic, a fundamental skill for designing robust backend services.
1. Exception Propagation: Passing the Responsibility
In the last lesson, you caught exceptions immediately. The alternative is to "duck" or "propagate" the exception, letting it travel up the call stack to the method that called yours. This is a common and powerful pattern. A low-level method (e.g., one that reads from a file) might not know how to handle a FileNotFoundException. Should it retry? Log the error? Alert the user? By propagating the exception, it delegates that decision to a higher-level method that understands the broader context of the operation.
This process is often called "passing the buck." A method that propagates an exception is effectively saying, "I can't or shouldn't handle this error; it's the caller's responsibility."
The flowchart below illustrates this concept for a checked exception.
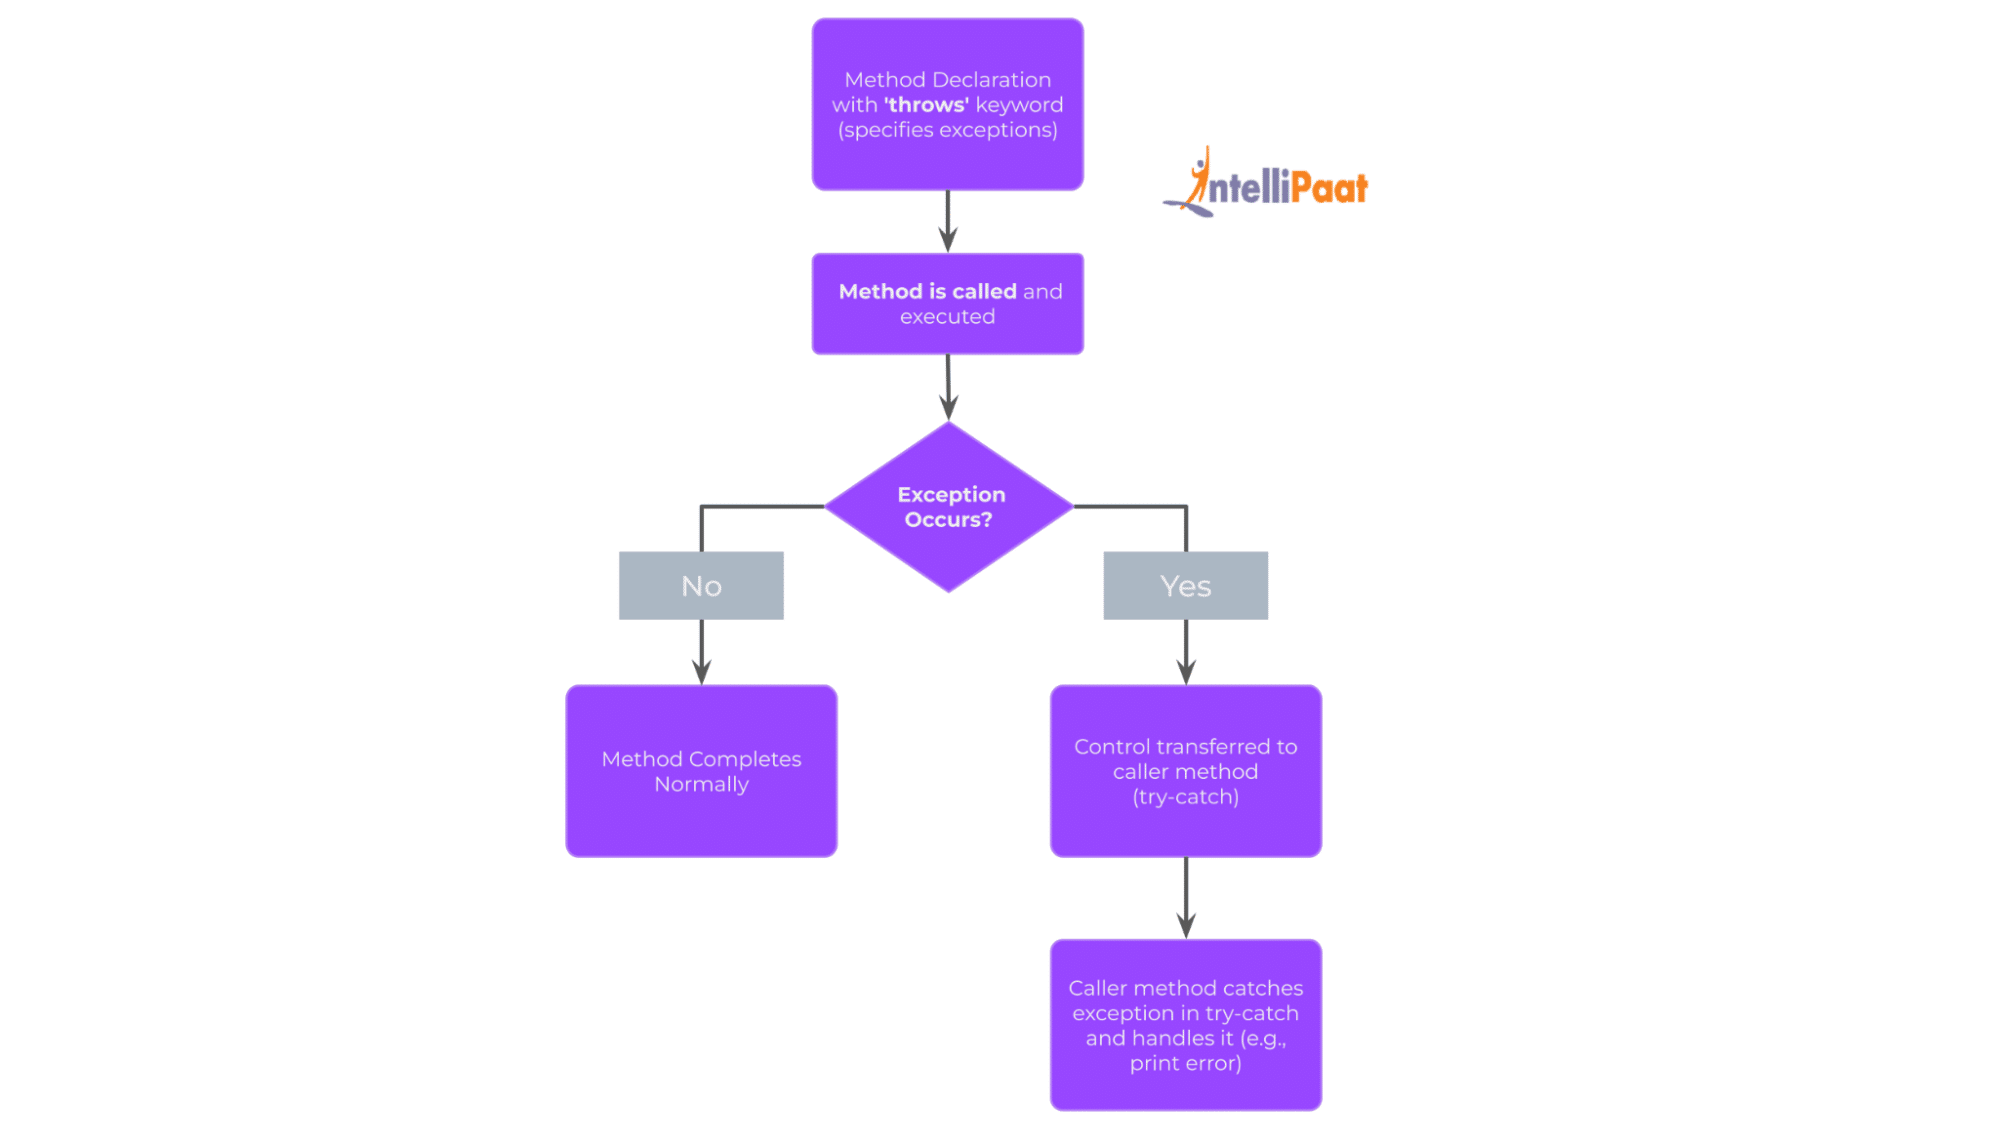
When an exception is thrown, Java searches backward through the call stack for a try-catch block that can handle it. If an exception is thrown in methodC, which was called by methodB, which was called by methodA, the exception first looks for a handler in methodC. If methodC doesn't handle it, the exception propagates to methodB. If methodB also doesn't handle it, it propagates to methodA. If no handler is found anywhere in the call stack, the program terminates and prints the stack trace.
The following image visualizes this propagation perfectly.

2. The throws Keyword: Declaring an Exception
To propagate a checked exception, you must explicitly declare it in the method's signature using the throws keyword. This acts as a warning to any other developer who wants to use your method. The compiler enforces this contract: any method that calls a method marked with throws must either handle the declared exception with a try-catch block or propagate it further by also declaring throws in its own signature.
For unchecked exceptions (like NullPointerException or IllegalArgumentException), using throws is optional but can be good practice for documentation.
The following article from Baeldung explains this clearly.
This article section explains why a method might choose to propagate an exception and introduces the throws keyword.
Read the section titled "4.1. throws". Pay close attention to the core idea that using throws shifts the responsibility of handling the exception to the caller.
Let's also consult a second resource for a different perspective and syntax summary.
When and Why to Use Throw vs Throws in Java Exception Handling | Rollbar
This article from Rollbar offers a concise explanation of throws and its purpose in exception propagation.
Read the sections "Java Throws Keyword", "Java Throws Example", and "Java Throws Syntax". Note how the throws keyword can list multiple exception types.
3. The throw Keyword: Triggering an Exception
While many exceptions are thrown by the Java runtime or standard libraries (e.g., IOException from file operations), you can also trigger them manually using the throw keyword. This is incredibly useful for enforcing your application's business rules and validating inputs. For instance, if a method expects a positive number but receives a negative one, it can throw new IllegalArgumentException("Input must be positive").
The throw keyword is used to throw a single instance of an exception object.
throw new SomeExceptionType("An informative message");
The following video provides a practical walkthrough of both throw and throws.
Throw And Throws In Java Tutorial #48
This video by Alex Lee demonstrates how to use the throw keyword to manually create and trigger an exception, including with a custom message.
Watch the segment from the start of the throw explanation. Pay attention to how he throws both a standard ArrayIndexOutOfBoundsException with a custom message and a more generic Exception.
When you throw a checked exception, you must also satisfy the compiler by either catching it immediately or declaring it with throws in the method signature. If you throw an unchecked exception, you are not required to do so.
This next reading from Baeldung covers these scenarios in detail.
This article dives deeper into the mechanics of throwing both checked and unchecked exceptions.
Read the subsections "Throwing a Checked Exception" and "Throwing an Unchecked Exception". The distinction is critical for designing clean APIs.
Here is a summary of the key differences:
throw |
throws |
|---|---|
| Used within a method body. | Used in the method signature. |
| Used to trigger an exception. | Used to declare possible exceptions. |
Throws a single instance of Throwable. |
Declares one or more exception classes. |
Followed by an new exception object. |
Followed by exception class names. |
4. Your Turn: A More Robust Registration Service
Let's apply these concepts to build a more robust user registration process. In a real backend application, you'd need to validate user input and handle potential database failures. throw and throws are perfect for this.
Task:
-
Create a simple
RegistrationServiceclass. -
Implement a
registermethod that takes ausernameandpassword. -
Use
throwfor Validation (Unchecked Exception):- Inside the
registermethod, add validation logic:- If
usernameisnullor shorter than 4 characters,throw new IllegalArgumentException("Username must be at least 4 characters long."); - If
passwordisnullor shorter than 8 characters,throw new IllegalArgumentException("Password must be at least 8 characters long.");
- If
- Since
IllegalArgumentExceptionis unchecked, you do not need to add athrowsclause for it.
- Inside the
-
Use
throwsfor External Failure (Checked Exception):- Let's simulate a database error, which is an external failure beyond your immediate control.
- Modify the
registermethod signature to declare that it can throw anIOException:
public void register(String username, String password) throws IOException - After the validation checks, add code to simulate this failure. For simplicity, we'll make it fail 50% of the time.
// After validation...
if (new java.util.Random().nextBoolean()) {
    throw new IOException("Failed to connect to the user database.");
}
System.out.println("User '" + username + "' registered successfully!");
-
Handle the Propagation:
- In your
mainmethod, create an instance ofRegistrationServiceand call theregistermethod. - Wrap the call in a
try-catchblock. Your IDE will likely force you to do this becauseregisternowthrowsa checkedIOException. - Add separate
catchblocks forIllegalArgumentExceptionandIOException. This allows you to provide different feedback based on the error type (e.g., "Invalid input" vs. "A temporary server error occurred"). - Print a user-friendly message in each
catchblock.
- In your
This exercise mirrors a common pattern in enterprise development: service layers validate input and propagate external failures, while controller or UI layers handle these exceptions to present a clean result to the user.
Conclusion
You have now added two powerful keywords, throw and throws, to your exception handling toolkit. You understand that you don't always have to handle an exception where it occurs. Propagating exceptions allows you to design cleaner, more specialized components where low-level methods focus on their tasks and high-level methods manage policy and user interaction.
Key Takeaways:
- Exception Propagation is the process of an exception moving up the call stack until it is handled.
- The
throwskeyword is a declaration in a method signature that indicates it might propagate a checked exception to its caller. - The
throwkeyword is an action used within a method to manually create and trigger an exception instance, often for validation or enforcing business rules. - You must handle or propagate checked exceptions. Propagating unchecked exceptions is optional but can be good for documentation.
In the exercise, you may have found it slightly odd to use a generic IOException for a user registration failure. Wouldn't a more descriptive exception like UserDatabaseException be better? In our next lesson, you will learn how to create your own custom exception classes to make your error handling even more expressive and maintainable.