Hello! Welcome back to your course on PC and server hardware.
In our last lesson, you learned how to interpret specification sheets to ensure that core components like the CPU, RAM, and motherboard are all compatible. That's the critical planning phase. Today, we put that knowledge into practice.
This lesson directly addresses the learning outcome: Assemble a PC from components, including installing the CPU, RAM, motherboard, and connecting power/data cables following anti-static procedures. This is a foundational, hands-on skill for any hardware technician. Whether you're building a new system from scratch or replacing a faulty motherboard in a production server, the core steps are the same. Your preference for a "practice-first" approach will be front and center today.
1. Preparation: The Foundation of a Successful Build
Before touching any components, a successful build starts with a prepared workspace and a deep respect for a tiny, invisible threat: electrostatic discharge (ESD).
Electrostatic Discharge (ESD) is the sudden flow of electricity between two electrically charged objects. Your body can build up a static charge without you noticing, and discharging it through a sensitive component like a CPU or RAM module can permanently damage it. In a professional environment, preventing ESD is non-negotiable.
The primary tool to combat this is an anti-static wrist strap.

To see how to set up your workspace and use these precautions in practice, let's watch the first part of a very detailed build guide.
How to Build a PC, the last guide you’ll ever need! (2024 Update)
The video 'How to Build a PC, the last guide you’ll ever need!' from Linus Tech Tips provides an excellent, professional-level walkthrough. We'll start with their advice on preparing your workspace.
Watch from 00:38:06 to 00:40:27. Pay close attention to the explanation of how to ground yourself using the power supply unit (PSU) and an anti-static strap.
Key Anti-Static Procedures:
- Best Practice: Use an anti-static wrist strap. Clip the alligator clip to an unpainted metal part of the PC case.
- The "Good Enough" Method: If you don't have a strap, plug the PSU into the wall outlet (but keep the PSU's own power switch off). Periodically touch the metal chassis of the PSU to discharge any static buildup from your body.
- Work on a hard surface, not carpet. Keep components in their anti-static bags until you are ready to install them.
2. The Bench Build: Assembling the Core Components
It's much easier and safer to install the CPU, RAM, and M.2 SSDs onto the motherboard before you put it in the case. This is often called a "bench build" because you typically do it on your workbench, using the motherboard box as an insulated, non-conductive surface.
A. Installing the CPU
This is one of the most delicate steps. The pins on the CPU (on older AMD models) or in the motherboard socket (for Intel and newer AMD) are extremely fragile. Never force a CPU into its socket.
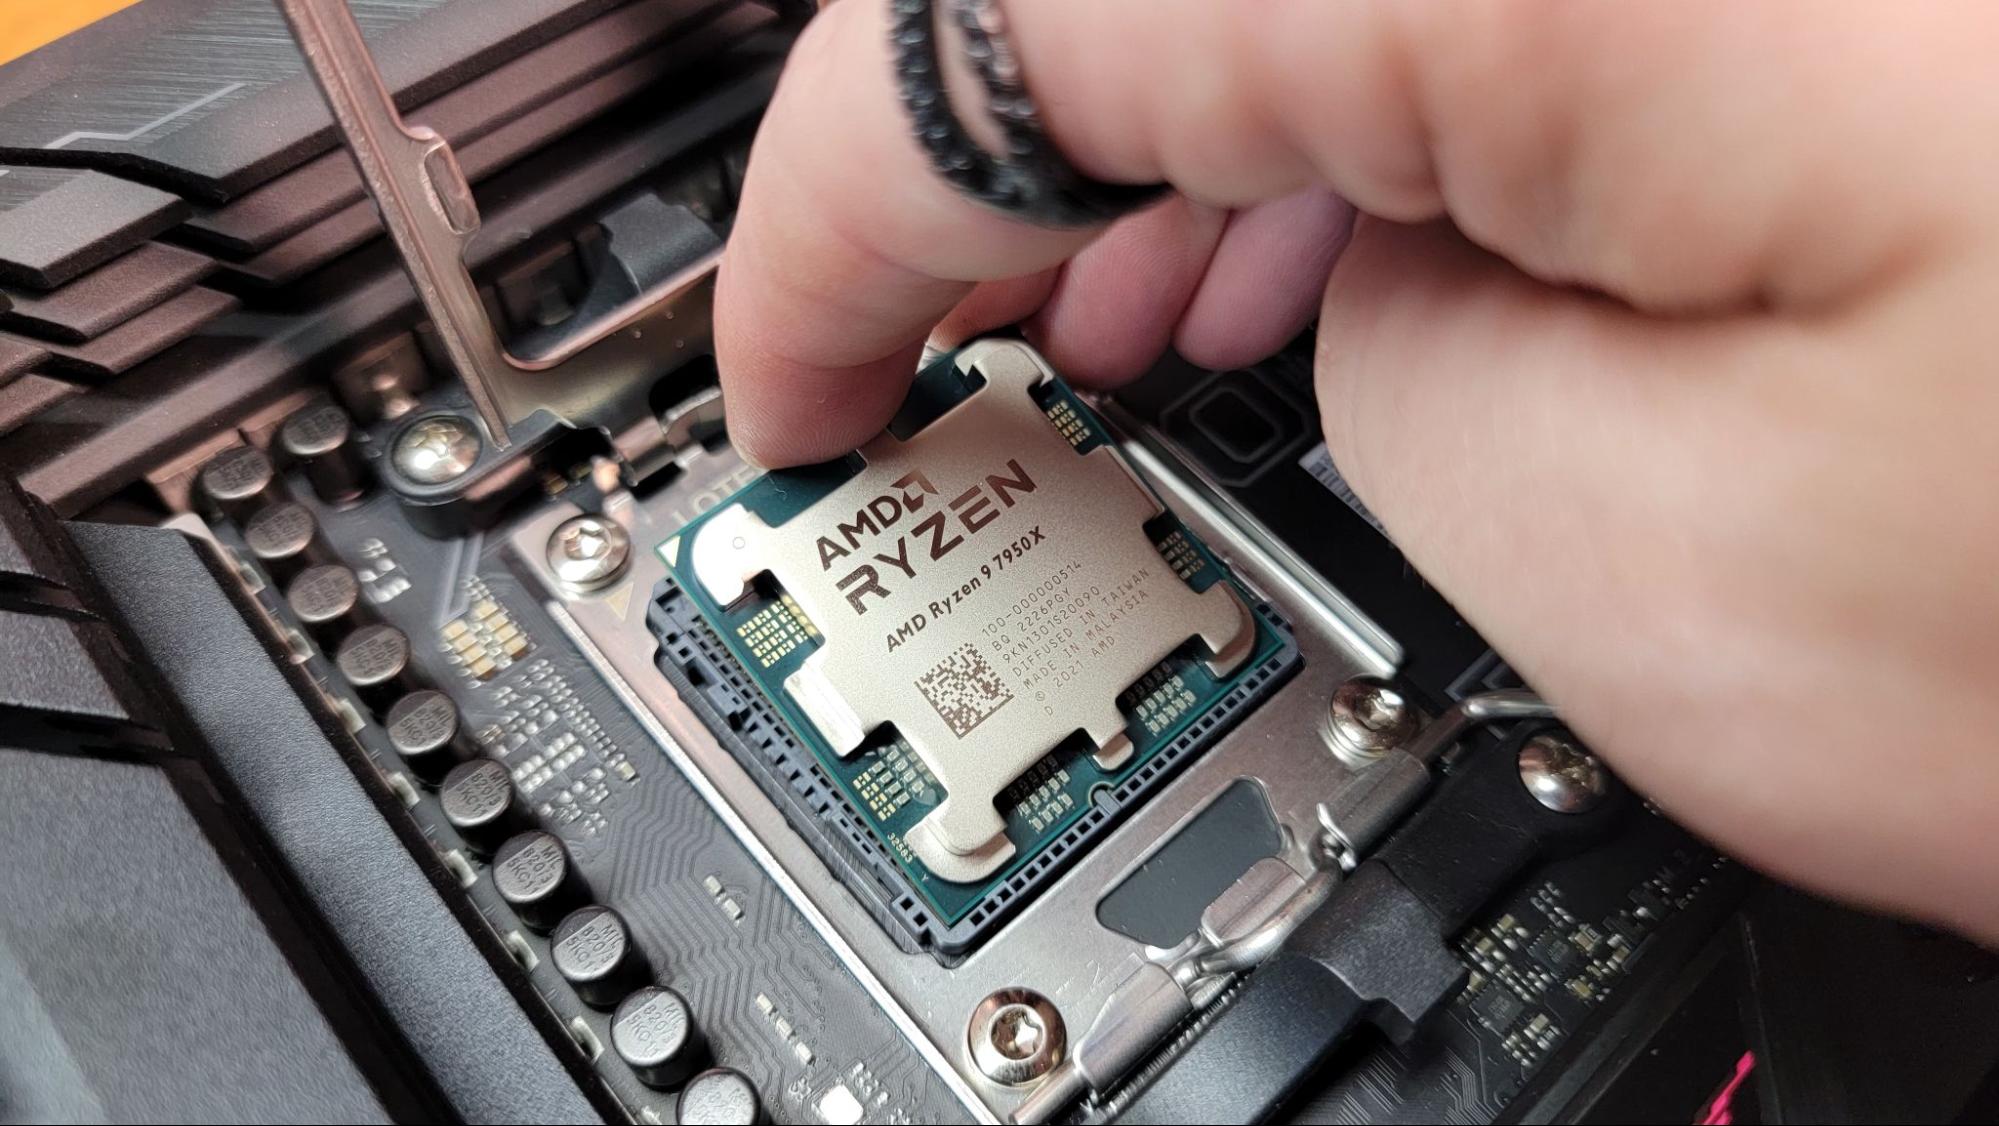
The following video segment provides an exhaustive guide to installing various types of CPUs. The principles of alignment and careful handling are universal.
How to Build a PC, the last guide you’ll ever need! (2024 Update)
Let's return to the Linus Tech Tips guide for a detailed look at CPU installation. It covers the different mechanisms for consumer and even server-grade processors.
Watch from 00:40:27 to 00:49:45. Focus on the process for a standard consumer CPU (Intel LGA or AMD PGA/LGA). Notice how the process always involves: opening a retention lever, aligning the CPU, letting it drop into place, and then securing the lever.
CPU Installation Checklist:
- Place the motherboard on its box.
- Open the CPU socket's retention arm and lift the load plate.
- Identify the alignment indicators (usually a golden triangle) on both the CPU and the socket.
- Handle the CPU by its edges and gently place it into the socket, aligning the indicators. It should drop in with zero force.
- Lower the load plate and secure the retention arm. It will require firm pressure, and you may hear some creaking noises; this is normal.
B. Installing the RAM
As we discussed in the last lesson, installing RAM in pairs in the correct slots allows you to take advantage of dual-channel memory for better performance.
How to Build a PC, the last guide you’ll ever need! (2024 Update)
Now, let's watch how to install RAM modules.
Watch from 00:49:37 to 00:53:05. Note how the RAM stick is aligned using the notch and how it clicks into place.
RAM Installation Checklist:
- Consult your motherboard manual to identify the correct slots for your number of RAM sticks (e.g., A2 and B2 are common for a two-stick setup).
- Open the retention clips at the end(s) of the RAM slots.
- Align the notch on the bottom of the RAM stick with the key in the slot. It can only fit one way.
- Press down firmly and evenly on both ends of the RAM stick until the retention clips click shut.
C. Installing the M.2 SSD
Most modern systems use M.2 SSDs for the operating system and applications due to their high speed. They mount directly to the motherboard.
How to Build a PC, the last guide you’ll ever need! (2024 Update)
This segment shows how to install a 'gumstick' M.2 drive.
Watch from 00:53:05 to 00:56:48. A critical takeaway here is to remove the protective plastic film from the thermal pads on the motherboard heatsink before installation.
With the CPU, RAM, and M.2 drive installed, your motherboard is prepped and ready to be mounted in the case.
3. Case Installation: Bringing It All Together
Now we move from the bench to the chassis.
A. Prepping the Case and Mounting the Motherboard
Before the motherboard goes in, the case needs to be prepped with standoffs and the I/O shield.
- Standoffs: These small brass or metal screws hold the motherboard away from the metal case tray, preventing a catastrophic short circuit.
- I/O Shield: This plate fits in the back of the case and labels the ports on your motherboard. Many modern boards have an integrated I/O shield, simplifying this step.
How to Build a PC, the last guide you’ll ever need! (2024 Update)
This next clip covers preparing the case and securing the motherboard.
Watch from 01:13:45 to 01:19:05. Focus on the importance of matching the standoffs to the holes on the motherboard and the process of carefully lowering the board into place.
Motherboard Mounting Checklist:
- Take the side panels off your case.
- Install the I/O shield from inside the case, if it's not pre-attached to your motherboard.
- Ensure standoffs are installed in the case to match every mounting hole on your motherboard. Remove any extras.
- Carefully lower the motherboard, aligning its ports with the I/O shield openings and its holes with the standoffs.
- Screw the motherboard into place. Start with the center screw to anchor it, then secure the rest. Be snug, but don't overtighten.
B. Installing the CPU Cooler
A CPU generates significant heat and requires a cooler. This could be an air cooler (heatsink with a fan) or an All-in-One (AIO) liquid cooler. The process always involves applying thermal paste to transfer heat from the CPU to the cooler.
How to Build a PC, the last guide you’ll ever need! (2024 Update)
Cooler installation can vary widely, but this video covers the fundamental principles for both air and liquid coolers, including the all-important thermal paste application.
Watch from 00:56:48 to 01:07:12. Whether you're using an air or liquid cooler, pay attention to the general pattern: attach the correct mounting brackets for your CPU socket, apply a pea-sized dot of thermal paste, and tighten the cooler down in a cross-pattern to ensure even pressure.
C. Installing the Power Supply Unit (PSU)
The PSU provides power to every component. They can be modular (you only attach the cables you need) or non-modular (all cables are permanently attached).
How to Build a PC, the last guide you’ll ever need! (2024 Update)
Let's watch how the PSU is installed and how to handle its cables.
Watch from 01:31:33 to 01:41:21, focusing on the PSU installation part of the segment. Note the fan orientation (usually facing down to pull cool air from outside the case) and the process of securing it to the chassis.
4. Making the Connections: The Cabling Phase
This is where the PC truly comes to life. It can be the most time-consuming part of the build. Route cables through the back of the case whenever possible for a clean look and better airflow.
For a different perspective on cabling, we'll consult another excellent guide.
How to Build a PC: The Ultimate Beginner's Guide
The PCMag guide, 'How to Build a PC', provides very clear text and images for the cabling process. It's a great resource to have open as a reference.
I recommend you open this guide and scroll to Step 6 ('Connect the Case Cables to the Motherboard') and Step 8 ('Install the Power Supply, and Plug In Its Cabling'). You don't need to read it all now, but use it as a visual aid for the following steps.
Here is the order I recommend for connecting cables:
-
Front Panel Connectors: These are the small, fiddly wires for your case's power button, reset button, USB ports, and audio jacks. This is often the hardest part.
- Resource: Watch the LTT video from 01:19:05 to 01:26:01 (LINK,
idx=6). - Pro Tip: Your motherboard manual is your best friend here. It will have a diagram showing exactly which pin is for which connector. Pay attention to the
+and-polarity for the LED connectors!
- Resource: Watch the LTT video from 01:19:05 to 01:26:01 (LINK,
-
Main Power Cables:
- 24-pin ATX Cable: The largest connector, goes from the PSU to the main power socket on the motherboard.
- 8-pin (or 4+4 pin) CPU Cable: Goes from the PSU to the socket usually located near the top of the motherboard, by the CPU.
- These are keyed to only fit one way. Make sure you hear a "click" from the retention latch.
-
Storage Drives (SATA):
- Resource: Watch the LTT video from 01:26:01 to 01:31:33 (LINK,
idx=7). - Mount your 2.5" or 3.5" drives in their bays.
- Connect the SATA data cable (a small, L-shaped cable) from the drive to a SATA port on the motherboard.
- Connect the SATA power cable (a larger, L-shaped cable) from the PSU to the drive.
- Resource: Watch the LTT video from 01:26:01 to 01:31:33 (LINK,
-
Graphics Card (GPU) and Power:
- Resource: Watch the LTT video from 01:41:21 to 01:46:43 (LINK,
idx=9). - Remove the necessary PCIe slot covers from the back of your case.
- Open the latch on the end of the top-most long PCIe slot.
- Align the card and press it firmly into the slot until the latch clicks shut.
- Secure the card to the case with screws.
- Connect the PCIe power cables (6-pin, 8-pin, or the newer 12VHPWR connector) from the PSU to the GPU. A high-end card may require two or even three of these connectors.
- Resource: Watch the LTT video from 01:41:21 to 01:46:43 (LINK,
5. Common Mistakes to Avoid
Before we conclude, let's review some common pitfalls that trip up new builders. Avoiding these will save you hours of troubleshooting.
Build Your Own Gaming PC: Common Mistakes to Avoid
This guide from Xidax has a fantastic, concise list of common mistakes. Reading this will reinforce the key safety and procedural points from the lesson.
Read the entire 'Common Mistakes to Avoid' section. It's a quick read that summarizes the most important things to double-check.
Conclusion
Congratulations on completing this virtual PC build! You've walked through the entire process, from preparing your workspace to connecting the final power cable. This hands-on knowledge is invaluable.
Key Takeaways:
- Safety First: Always use anti-static precautions to protect components from ESD.
- Order of Operations: A logical assembly order (bench build -> case install -> cabling) makes the process smoother and easier.
- No Force Required: Components like the CPU and RAM are designed to fit perfectly when aligned. If you need to use excessive force, something is wrong. The only exceptions are the CPU retention arm and seating RAM, which require firm, even pressure.
- Read the Manual (RTFM): Your motherboard manual is the ultimate source of truth for front-panel pinouts and correct RAM slot configuration.
In our next lesson, we will tackle the moment of truth: powering on the system for the first time. You'll learn how to navigate the BIOS/UEFI settings to configure the boot order and enable key hardware features, preparing the machine for an operating system.