Hello! Welcome back to your course on PC and server hardware.
In our last lesson, you did a fantastic job of virtually assembling a PC, from seating the CPU to managing all the complex cabling. Now, it's time for the moment of truth: powering on the machine and telling it what to do.
This lesson directly addresses the learning outcome: Navigate BIOS/UEFI settings to configure boot order and enable/disable key hardware features like virtualization. This firmware is the bridge between the hardware you just assembled and the operating system you will eventually install. Mastering it is a core skill for any technician, essential for setting up new systems, diagnosing boot problems, and optimizing performance.
1. What is BIOS/UEFI? The PC's Pre-Flight Check
Before a computer loads an operating system like Windows or Linux, it runs a piece of software stored on a chip on the motherboard. This is the BIOS (Basic Input/Output System) or its modern successor, UEFI (Unified Extensible Firmware Interface).
Think of it as a pre-flight checklist for an airplane. It performs a Power-On Self-Test (POST) to check that all the core components (CPU, RAM, storage) are present and functional before handing control over to the OS.
You'll encounter two main types:
- Legacy BIOS: The older, text-based interface you navigate with a keyboard.
- UEFI: The modern standard with a graphical, mouse-driven interface, faster boot times, and enhanced security features.
While the look and feel differ, their fundamental purpose is the same. To see these differences and learn how to access the setup utility, watch the following video.
The video 'PC BIOS Settings' by ExplainingComputers provides an excellent introduction to what BIOS/UEFI is, the differences between them, and how to access the settings on various computers.
Watch from the beginning to 06:16. Pay attention to the different keys used to enter the BIOS/UEFI (like Del, F2, Esc) and the different interfaces you might see. Note the advice on exiting without saving, which makes exploring these settings risk-free.
As you saw, the settings you change are stored in a special type of memory called CMOS, which is kept alive by a small battery on the motherboard. If that battery dies, the system reverts to its default settings.
2. Practical Task 1: Configuring the Boot Order
One of the most common tasks you'll perform in the BIOS/UEFI is changing the boot order or boot priority. This tells the computer the sequence of devices it should check for an operating system.
Why is this so important?
- OS Installation: To install Linux, you'll need to tell the PC to boot from your USB installer drive first, before it tries to boot from the empty internal hard drive.
- Troubleshooting: You might need to boot from a USB drive containing diagnostic tools like
memtest86. - System Configuration: Ensuring the PC boots from the correct internal drive after an OS is installed.
The following resources will show you how to do this.
Let's return to the 'PC BIOS Settings' video, which demonstrates changing the boot order in both legacy and UEFI environments.
Watch from 06:16 to 08:34. Notice how you can set a priority list of devices (e.g., USB first, then SSD).
Modern UEFI interfaces often have a simple "EZ Mode" for common tasks.
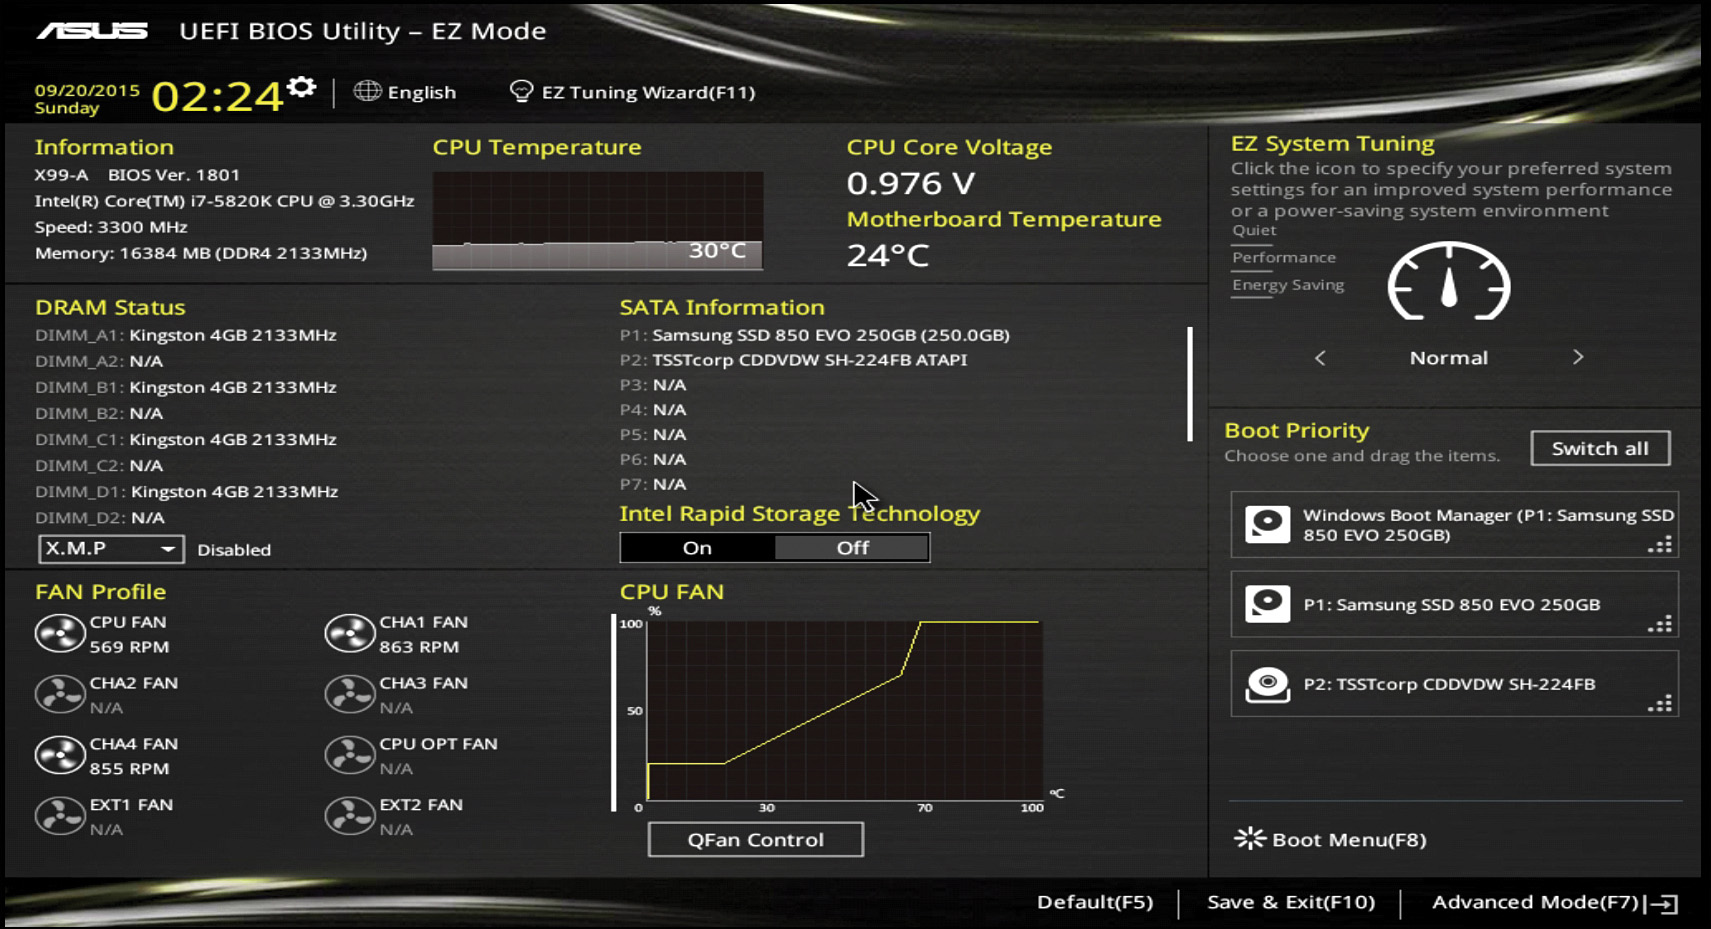
For more fine-grained control, you'll use the "Advanced Mode".

Many systems also offer a one-time boot menu, often accessed by pressing keys like F11, F12, or Esc during startup. This is a crucial shortcut for technicians, as it allows you to choose a boot device for the current startup only, without changing the saved boot order.
3. Practical Task 2: Enabling Key Hardware Features
Beyond the boot order, the BIOS/UEFI is the control panel for the motherboard's built-in hardware. Knowing where to find these settings is key to preparing a system for its intended role.
For a comprehensive overview of the settings you might encounter, the following article is an excellent reference.
Configure and Use BIOS/UEFI Tools
The article 'Configure and Use BIOS/UEFI Tools' from Pearson IT Certification contains a detailed table of major settings. We'll use this as a reference guide.
Open the article and locate Table 2-1 Major CMOS/BIOS/UEFI Settings. Skim through this table to get a sense of the breadth of options available. We will focus on a few key settings from this list.
Let's dive into a few of the most important settings for a future data center technician.
A. Virtualization Support (VT-x / AMD-V)
Hardware-assisted virtualization is a CPU feature that dramatically speeds up the performance of virtual machines (VMs). In a data center environment where virtualization is ubiquitous, this setting is critical. It's almost always disabled by default.
- On Intel systems, this is called Intel Virtualization Technology (VT-x).
- On AMD systems, it's often called SVM (Secure Virtual Machine) Mode or AMD-V.
Configure and Use BIOS/UEFI Tools
The Pearson IT Certification article has a specific section on enabling this feature.
Read the section titled 'Virtualization Support'. It explains why this is important and shows what the setting looks like on both Intel and AMD systems.
B. Secure Boot
Secure Boot is a UEFI security feature that prevents the system from loading unauthorized or unsigned operating systems and bootloaders. This is great for preventing certain types of malware, but it can get in the way.
Practical implication: You often need to disable Secure Boot to install most Linux distributions or older versions of Windows.
This clip from 'PC BIOS Settings' clearly explains what Secure Boot is and shows how to disable it.
Watch from 08:34 to 10:30. Notice how the setting can sometimes be labeled 'Windows 8/10 Features' or require you to select 'Other OS'.
C. Integrated Peripherals
Your motherboard comes with many built-in devices (peripherals) like audio chips, network ports, and USB controllers. You can enable or disable these in the BIOS/UEFI.
Why would you disable a device?
- Security: Disabling all unused USB ports on a server can be a security hardening measure.
- Resource Management: If you install a high-speed 10Gbps network card, you might disable the onboard 1Gbps port to avoid confusion.
- Troubleshooting: Disabling devices can help isolate a hardware conflict.
The 'BIOS and UEFI Setup' video from ITFreeTraining provides a thorough walkthrough of the integrated peripherals menu in a legacy BIOS, but the principles are identical in UEFI.
Watch from 14:11 to 18:50. Pay attention to the variety of devices you can control, such as SATA controllers, LAN functions, and USB controllers.
4. Practice and Troubleshooting
Knowing where the settings are is one thing; accessing them reliably is another. Modern systems with "Fast Boot" enabled can make it difficult to press the setup key in time. The following resource provides several practical methods for accessing UEFI, which is invaluable in a professional setting.
How to boot to UEFI firmware settings in 5 simple ways
This article from SuperOps is a fantastic practical guide. It details multiple ways to get into the UEFI settings and how to troubleshoot common problems.
First, read the section 'How to boot to UEFI firmware settings?' to learn methods beyond just pressing a key at startup, like using the Windows Recovery Environment or a command line prompt. Then, read 'Issues that arise when booting to UEFI firmware settings and how to troubleshoot them'. This is essential troubleshooting knowledge.
Conclusion
You've now covered the critical first step after assembling a PC: configuring the firmware that governs the hardware. This knowledge allows you to prepare a machine for any task, from installing a new operating system to enabling enterprise-level features like virtualization.
Key Takeaways:
- BIOS/UEFI is the foundational firmware that initializes and tests hardware before the OS loads.
- Accessing the setup utility is done by pressing a specific key (Del, F2, Esc, F10) during the initial boot sequence.
- Configuring the boot order is essential for installing operating systems and running diagnostic tools from external media.
- Key hardware features like Virtualization (VT-x/AMD-V) must be enabled for running VMs, and Secure Boot often needs to be disabled to install non-Windows operating systems.
- You can troubleshoot access issues by disabling Fast Boot or using the advanced startup options within your operating system.
In our next lesson, we will build on this foundation. You'll learn how to apply a systematic troubleshooting methodology to diagnose boot failures using POST codes and LED indicators. This will teach you what to do when you press the power button and nothing appears on the screen.