Introduction
Welcome to your next training lesson. In our previous session, we focused on building unilateral lower-body strength with the static split squat. Now, we're shifting our attention back to the upper body to develop two critical and often overlooked attributes: grip strength and shoulder health. Your ability to hang is a fundamental measure of upper body endurance and a prerequisite for virtually all advanced calisthenics pulling movements.
This lesson is dedicated to a single, powerful exercise: the dead hang. Specifically, we will cover how to perform dead hangs from a door-frame ledge to build grip strength and shoulder stability. This addresses your need to train with improvised equipment and will directly prepare you for more complex exercises like rows and eventually, pull-ups. As a student who spends time at a desk, you will also find this movement incredibly effective for counteracting the postural stress of studying.
The "Why" of Hanging
Before we get into the "how," it's important to understand the significant benefits of incorporating hanging into your routine. From a biomechanical and physiological standpoint, hanging is one of the most beneficial things you can do for your upper body.
The primary benefits include:
- Spinal Decompression: Gravity is a constant compressive force on your spine. Hanging uses that same force to your advantage, gently creating space between your vertebrae. This can help alleviate back stiffness and hydrate the spinal discs, providing a welcome reset after hours of sitting.
- Shoulder Health and Mobility: Modern lifestyles rarely require us to lift our arms fully overhead. This lack of use can lead to a gradual tightening of the shoulder joint and surrounding muscles. Hanging passively stretches the lats, chest, and shoulder muscles through their full range of motion. Dr. John Kirsch, an orthopedic surgeon, has even researched how hanging can reshape the acromion bone in the shoulder, potentially increasing the subacromial space and reducing the risk of common shoulder impingement injuries.
- Grip Strength: Your ability to hold your own bodyweight is a direct measure of your grip and forearm strength. This is not just crucial for lifting and calisthenics; research has shown a strong correlation between grip strength and overall long-term health.
To get a more detailed look at these benefits, the following article is an excellent resource.
The Benefits of Hanging for Strength and Mobility
This article from The Art of Manliness provides a fantastic overview of why hanging is so beneficial, including a discussion of Dr. Kirsch's fascinating work on shoulder health.
Please read the section titled "The Benefits of Hanging". As you read, pay particular attention to the explanation of how hanging affects the shoulder joint structure and its role in injury prevention.
Passive vs. Active Hangs: A Critical Distinction
The term "dead hang" is often used to describe a passive hang, but it's crucial to understand the difference between passive and active hanging. You will need to master both.
- Passive Hang: In this variation, you are completely relaxed. Your shoulders rise up towards your ears, and your body sinks into a deep stretch. The goal is to let gravity do the work, decompressing the spine and stretching the lats and shoulders.
- Active Hang: This variation involves muscular engagement. From a passive hang, you actively pull your shoulder blades down and back, as if trying to put them in your back pockets. This lowers your shoulders away from your ears and creates tension. The active hang builds strength and stability in the muscles that support your shoulder girdle (like the lower trapezius and serratus anterior).
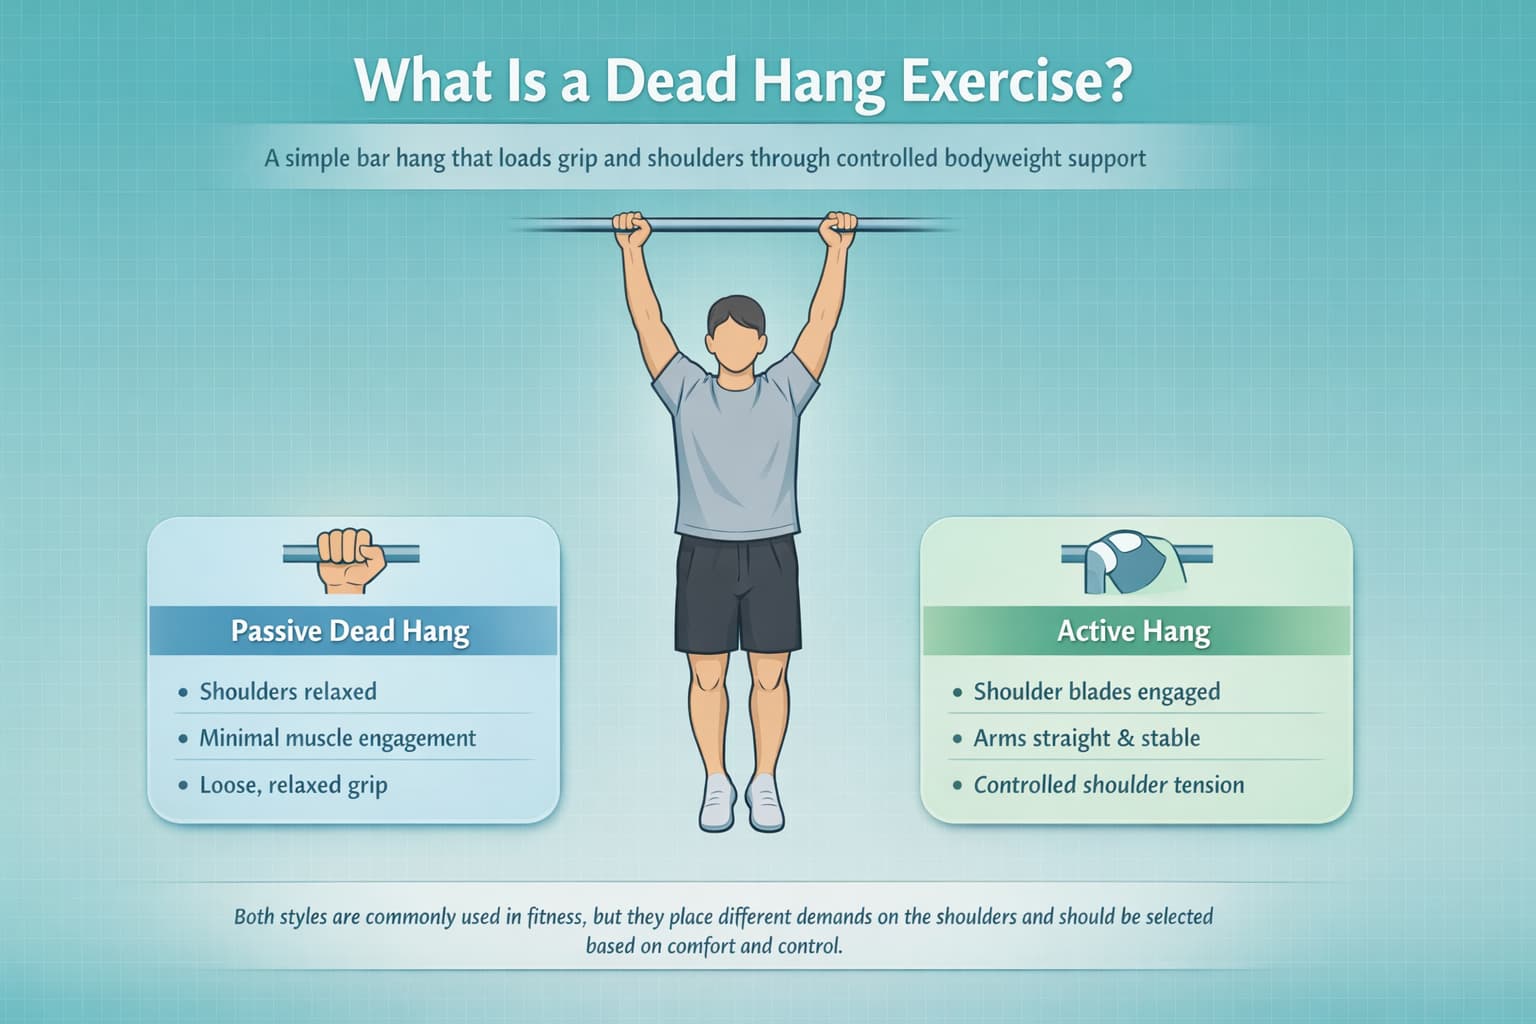
The active hang is a foundational component of the pull-up. Learning to initiate this scapular retraction is the very first step in pulling your body up.
Performing the Hang: Your Progression Plan
Since you'll be using a door-frame ledge, safety and a gradual progression are paramount.
A Word on Safety: Before you begin, thoroughly inspect your door frame. You must use a solid, structural part of the frame. Do not hang from thin, decorative molding that could easily break away. Test it with a small amount of weight first. The ideal ledge is one that is flat and deep enough to get most of your finger pads on. Because you're using a ledge and not a bar, this will be more challenging for your fingers, so starting with assistance is non-negotiable.
Here is a clear, step-by-step plan to get you started. We will borrow a structured progression plan to guide your efforts.
Benefits of Hanging for Strength and Spine Health - BodySpec
This table from BodySpec provides a clear, phased approach to building your hanging endurance, which we will adapt for your situation.
Review the table under the heading "Beginner-to-Advanced Hanging Progression Plan". We will be focusing on the "Foundations" and "Builder" phases.
Phase 1: Foundations (Assisted Hangs)
Your first goal is simply to get your body accustomed to the overhead position and the demand on your grip, without using your full bodyweight.
- Grip the Ledge: Stand underneath your door-frame ledge. Place your fingers over the top with an overhand grip (palms facing away from you), about shoulder-width apart.
- Keep Your Feet on the Ground: Bend your knees and slowly allow your arms to take on some of your body weight. Your feet should remain firmly on the floor.
- Hold: Start by holding this partially-weighted position. Focus on your breathing. You should feel a stretch in your shoulders and lats, and your forearms will begin to work.
Your initial goal, as outlined in the "Foundations" phase of the table, is to work up to 5 sets of 30-second assisted hangs. Rest for 60-90 seconds between sets. You can do this three times per week on your training days.
The following video demonstrates the concept of using your feet for assistance.
The presenter from Strength Side clearly shows how to use your feet to modify the difficulty of the hang.
Watch the segment from this video to see how you can use your feet on the ground to assist the hang and manage the intensity.
Phase 2: Builder (Full Hangs)
Once you can comfortably complete your assisted hangs and feel your grip strength improving, you can progress to lifting your feet off the ground for short periods.
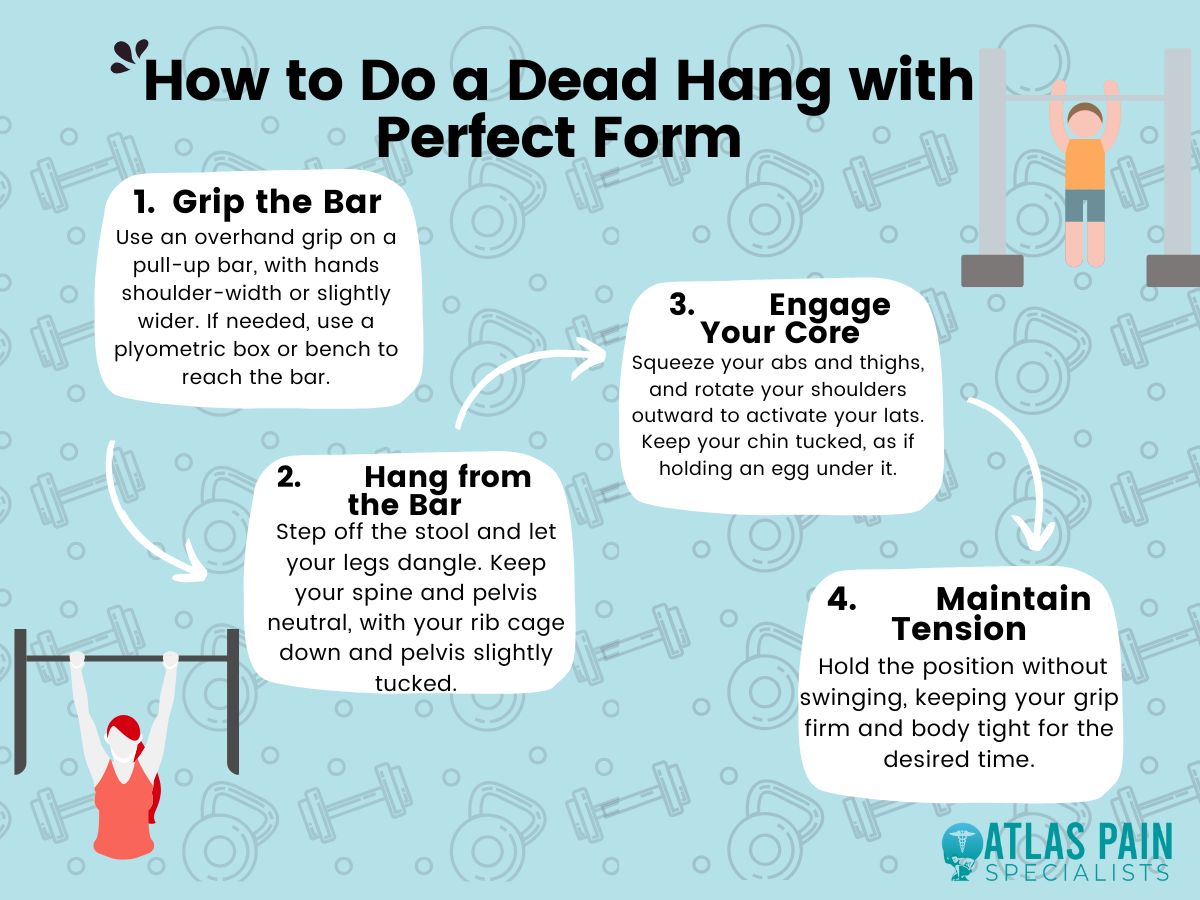
- Grip the Ledge as before.
- Hang from the Bar (Ledge): Slowly lift your feet off the floor. Keep your legs straight or slightly bent.
- Engage Your Core: Keep a slight tension in your abs to prevent swinging. Your body should be in a straight line.
- Maintain Tension: Hold the position for as long as you can with good form. When your grip starts to fail, lower your feet to the ground with control.
Your goal in this phase is to work towards an unbroken 60-second hang. This is a significant benchmark for grip and upper body endurance. Start with shorter holds (e.g., 5-10 seconds) and gradually increase the time as you get stronger. You can use a method called "accumulated time." For example, if your goal is 60 seconds, you might do 6 sets of 10-second holds, or 4 sets of 15-second holds, resting in between.
Conclusion
You now have a complete plan to master the dead hang using the equipment available to you. This is more than just an exercise; it's a tool for restoring posture, building a formidable grip, and laying the groundwork for impressive feats of strength.
Key Takeaways:
- Hanging decompresses the spine, improves shoulder health, and builds powerful grip strength.
- Start with passive hangs for stretching and progress to active hangs to build strength.
- Safety first: Ensure your door-frame ledge is solid and structural.
- Begin with assisted hangs, keeping your feet on the floor to control the amount of weight.
- Progress gradually by increasing your hold time, aiming for the benchmark of a continuous 60-second hang.
The grip strength and shoulder stability you develop here will be invaluable. In our next training lesson, we will put them to use as you learn to perform rows and reverse flyes using a chest expander, further strengthening your back and improving your posture. Following that, our next lifestyle lesson will help you begin dissecting your distraction habits by teaching you how to identify your personal triggers.